The Address Book Service
This feature, part of the Mobile module, provides an LDAP Address Book that Outlook clients can connect to in order to access the system’s GAL, the user’s own Address Books and other Admin-defined Address Books.
This service is the core of the LDAP Address Book feature, as it provides the endpoint to which the Outlook clients connect.
The service is exposed on port 8389 of all mailbox services and uses the TLS encryption protocol.
This endpoint is read-only, to improve the system’s security.
Accessing the LDAP Address Book
The LDAP Address Book can be only accessed by Outlook clients through the same credentials used for Exchange ActiveSync connection (email address and either their password or a dedicated Mobile Password.)
Clients can reach the service by contacting port 8389 of the mailbox server hosting their mailbox.
Warning
Since it is not possible to route requests through Zimbra’s Nginx, the connection must be established to the exact mailbox server and not the system’s general FQDN.
Another options would be to define custom firewall rules to forward port 8389 from the proxy to the mailbox server, as explained in the procedure below, which requires to modify some system files and assumes the mailbox server located at local IP 10.129.67.1.
Enable IPv4 IP forwarding
Add these firewall rules to the iptables script of your proxy:
-t nat -A PREROUTING -p tcp --dport 8389 -j DNAT --to-destination 10.10.10.10:8389
-A FORWARD -p tcp --dport 8389 -m state --state -NEW,ESTABLISHED,RELATED -j ACCEPT
Note
The second rule is only needed if your default is rejected.
Contacts and Address Books
By default, the LDAP Address book provides access to the following items:
An user’s own address books and contacts.
The user’s GAL.
Other users’ address books (such as shared ones) are not visible in the LDAP Address Book.
Additional Address Books
Additional Address Books can be exposed by the Administrator at domain
and global levels through the zxsuite mobile addressBook subcommands.
zxsuite mobile addressBook add- to add a new Address Book to the LDAP Address Bookzxsuite mobile addressBook list- to list all current Address Books exposed in the LDAP Address Bookzxsuite mobile addressBook remove- to remove an Addres Book from the LDAP Address Book
The addressBook add command’s first parameter is the scope to which
the Address Book will be visible, either “Global” or “Domain”:
~$ zxsuite mobile addressBook add global

Syntax:
   zxsuite mobile addressBook add global {27ee8dd9-d813-4ca7-a988-580df0027a58|user1@example.com} {all|folder id}

PARAMETER LIST

NAME          TYPE      EXPECTED VALUES
account(M)    String    27ee8dd9-d813-4ca7-a988-580df0027a58|user1@example.com
folder(M)     String    all|folder id

(M) == mandatory parameter, (O) == optional parameter

Usage example:
zxsuite mobile addressBook add global user@example.com 7
~$ zxsuite mobile addressBook add domain

Syntax:
   zxsuite mobile addressBook add domain {domain} {27ee8dd9-d813-4ca7-a988-580df0027a58|user1@example.com} {all|folder id}

PARAMETER LIST

NAME          TYPE      EXPECTED VALUES
domain(M)     String
account(M)    String    27ee8dd9-d813-4ca7-a988-580df0027a58|user1@example.com
folder(M)     String    all|folder id

(M) == mandatory parameter, (O) == optional parameter

Usage example:
zxsuite mobile addressBook add domain example.com user@example.com 7
Both commands also require the owner of the Address Book, either in email or zimbraID form, and the FolderID of the address book being added, e.g:
zxsuite mobile addressBook add global user@example.com 7This will add folder 2 (the default /Contacts folder) of the
user@example.comuser to the LDAP Address Book of all users in the system.
zxsuite mobile addressBook add domain example.com user@example.com 7This will add folder 7 (the default /Contacts folder) of the
user@example.comuser to the LDAP Address Book of all users in the ``example.com`` domain.
The addressBook remove command uses the same syntax and arguments to
remove an Address Book from the LDAP Address Book through the
appropriate scope.
Additional Address Books will be displayed in Outlook’s LDAP Search by showing the owner’s Display Name and the Address Book name separated by a slash, e.g. “John Doe/EMEA Distributors”.
Outlook setup
To access the LDAP Address Book from Outlook simply follow these steps:
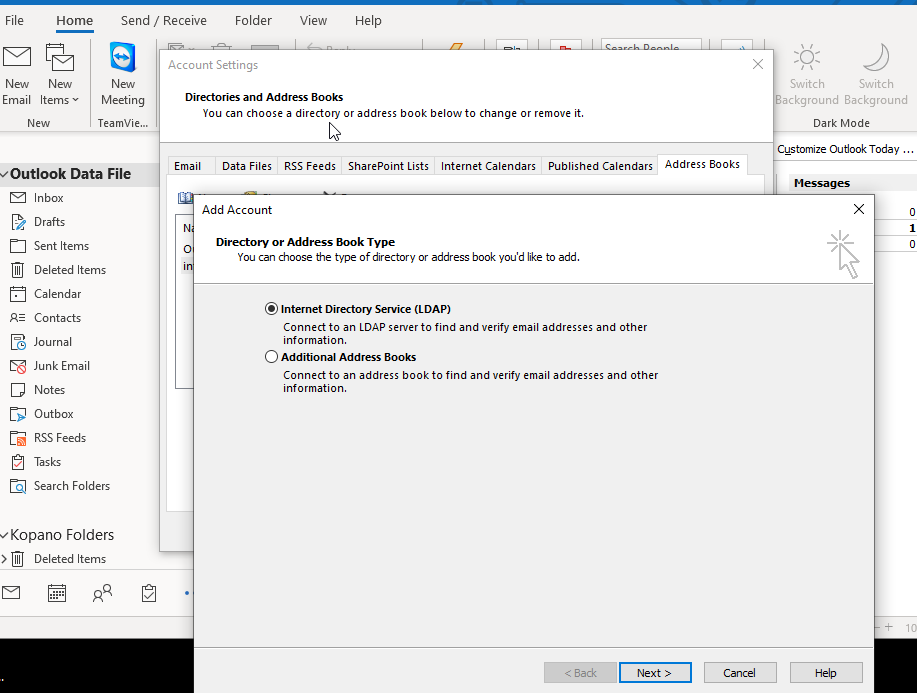
In the “Account Settings” section, enter the “Address Books” tab and click on “Add”.
Select “Internet Directory Service (LDAP)” and press “Next”.
Enter the direct URL of the mailbox server, then tick the “This server requires me to log in” option and enter your email address and password (or Mobile Password if existing).
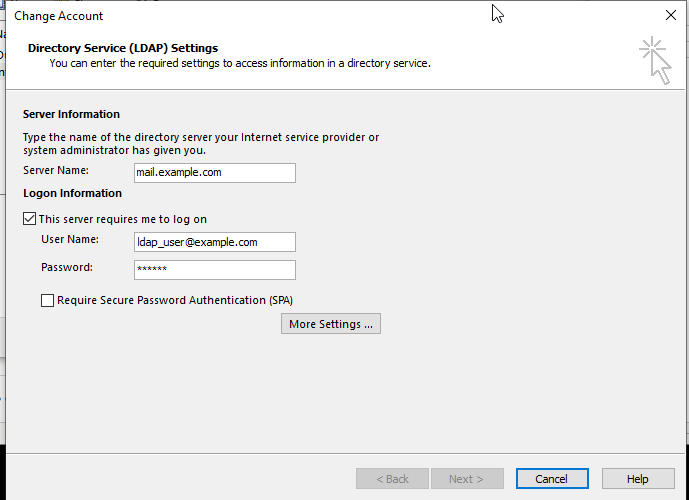
Click on “More Settings”
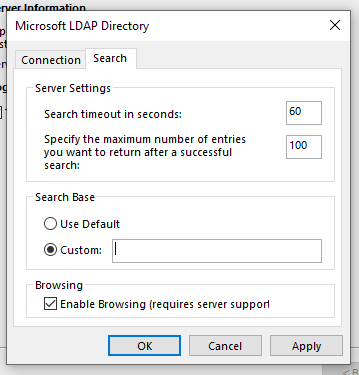
In the “Connection” tab enter the server’s URL as the Display Name and
8389as the port, then tick the “Use Secure Socket Layer” option.

In the “Search” tab, select “Custom” as the search base and leave the input field blank.
Click on “Ok” to close the “More Options” window and “Next” on the “Add Account” window to conclude the process.
Address Book naming
In Outlook, own Address Books accessed by LDAP are named with a slash character preceding the name of the folder, e.g. “/Contacts”.
GAL entries and Address Books also include the name of the datasource, e.g. “InternalGAL/_zimbra”.
Other users’ Address Books include the Display Name of the owner and the folder name, e.g. “John Doe/EMEA Partners”.