Manage#
The Manage Domains page contains options to configure accounts, mailing, and generic resources.
Accounts#
The list of all account in the domain is present here, along with information on their type and status.
The list can be filtered using the text field above the list, while a new account can be created using the + button.
A click on any account will open a new panel that contains a number of information and options that can be modified. When editing a user’s account, most of the option are the same that can be found in the Create an Account section and are organised in tabs.
On the panel’s top right corner, buttons allow to VIEW MAIL of the user, that is, to access the user’s mailbox and to DELETE the user. Upon deletion, all the e-mails, contacts, calendars, and files owned by the user will be deleted: in other words, all user’s blobs and associated metadata will be removed from Carbonio CE.
Options defined in the user’s COS are inherited, but can be modified for any individual user. The values that have been modified are accompanied by a circular arrow icon. If you hover on that icon, you will see the inherited value, while if you click on it you will restore the COS value.
The configuration options available for each account are grouped in several categories. Click on each button to go to the respective category.
General configuration options of the account
Personal information about the user and its role
Options about e-mail management and features available to users
Default values for preferences that can be overridden by the user
Password policies, OTP, backup and other security-related options
Additional Domain Administration roles
General
This tab contains all the options provided during the account creation, plus other options, including:
The number of aliases of the account
-
The type of the account, which is one of
Normal: a Regular user
Admin: a Global Administrator
Upon clicking the arrow on the right-hand side of the option, the Administration tab will open, to allow changing the account type.
-
To force the user to change password at the next login
Note
An Admin can not change the password of a user, only wipe it, so the user is forced to change it on the next login attempt.
The quota used and available for the e-mails and the Carbonio Files module. It is possible to insert up to three decimal digits for each quota.
To remove the user’s password from LDAP
The COS the user belongs to
The Distribution List memberships
To move a user to another domain, which must be defined on the same server, by writing the new one in the Domain Name
At the bottom, it is possible to see all the user’s open sessions, which can be terminated by selecting one and clicking END SESSION button on the top right of the list.
Profile
Data in this tab represent the user’s phones, company, and address. They can be managed by both the user and the Administrators.
Configuration
The options listed here allows to specify e-mail forwarding and to enable various features related to the everyday use of Carbonio CE.
Forwarding
These options allow to forward all the e-mail sent to the user to a different address.
User can specify mail forwarding filter this option is needed by users to allow them to create e-mail filter to forward e-mails to a different address.
Forwarding address specified by the user is useful if, for example, you as a rule don’t allow users to forward e-mails, but want or need to make an exception.
Mail Transport
This advanced option proves useful only in split-domain or migration scenarios.
Chat
Options here allow to configure the Chats
- General Settings
-
The only option here enables or disables the Chats.
- Messaging & Presence
-
Define the time out after which text messages can be modified or deleted and whether a user can see other users’ status and read receipt.
- Private and Group Chats
-
These options limit the user ability to create new private chats and groups and limit their number and the file size of files that can be shared.
- Video Calls
-
Enable video call and the possibility of users to record video calls and use virtual backgrounds.
- Sharing & Attachments
-
Enable files upload in chats and calls and set the file’ maximum size.
Features
It is possible to prevent the user to access some of the Carbonio CE features by using the switches for the various Components. For example, Web feature means access to the web interface, Mobile App allows access via cell phone or tablet, and so on.
User Preferences
This tab contains settings that control how users view, manage and interact with their data across the platform. These preferences affect the behavior and appearance of emails, calendars, and contacts, shaping the overall user experience in the client interface.
Mail Options
The Mail Options section controls how messages are displayed and managed.
Option |
Description |
|---|---|
View mail as HTML |
Enable or disable HTML rendering for email messages. |
Group messages |
Choose whether emails are grouped by single message or by conversation. |
Auto-delete duplicate messages |
Automatically remove duplicate emails when enabled. |
New Mail Toast Notification |
Enable or disable toast notifications for newly received emails. |
Default Charset |
Define the default character encoding used for emails. |
Receiving Mails
The Receiving Mails section defines how and when incoming messages are handled.
Option |
Description |
|---|---|
Check new email every |
Select the interval for checking new incoming messages from a predefined list of values. |
Auto-reply messages |
Enable or disable automatic reply messages. |
Out of office lifetime |
Define the start and end time for the out-of-office auto-reply. |
Read Receipt Settings |
Configure how read receipt requests are processed. |
Sending Mails
The Sending Mails section controls message sending behavior.
Option |
Description |
|---|---|
Save to Sent |
Enable or disable saving sent messages in the Sent folder. |
Allowed sender addresses |
Specify which email addresses are allowed for sending messages. |
Ask for read receipt |
Enable or disable the ability to request read receipts when sending emails. |
Composing Mails
The Composing Mails section manages email composition preferences.
Option |
Description |
|---|---|
Mail signature |
Enable or disable the email signatures feature. |
Signatures management |
Add, edit, or remove email signatures. |
Note
Signatures can not be assigned to Resources.
Contact Options
The Contact Options section configures contact management behavior.
Option |
Description |
|---|---|
Auto-add contacts |
Automatically add email recipients to the contact list when enabled. |
Use GAL auto-fit |
Enable or disable Global Address List auto-completion. |
Calendar Options
The Calendar Options section defines default calendar behaviors and invitation handling.
Default Settings
Option |
Description |
|---|---|
Time Zone |
Set the default time zone for the calendar. |
Default appointment duration |
Define the default duration for new appointments. |
Appointment reminder |
Set the reminder time (in minutes) before an appointment starts. |
Default calendar view |
Choose the default calendar view (e.g. Day, Week, Month). |
Week start |
Select the first day of the week. |
Default appointment visibility |
Define the default visibility level for new appointments. |
Additional Options
Option |
Description |
|---|---|
Past appointment reminders |
Enable or disable reminders for appointments in the past. |
Send cancellation emails |
Enable or disable email notifications when appointments are cancelled. |
Auto-add forwarded appointments |
Automatically add forwarded invitations to the calendar. |
Add invites with PUBLISH method |
Enable or disable adding invitations using the PUBLISH method. |
Auto-add invited appointments |
Automatically add appointments when the user is invited. |
Auto-decline blacklisted senders |
Automatically decline invitations from blacklisted senders. |
Notify delegated changes |
Enable or disable notifications for changes made by delegated accounts. |
iCal delegation model |
Enable or disable the iCal delegation model for shared calendars. |
Security
Options present here allow to manage the account security: policies for password and failed login. New application passwords can be created; a policy can set to force the user to select a secure password and the type of characters to be chosen.
Password
A policy can set to force the user to select a secure password and the type of characters required for the password. The Forgotten password feature, if enabled, allows a user to receive a token, to temporarily access the webmail, to the recovery address specified in the textfield next to the option. It also provides the user a new option in the , namely the ability to change the recovery address.
See also
The password recovery procedure is described in section Lost Password.
The Failed login policy determines how the system behaves when a user fails too many consecutive logins.
Administration
By toggling the Global Administration switch you can promote or demote the user to Global Administrator or vice versa.
Account Statuses#
A user account can be in one of the following statuses.
Active. The account is enabled and ready for everyday operations: the user can log in and send and receive e-mails.
Under Maintenance. This state occurs during maintenance operations on the domain or account: backup, import, export, restore. The user can not login, e-mails are queued on the MTA.
Locked. The account can not be accessed by the user, but incoming e-mails are still delivered. This status can be set for example if the user violates the terms of service or if the account has been cracked
Closed. The user is not allowed to log in, incoming e-mails are rejected.
Pending. This status is usually seen during the account creation, when it is not yet active. User can not log in, incoming e-mails are rejected.
-
LockOut. This is the only status that can not be set. It is applied automatically when the log in attempts fail for a given number of times. It is a preventive measure to avoid unauthorised access of brute force attacks. The account will not be accessible for a given interval (“lockout period”)
Hint
Both the number of failed attempts and the lockout period can be configured.
The status of an account also influences the items stored in that user’s Carbonio Files: Whenever an account is in Closed status, the item shared by that user are no longer visible to the users who could access it.
Account Aliases#
An alias is a new e-mail address that can be associated with an existent account. It works exactly like any other account, including the ability to login to Carbonio CE with it. All e-mails sent to the alias will land in the Account’s mailbox.
The aliases can be easily managed from the General tab of the user’s option. Click the pencil icon right below the account’s username: in the opening dialog window, provide a new alias and the domain then click + to add the alias to the user. Existent aliases can be modified or deleted using the small icons next to the e-mail in the Your Available Aliases field.
Distribution List#
Distribution lists can be simply created by clicking the + button to open a tabbed modal dialog in which to configure it.
In the first tab (GENERAL), you can give a name, an address, and a description to the distribution list; if you want a dynamic mode, that automatically populates the list’s members, refer to section Dynamic Mode.
In the second tab (MEMBERS), you can add Members by simply writing the e-mail addresses in the test field.
Hint
E-mail addresses are auto-completed while typing.
In the third tab (SECURITY), owner settings can be configured. Owners can be added to the list, and they will see the lists of which they are owners in a dedicated menu item, where they can manage details and members. In this tab, the admin can also configure “Sending Options,” choosing who is allowed to send emails to the list. The available options are:
Everyone
Members only
Internal users only
Only users in a defined list
From the last tab (DELEGATES), an admin can set one or more delegate users (or groups of users) among the domain users. These users or groups can be assigned one of two permissions:
Send
Send on Behalf of
Once granted, the user, or any user in the group, can select the distribution list from the Webmail interface to send a new email.
Once a distribution list has been created, it can be further configured by adding aliases, which work like e-mail accounts, changing the description, notes, and members, and granting selected users the permission to send e-mails to the distribution list or making them Owners.
Whenever new members are added to a Distribution List or the list
permissions are modified, it is necessary to restart the milter
service. From the CLI, execute the command
As the zextras user
zextras$ zmmilterctl refresh
As the root user
# systemctl restart carbonio-milter.service
As the zextras user
zextras$ zmmilterctl refresh
As the root user
# systemctl restart carbonio-milter.service
Dynamic Mode#
Distribution list’s Dynamic Mode allows the automatic management of members. Indeed, each Dynamic Distribution List is identified by a name and by a unique Distribution List URL, which is an LDAP query that automatically populates the members of the Distribution List.
To create a Dynamic Distribution List, the procedure is similar to the normal Distribution Lists: click the + button and provide a Displayed Name name and list Name, then click the Dynamyc Mode switch to access more options, including the Distribution List URL, which is mandatory.
Hint
The Distribution List URL already includes the
ldap:/// prefix, so you do not need to add it.
You can also make the list Hidden from GAL and add owners to the list, who can manage the configuration of the list.
Advanced options, like subscription and unsubscription options are available after the creation of the Dynamic Distribution List, when editing it.
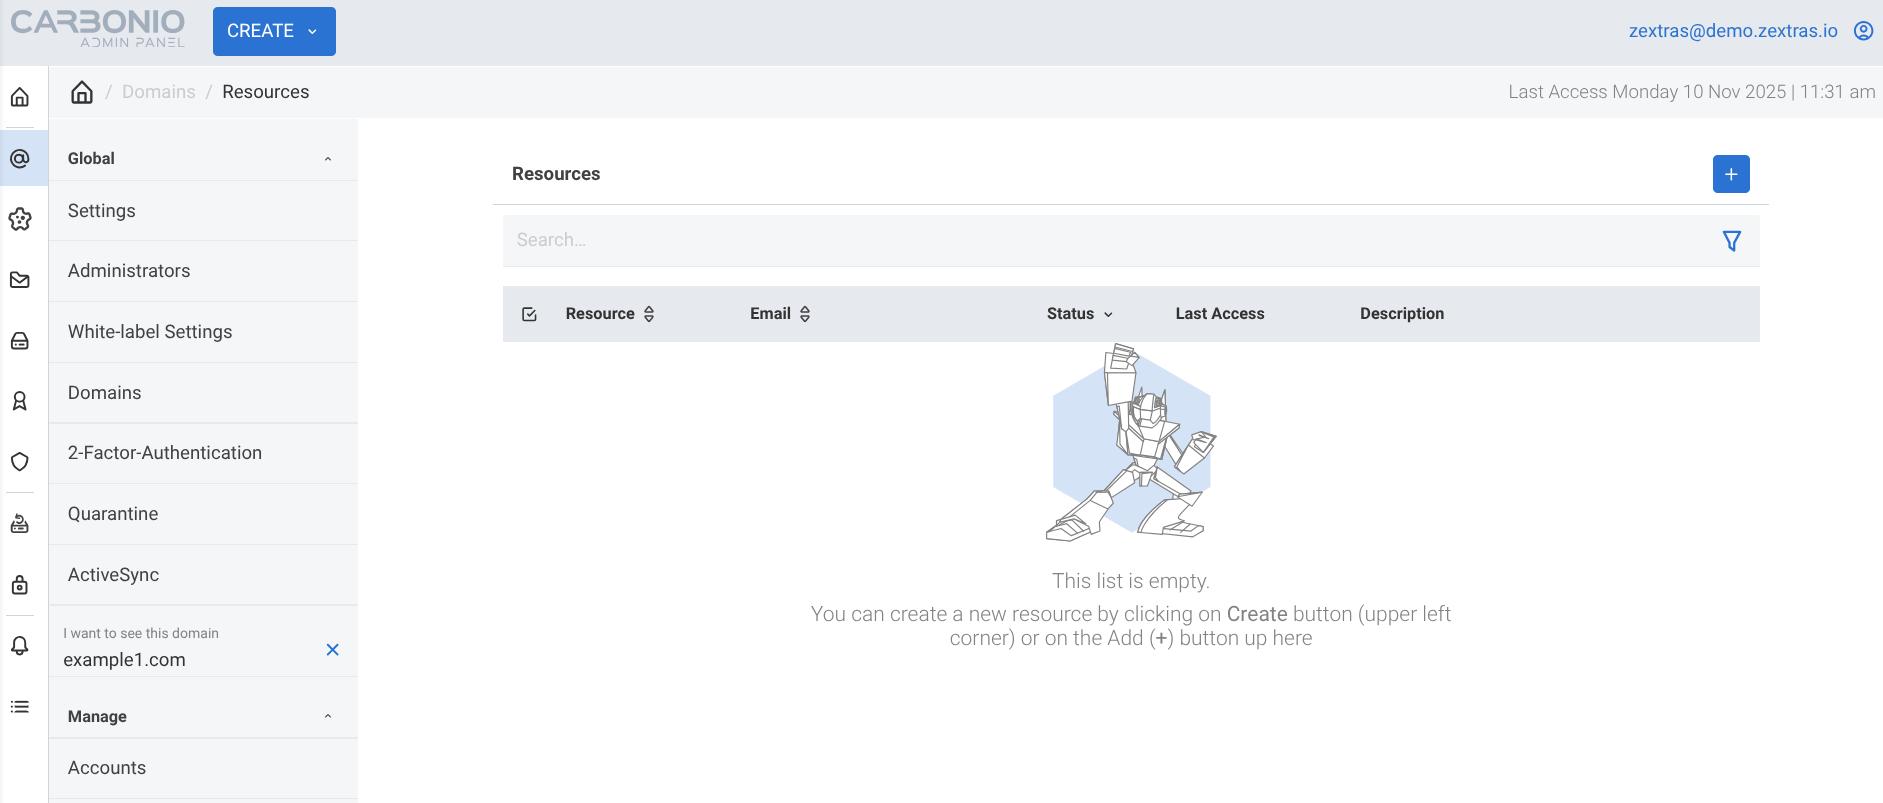
Resources#
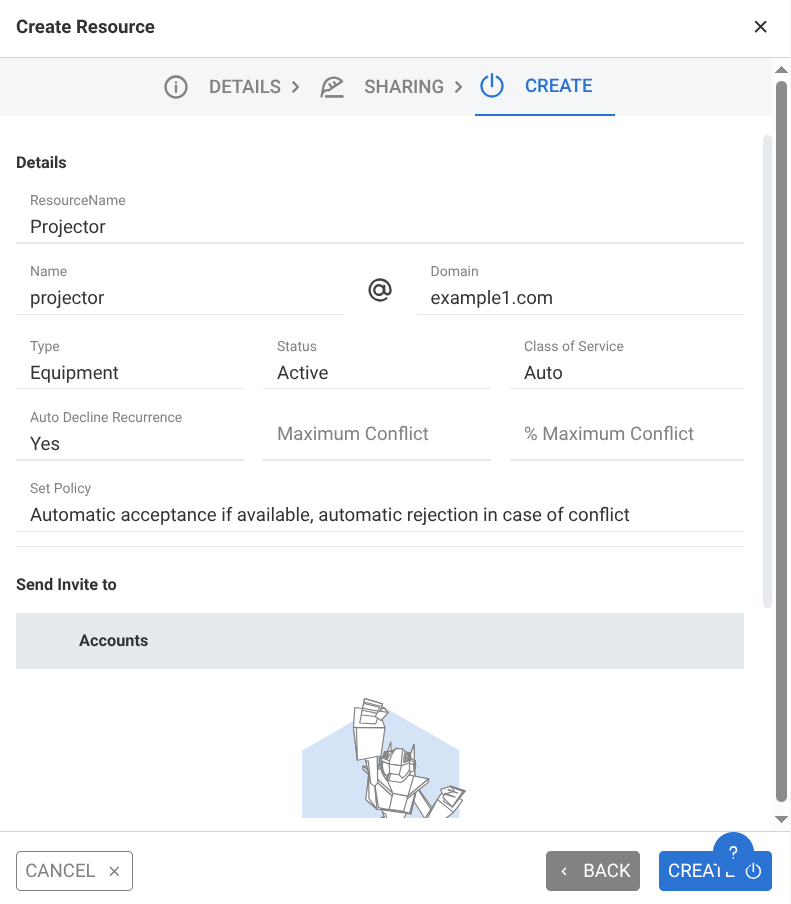
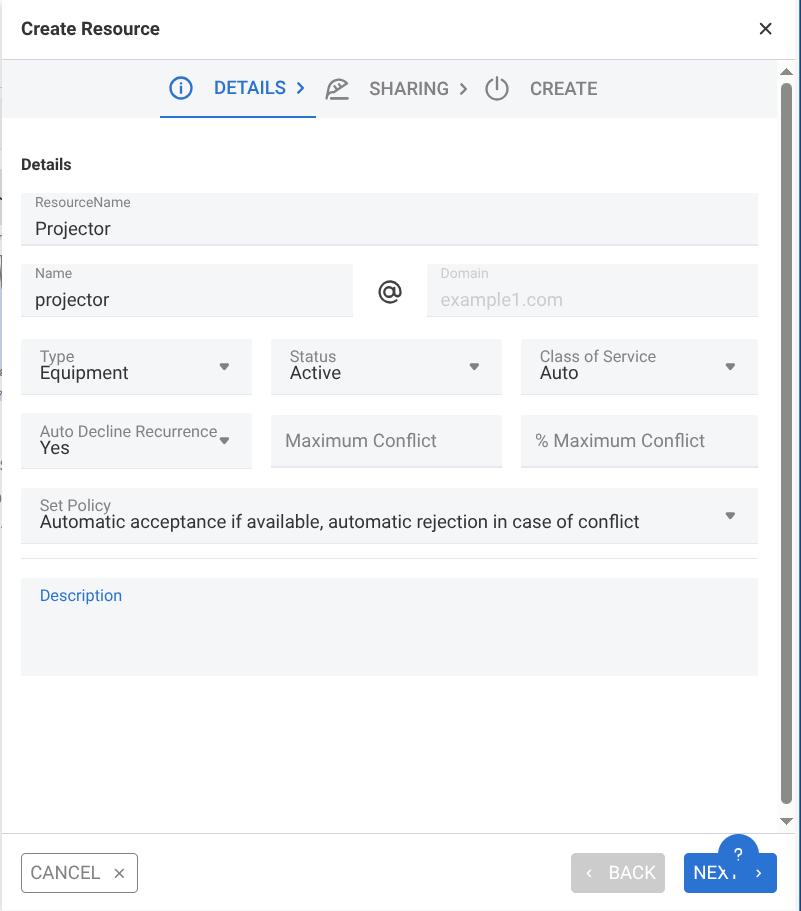
A Resource is a generic object that can be assigned an e-mail address, but, unlike other regular accounts, they do not need any signature, so you can not specify one.
A Resource can be of type Meeting Room or Equipment and is used to book either of them and let colleagues know the it is not available. There is no strict definition of Equipment: it can be any type of (mobile) furniture, like for example a projector or a company car.
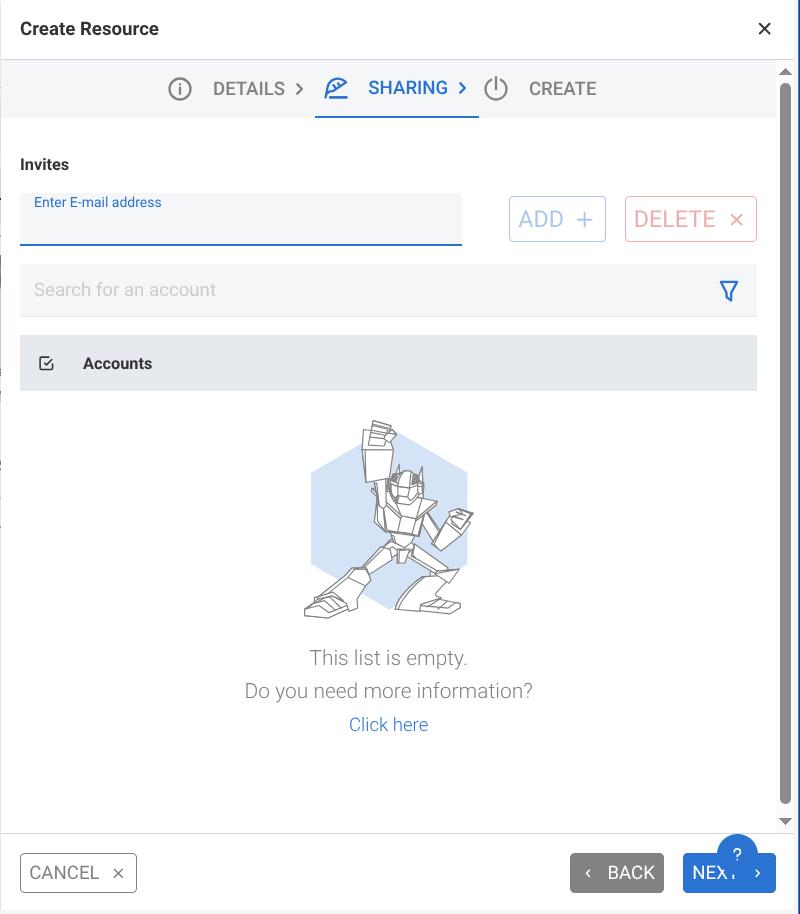
Each resource is associated to an e-mail address: When a Resource is needed, you can create an appointment and invite the Resource.
One out of four policies is assigned to Resource, to determine how to react to the booking request:
Automatically accept when available, automatically reject if there is a scheduling conflict
Manually accept when available, automatically reject if there is a scheduling conflict
Always accept automatically if available
Never accept automatically
Moreover, it is possible to configure a Resource to automatically decline recurrent appointments: in this case, the Resource will not be available if the appointment involving it is recurrent.
Additional e-mail addresses can be added to the resource, for example to notify the company’s facility manager which meeting rooms are reserved and which are free.
How to create a Resource#
To create a new Resource, click the + button on the top right corner of the Resources’ list
Fill in all the necessary information. In this example, we create a projector, which is a piece of equipment. Its recurrent use is not allowed, which means it must be reserved each time. As a policy, the projector is reserved if not already booked, otherwise it will not be possible to reserve it. The projector is also automatically assigned an e-mail address
You can choose to add an e-mail address that will allow someone to receive the requests for projector booking as well.
In the final step, a recap of the configuration will be shown.