

Working with Files#
Files is designed to simplify your file management needs. The Files offers a user-friendly platform for uploading, creating, and organizing your digital documents.
Whether you are collaborating with colleagues or simply keeping your files in order, Files allows you to effortlessly share and manage your documents and images.
With its intuitive interface, you can easily create multiple folders, upload files from your computer, save email attachments, and even generate new documents.
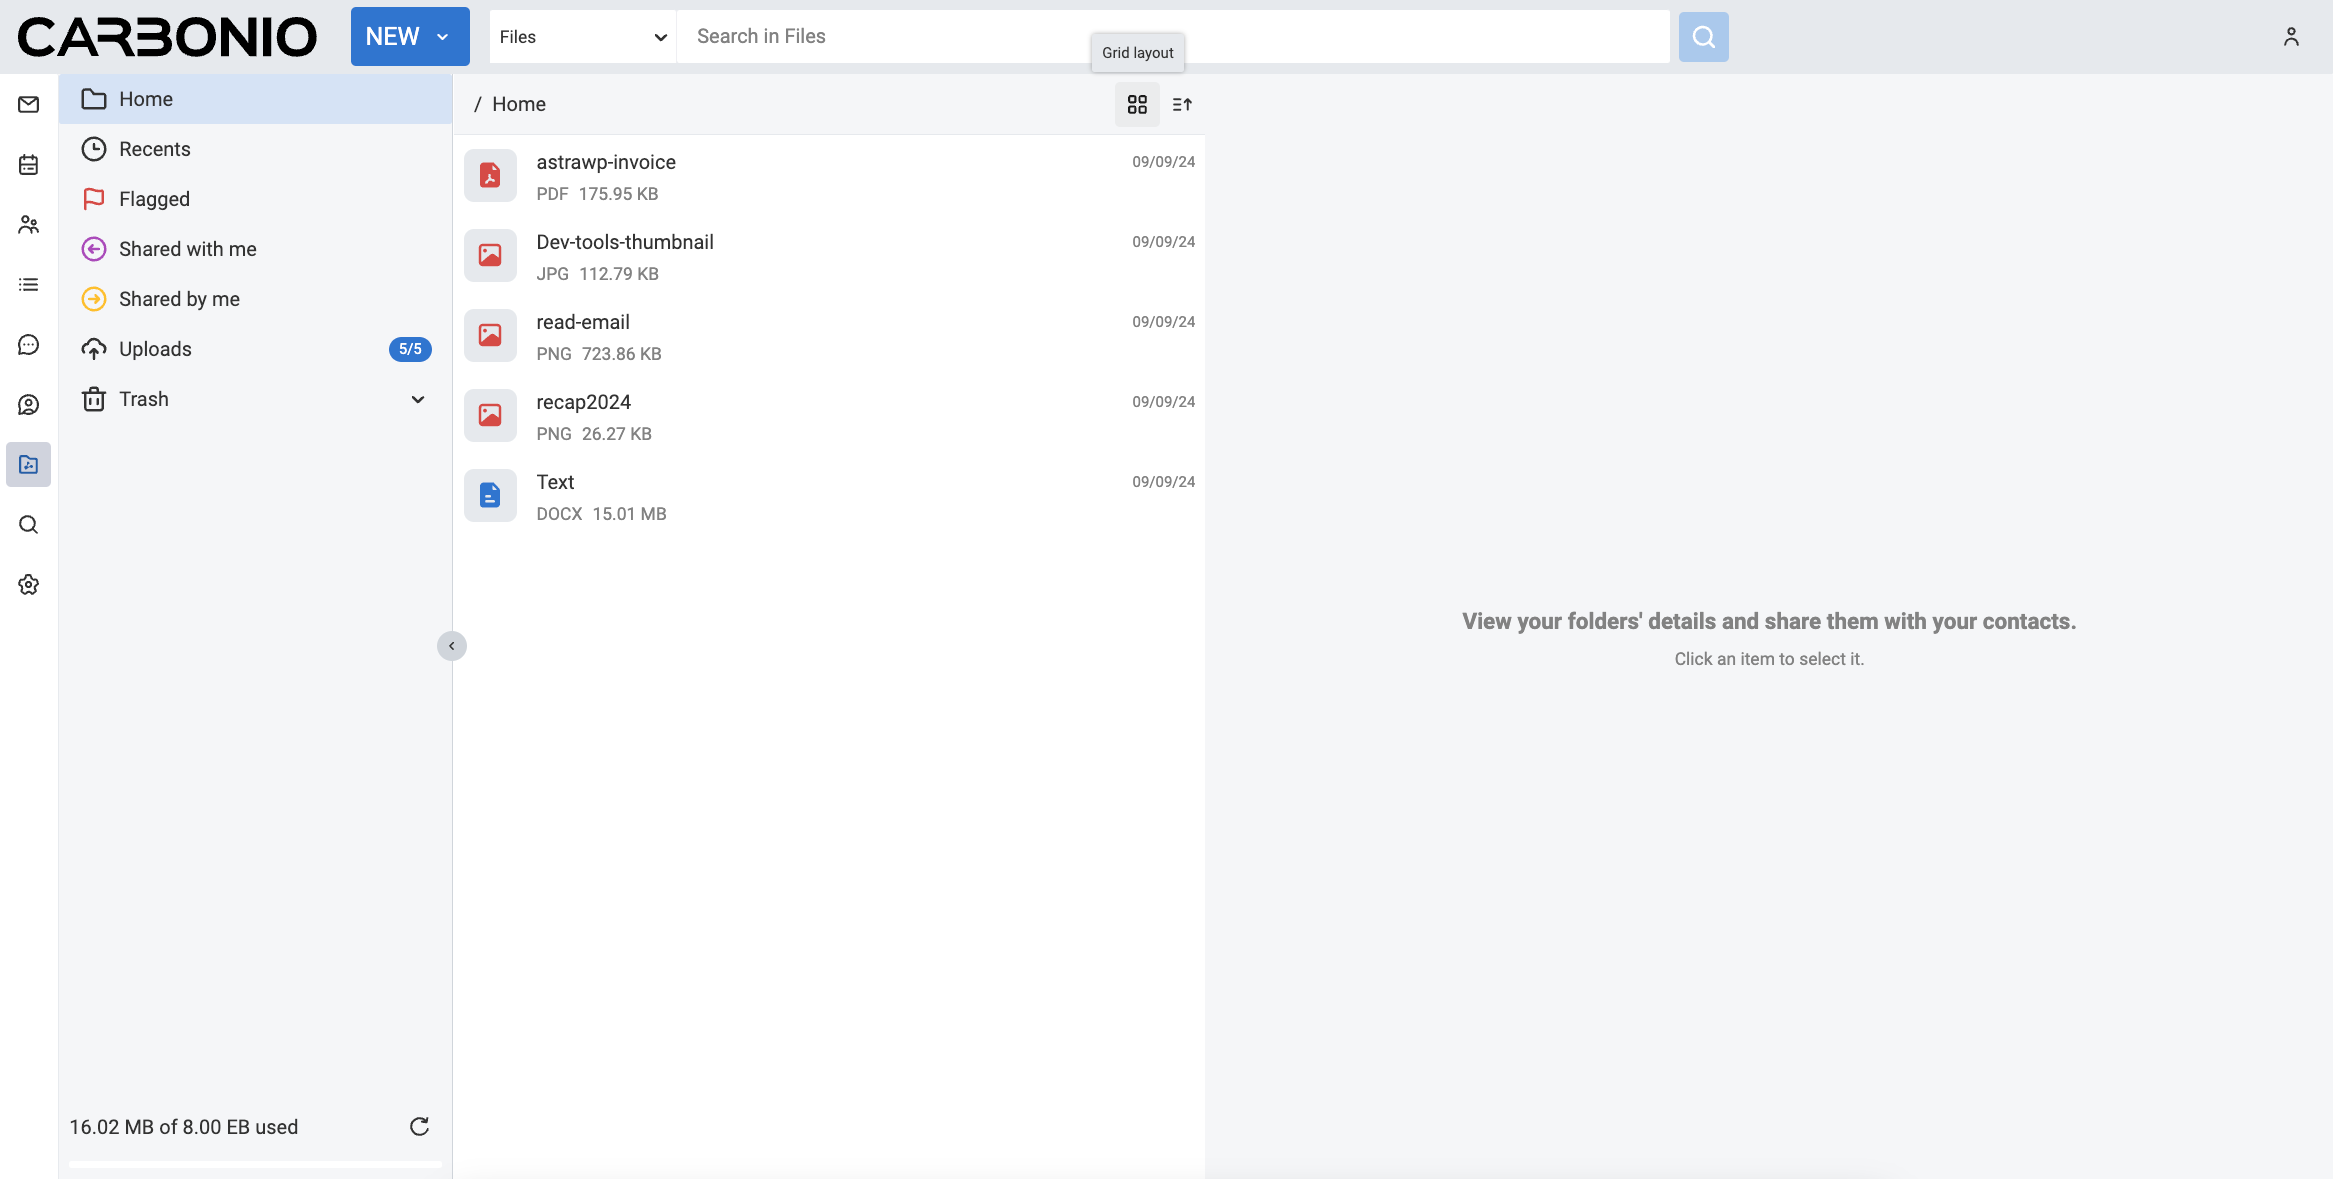
When you click on the Files icon, you will access to the Files module view: you can choose the grid layout button on the top-right of list header to switch the view from list mode to the grid mode. By choosing this mode you will see all the files and folders as thumbnails, instead of the vertical list.
Note
Using multiple Carbonio windows : when using two or more open browser’s tabs or windows to access Files, some of the operations you carry out on one of the windows is not immediately reflected in the other. To make sure that all the windows are synchronised, you need to click the account icon (rightmost icon on the top right corner of the GUI) to open the menu, then click Update view. In this way, you force the browser to reload and update its cache to include the latest changes on Files.
Creating a Folder#
To create a folder in Files:
Select the Files feature from your left sidebar.
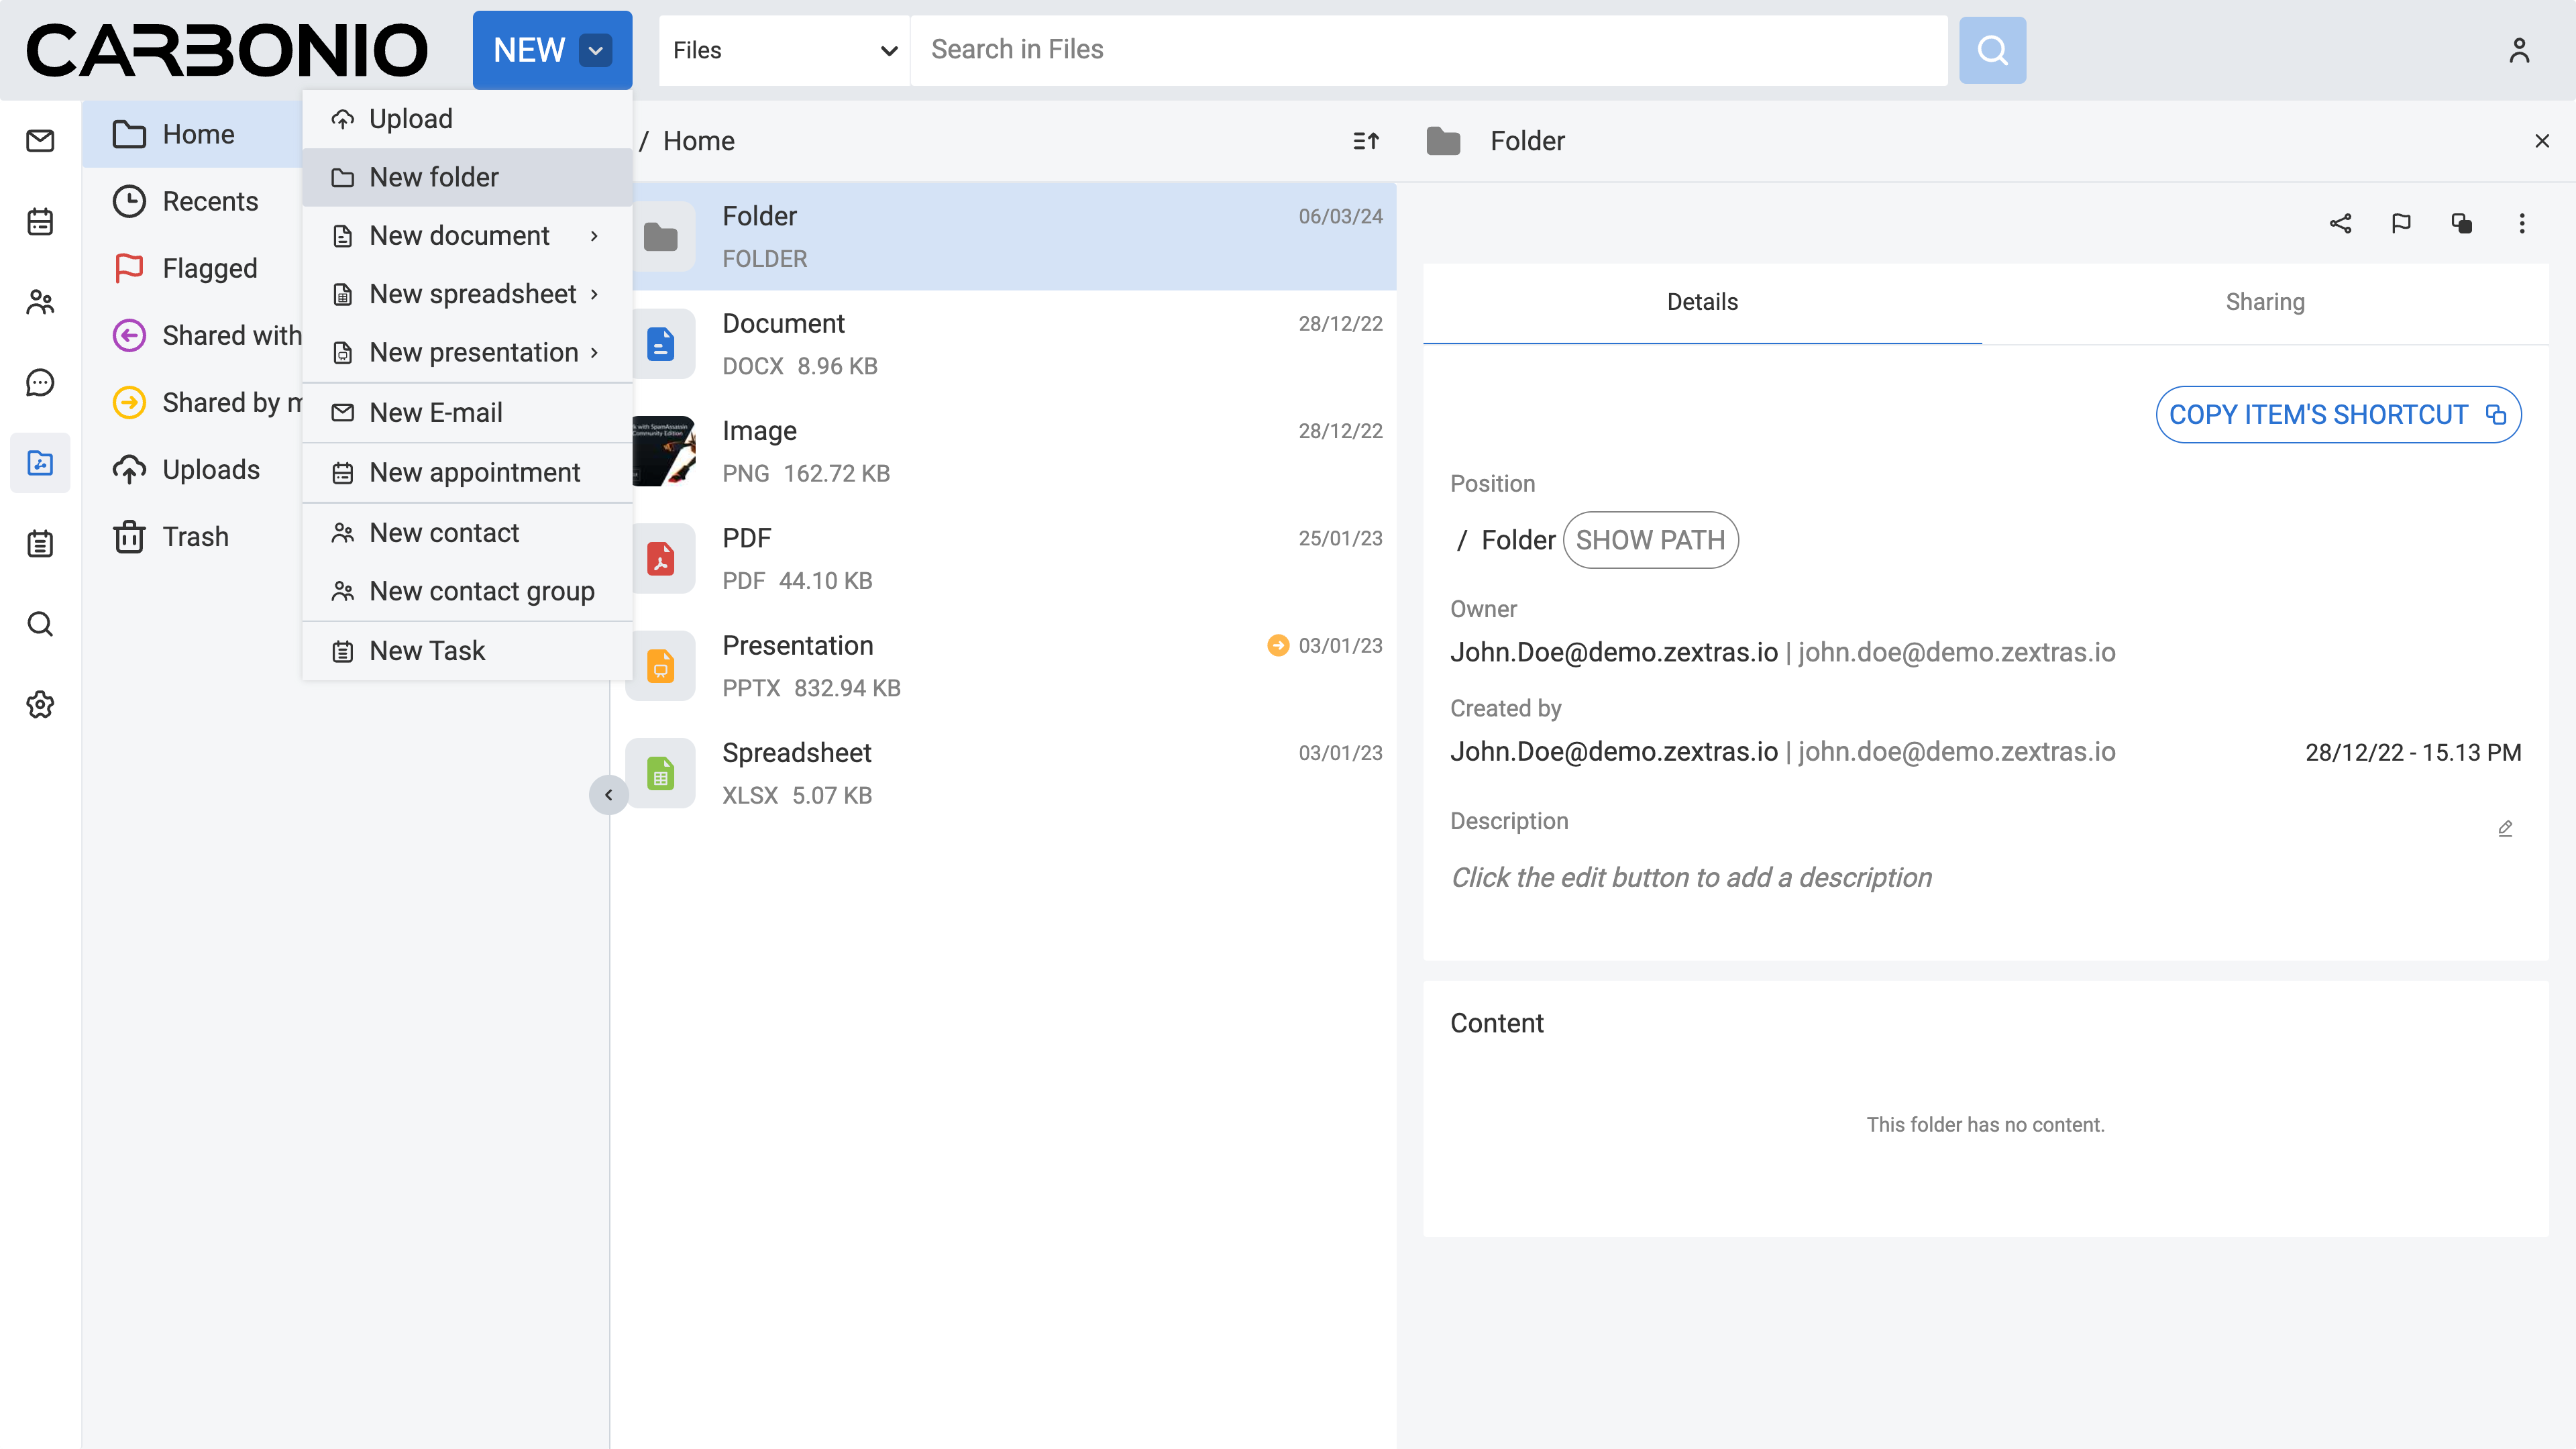
From the top bar, click the downward arrow next to the NEW button.
Select New Folder from the drop-down menu. A new board will appear.
Insert a name for the folder.
Click CREATE.
The new folder is displayed in the main panel among the list of files and folders.
If you wish to create a new folder within another folder, simply:
Navigate to the folder where you intend to create a new folder.
From the top bar, click the downward arrow next to the NEW button.
Select New Folder from the drop-down menu. A new board will appear.
Insert a name for the folder.
Click CREATE.
Adding a File from Your Computer#
To upload document files from your computer:
Select the Files feature from your left sidebar.
Navigate to the folder where you intend to upload the file.
From the top bar, click the NEW button. A new window appears.
Select a file from the window.
Click Open.
You can monitor the progress of the uploading process through the Uploads section, which is visible in the Navigation Panel.
Adding a File from Your Email Attachments#
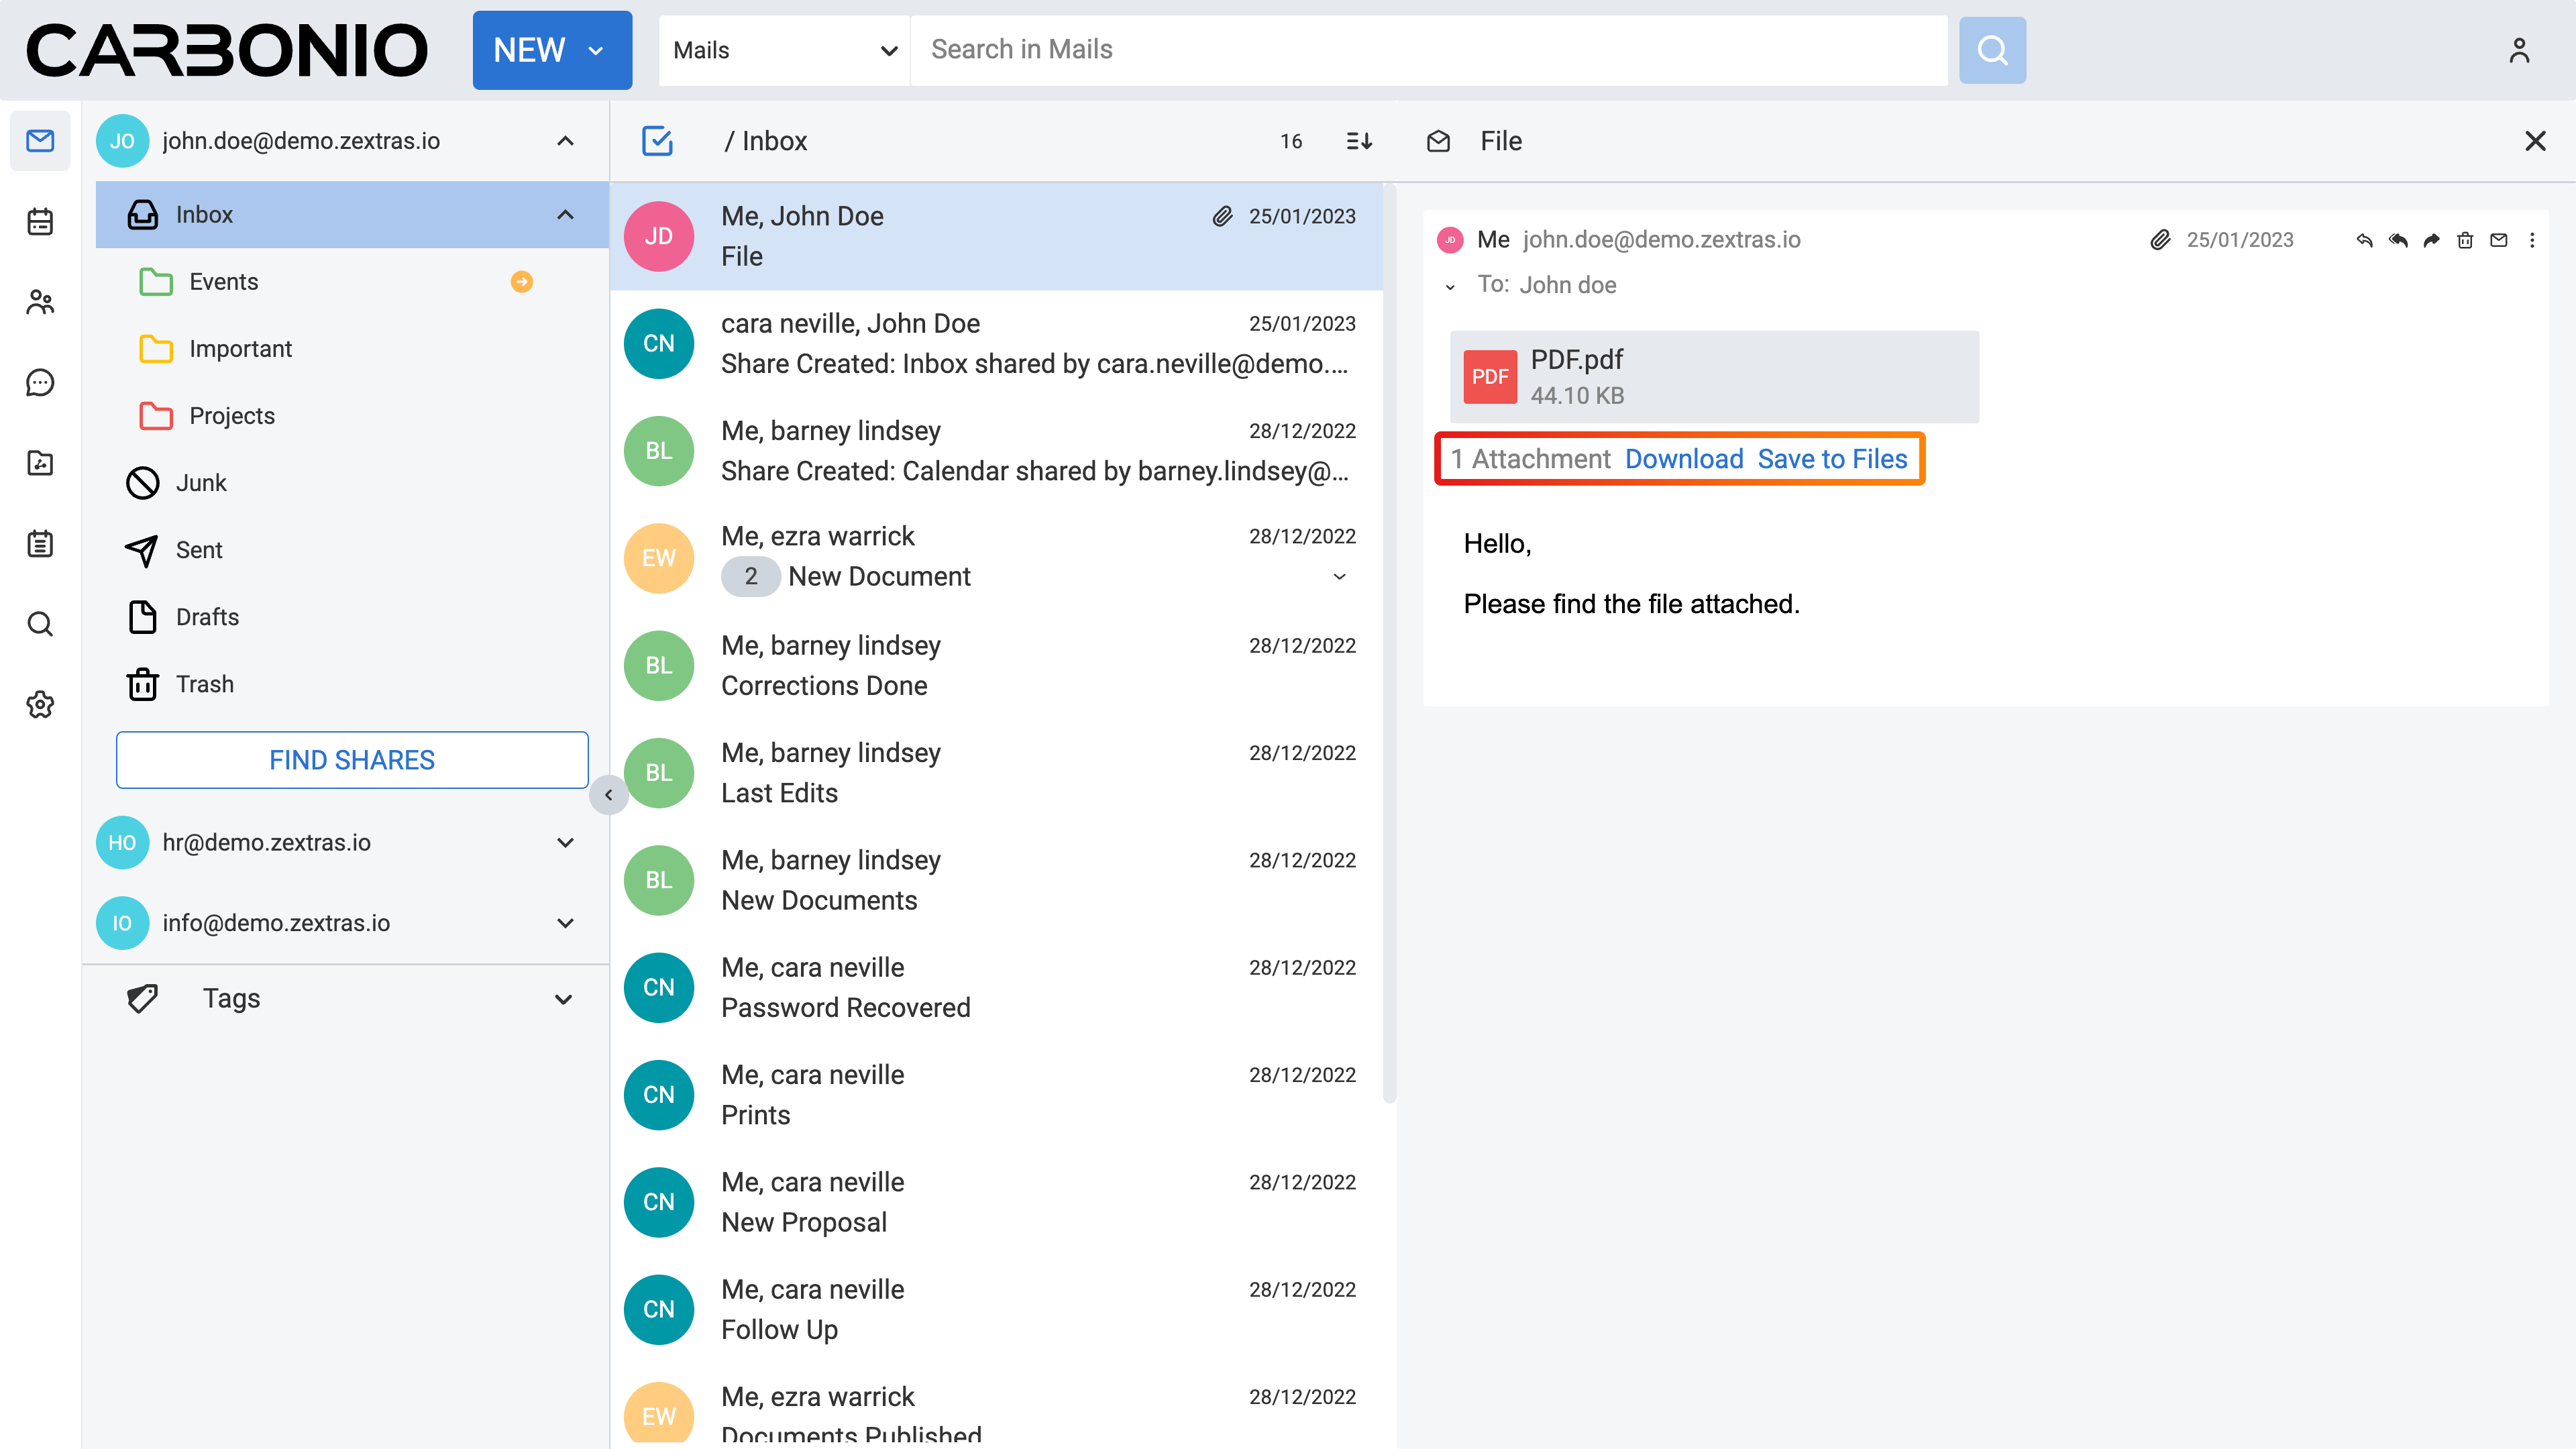
You have the option to save attachment files from your emails directly to your Files. To do so:
Select Mails from the left sidebar.
Select the email that contains the attachment you want to save.
On the right, you will see the email text and attachments. Hover your mouse cursor over the attachment you want to save without clicking.
Three buttons appear on the right side of the attachment. Click the left button with the Files icon. A new window appears.
Select the folder where you want to save the attachment.
Click the SAVE button.
Downloading a File on Your Computer#
To download a file on your computer:
Select the Files feature from your left sidebar.
Navigate to the folder that contains the file you want to download.
Right-click on the file.
Select Download from the drop-down menu. A new window appears.
Select the folder on your computer where you want to download the file.
Click the Save button.
Deleting a File or a Folder#
To delete a file or folder from your Files:
Select the Files feature from your left sidebar.
Navigate to the folder or folder that contains the item you want to delete.
Right-click on the item.
Select Delete from the drop-down menu.
Your file or folder will be automatically moved to your Trash folder. You can locate the Trash folder from the Navigation Panel.
If you want to remove the file permanently:
Click on the downward arrow next to the Trash folder.
Select My items.
On the Main Panel, right-click on the item you want to remove permanently.
Select Delete permanently from the drop-down menu.
Click DELETE PERMANENTLY to confirm.
Restoring a Trashed File or a Folder#
Deleting files and folders moves them into your Trash folder. You can access them there and restore them if needed.
Select the Files feature from your left sidebar.
Click on the downward arrow next to the Trash folder.
Select My items.
On the Main Panel, right-click on the item you want to restore.
Select Restore from the drop-down menu.
The restored item is automatically moved back to its original location before deletion.
Renaming a File or a Folder#
To rename a file or folder:
Select the Files feature from your left sidebar.
Navigate to the folder that contains the item you want to rename.
Right-click on the item.
Select Rename from the drop-down menu. A new window appears.
Edit the name.
Click the RENAME button.
Viewing a File#
To view a file stored in your Files:
Select the Files feature from your left sidebar.
Navigate to the folder that contains the file you want to view.
Right-click on the file.
Select Preview from the drop-down menu.
Double-clicking on the file will also open them for previewing purposes, but for editable formats including DOCX, XLSX, PPTX, ODT, ODS, and ODP, they will be opened in another tab in your browser. In this scenario, ensure that you refrain from editing the file, as it is in an editable mode and accidental deletions or additions may occur.
You can only preview most of the frequent file formats such as PDF, DOCX, XLSX, PPTX, ODT, ODS, and ODP, as well as image files like PNG, JPG, etc. You can also preview a video, by simply double clicking a video file or open it with preview action: if the browser support that mime type, the video is played directly on the browser. For unsupported files, you can download them to your computer and open them with specific applications.
Creating a File#
You can use Files to create specific files including text documents, spreadsheets, and presentation files.
To create a text document:
Select the Files feature from your left sidebar.
Navigate to the folder where you want to create the file.
From the top bar, click the downward arrow next to the NEW button.
Select New document from the drop-down menu.
Select the file format choosing either OpenDocument (.odt) or Microsoft (.docx) from the menu. A new window appears.
Insert a name for the file.
You will find the created file in the Main Panel among the list of files and folders.
To create a spreadsheet:
Select the Files feature from your left sidebar.
Navigate to the folder where you want to create the file.
From the top bar, click the downward arrow next to the NEW button.
Select New spreadsheet from the drop-down menu.
Select the file format choosing either OpenDocument (.ods) or Microsoft (.xlsx) from the menu. A new window appears.
Insert a name for the file.
You will find the created file in the Main Panel among the list of files and folders.
You can double-click on it to open the editor in another browser tab and begin editing the file online.
The main difference between OpenDocument and Microsoft files lies in their file formats and the software used to create and edit them. OpenDocument files (.odt, .ods, .odp) adhere to an open standard and are compatible with open-source office suites like LibreOffice.
In contrast, Microsoft files (.docx, .xlsx, .pptx) are created with Microsoft Office software. From a user perspective, OpenDocument files offer greater compatibility across different platforms and software suites, while Microsoft files are more commonly used in professional settings due to the widespread use of Microsoft Office.
Users typically choose between them based on software preference and collaboration requirements.
Editing a File Online#
In Files, you can edit certain documents online, including formats like DOCX, XLSX, PPTX, ODT, ODS, and ODP. When you double-click them, they will open in another tab in your browser for editing.
Select the Files feature from your left sidebar.
Navigate to the folder that contains the file you want to edit.
Double-click on the file.
A new tab will open in your browser for editing.
For text documents, you have various options for editing, including text formatting such as font styles, sizes, and colors. Additionally, you can add images, tables, and other objects to enhance the document’s content.
In spreadsheets, you can edit cell contents, apply formatting to cells, rows, and columns, and perform calculations using built-in functions. You can also insert charts, graphs, and other visual elements to present data effectively.
In presentation files, you can edit slide content, including text, images, and shapes. You have options to apply formatting to text, adjust slide layouts, and incorporate multimedia elements like videos and audio clips. Additionally, you can add animations and transitions to enhance the visual appeal of your presentation.
Moving a File between Folders#
To move a file to another folder:
Select the Files feature from your left sidebar.
Navigate to the folder that contains the file you want to edit.
Right-click on the file.
Select Move from the drop-down menu. A new window appears.
Select the folder where you want to move the file.
Click the MOVE button.
Alternatively, you can drag and drop files into different folders, or the parent folder displayed on the folder path at the top of the Main Panel, above the list of files and folders.
Copying a File#
To copy a file and create a duplicate in another folder:
Select the Files feature from your left sidebar.
Navigate to the folder that contains the file you want to copy.
Right-click on the file.
Select Copy from the drop-down menu. A new window appears.
Choose the destination folder where you want to copy the file.
Click the COPY button.
Flagging a File#
To flag a file for future reference and make it stand out, you can:
Select the Files feature from your left sidebar.
Navigate to the folder that contains the file you want to flag.
Right-click on the file.
Select Flag from the drop-down menu.
To remove the flag from the file, you can follow the same process and select Unflag.
Managing File Versioning#
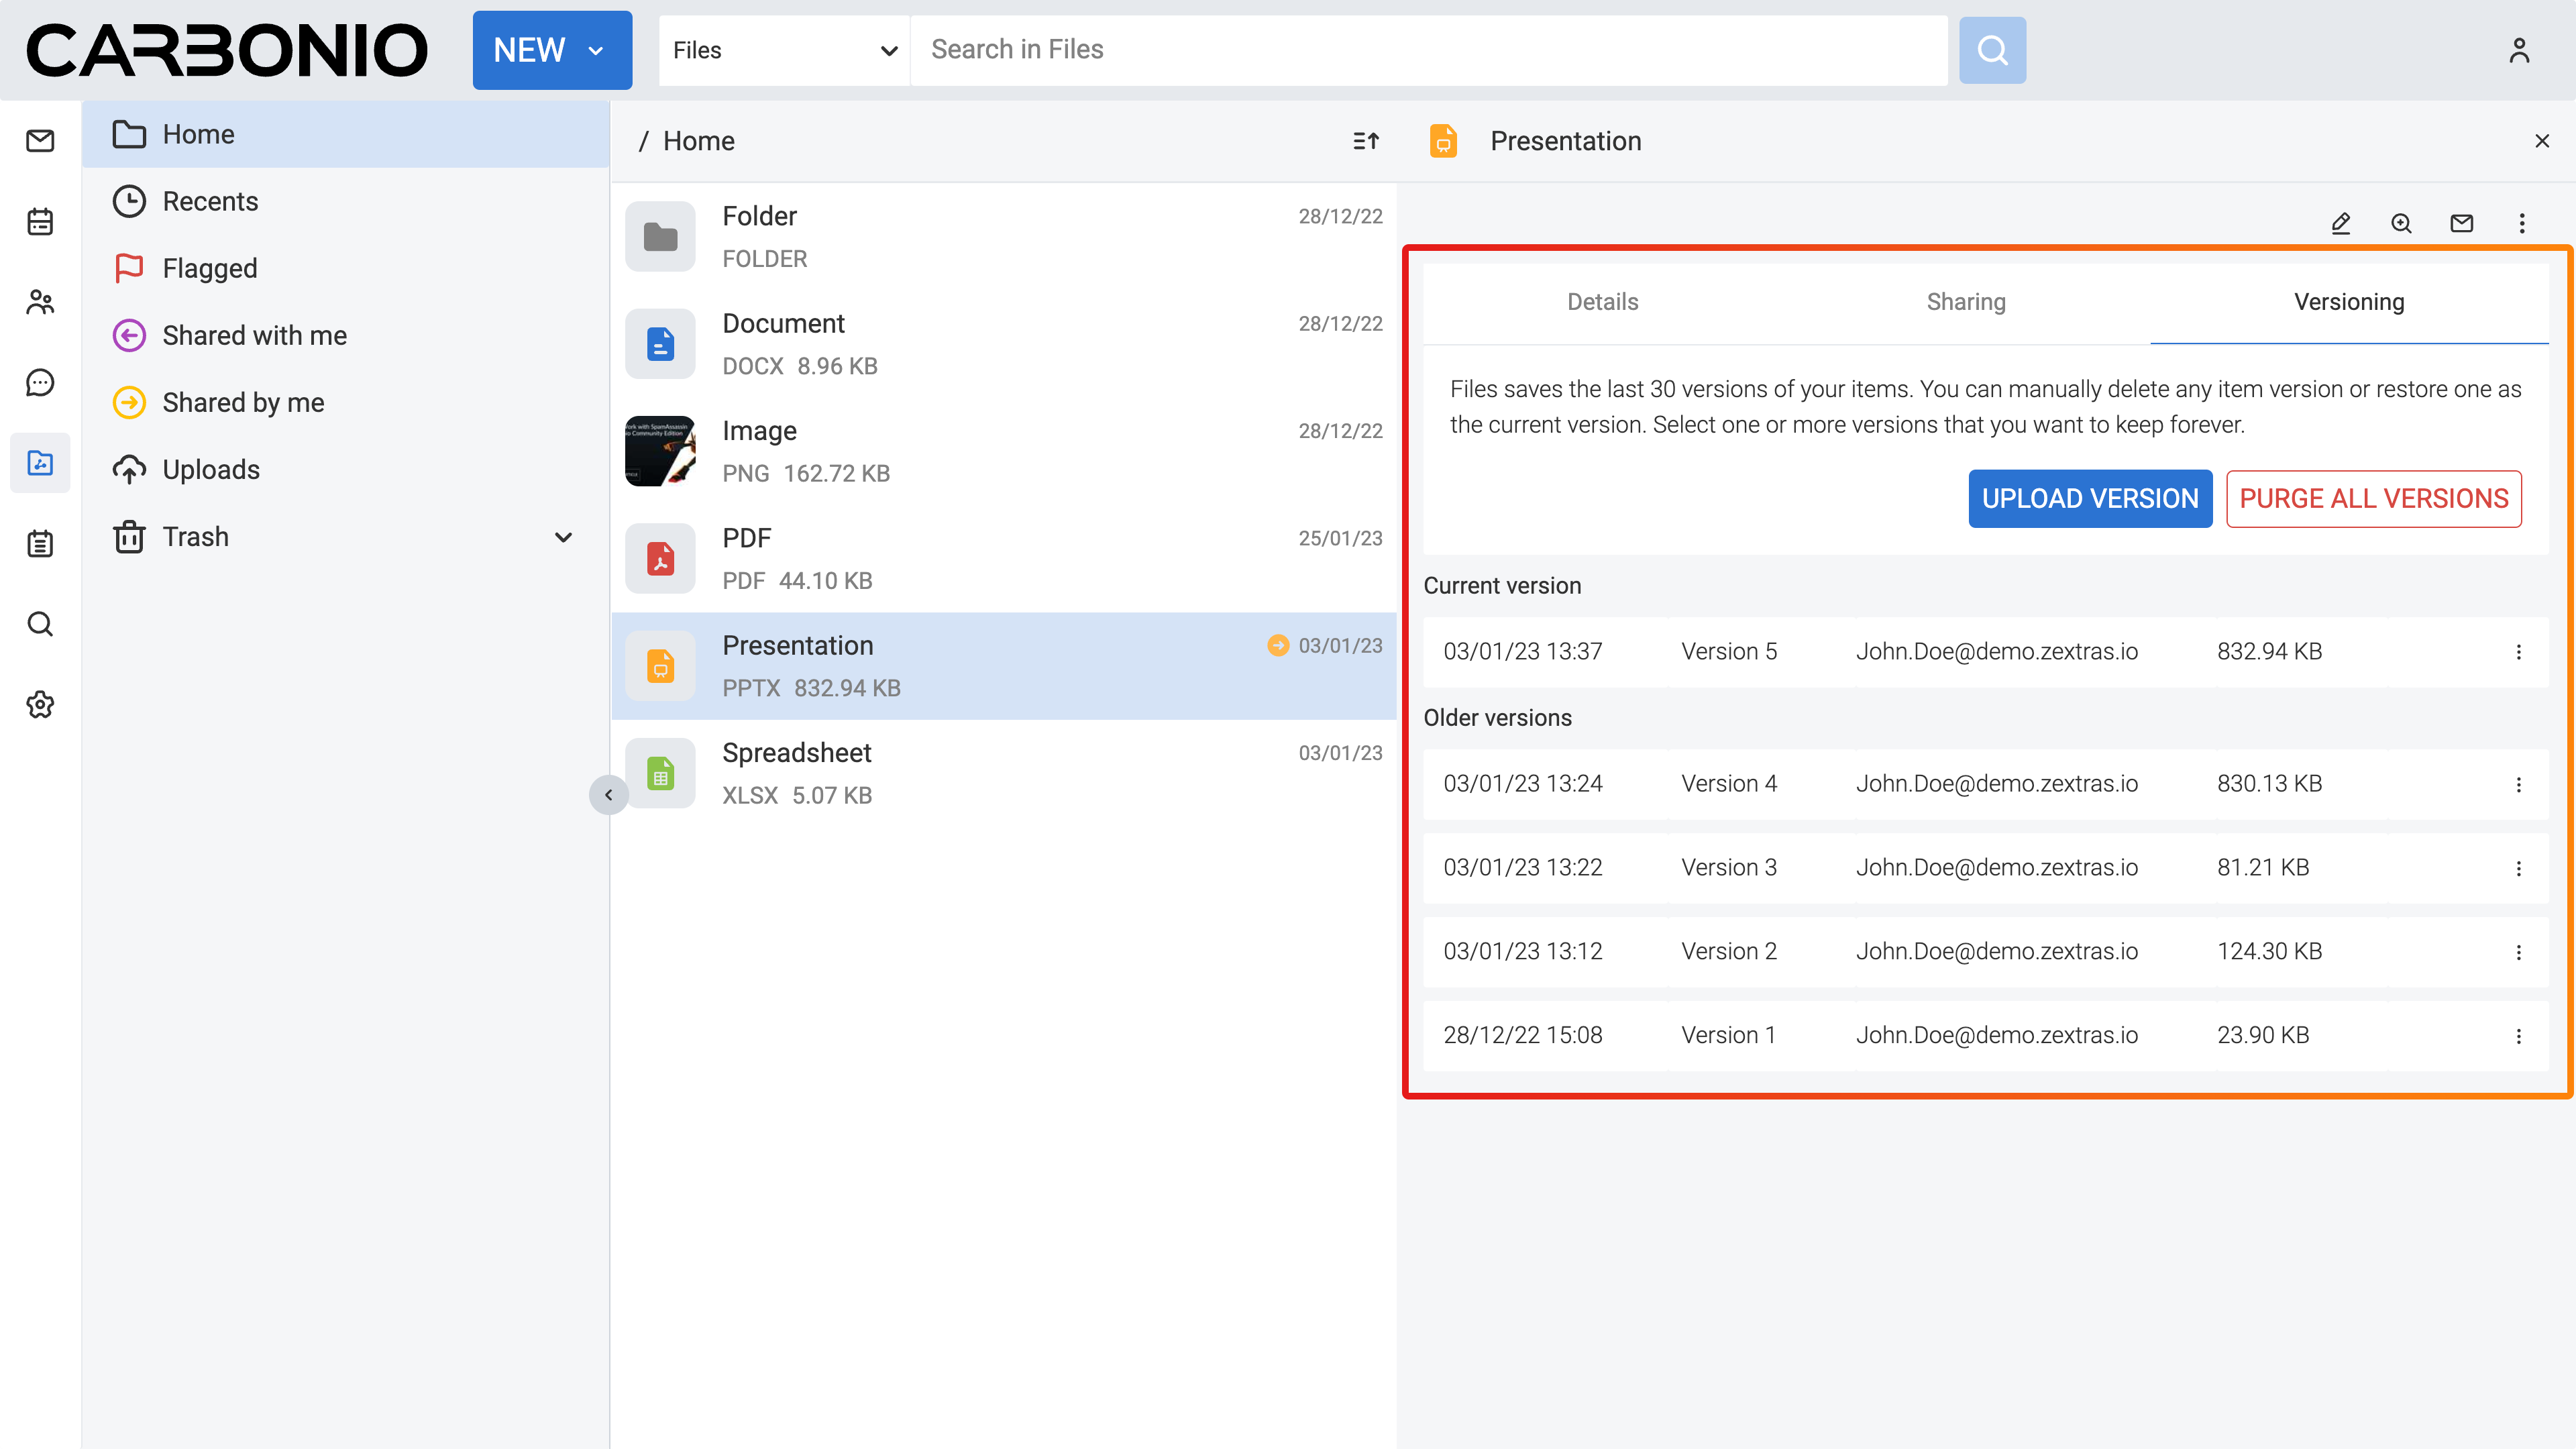
File versioning enables you to manage changes to your documents in Files. Each time you modify and save a file, the version number automatically updates. The most recent version number is visible in the file document list.
To view the history of the file, you can follow these steps:
Select the Files feature from your left sidebar.
Navigate to the folder that contains the file you want to check.
Select the file.
On the right side of the Main Panel, you will find three tabs. Click Versioning.
Under the Current version, you will find the last modified status of the file, and under Older versions you will find all previous versions, if they exist.
Updating a File with a New Version#
To update a file with a new version, follow these steps:
Select the Files feature from your left sidebar.
Navigate to the folder that contains the file.
Select the file.
On the right side of the Main Panel, click Versioning.
Click the UPLOAD VERSION button. A new window appears.
Choose the new version of the file from the opened window.
Click Open.
Restore a File to a Previous Version#
To restore a file to a previous version:
Select the Files feature from your left sidebar.
Navigate to the folder that contains the file.
Select the file.
On the right side of the Main Panel, click Versioning.
Under the Old versions section, click on the three vertical dots next to the version you want to restore.
Select Clone as current from the drop-down menu.
This will update the current version based on the cloned version, and the previous version will be added to the list of older versions.
Keep a Version of a File Forever#
Setting a version as Keep this version forever, will prevent that specific version from being deleted, even if a purge of all versions is performed.
To set a version as Keep this version forever:
Select the Files feature from your left sidebar.
Navigate to the folder that contains the file.
Select the file.
On the right side of the Main Panel, click Versioning.
Under the Old versions section, click on the three vertical dots next to the version you want to keep forever.
Select Keep this version forever from the drop-down menu.
Delete Version History of a File#
To delete the version history of a file:
Select the Files feature from your left sidebar.
Navigate to the folder that contains the file.
Select the file.
On the right side of the Main Panel, click Versioning.
Click the PURGE ALL VERSIONS button.
This will delete all versions of the file, keeping the current version.
In case a version is set to Keep forever, purging all versions will not affect that particular version. To remove these versions as well you need to first click on the three vertical dots next to the version and select Remove keep forever.
Delete a Specific Version of a File#
To delete a specific version of a file:
Select the Files feature from your left sidebar.
Navigate to the folder that contains the file.
Select the file.
On the right side of the Main Panel, click Versioning.
Under the Old versions section, click on the three vertical dots next to the version you want to delete.
Click Delete version from the drop-down menu.
If a version is set to Keep forever, the delete button will be disabled. You need to remove this version from Keep forever before performing the deletion. To remove these versions as well you need to first click on the three vertical dots next to the version and select Remove keep forever.
Sending a File as an Email Attachment#
You can send files stored in your Files as attachments via email to your colleagues. To do so:
Select the Files feature from your left sidebar.
Navigate to the folder that contains the file.
Right-click on the file.
Select Send via e-mail from the drop-down menu.
A new compose board will appear which includes the file as an attachment.
Complete composing your email and click SEND.
Sending an Email with a Link to a File#
Instead of sending the file as an attachment, you can opt to send an email with a link to a file stored in your Files. This can be particularly useful, especially for large files.
However, the procedure differs for colleagues who have accounts on the same system as you and for external users with no account on the system.
To send the link to your colleagues:
Select the Files feature from your left sidebar.
Navigate to the folder that contains the file.
Select the file.
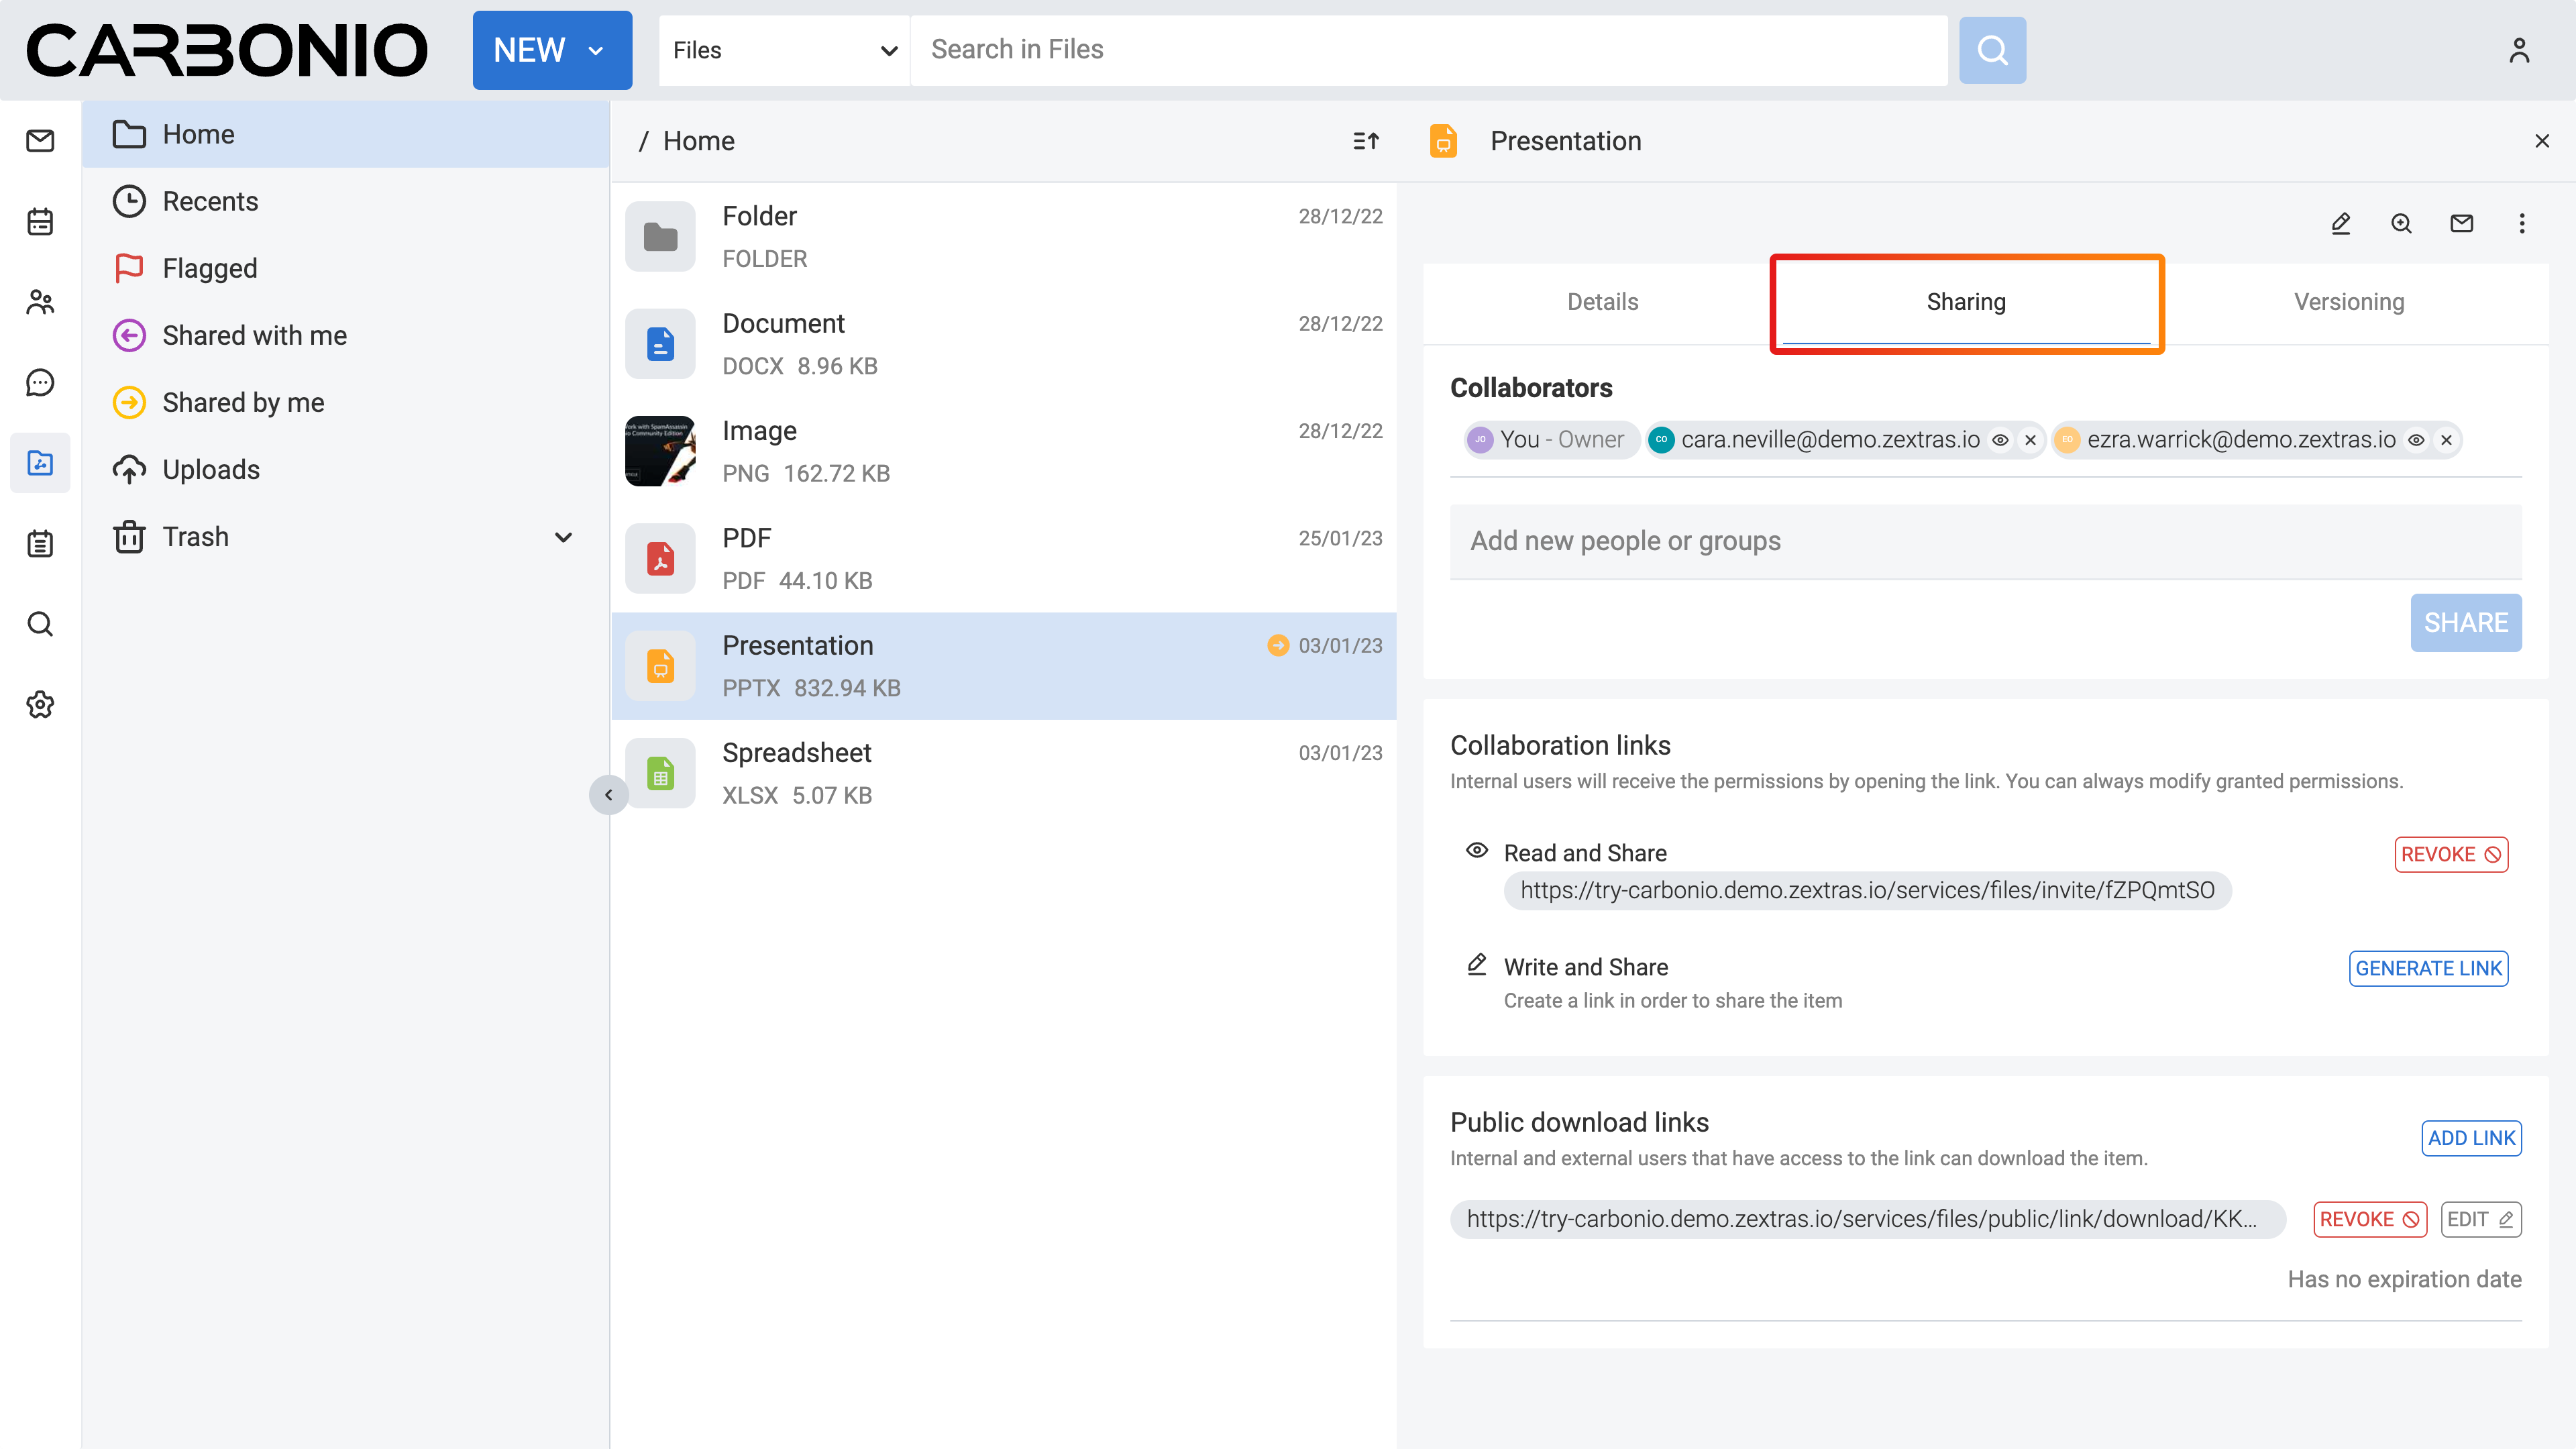
On the right side of the Main Panel, you will find three tabs. Click Sharing.
Under the Collaboration links section, click on the GENERATE LINK button next to either Read and Share or Write and Share depending on the privileges you want to grant to the recipient.
Copy the generated link by clicking on it. The link will be saved to your clipboard and can be pasted anywhere by right-clicking and selecting Paste, or by using the keyboard shortcut CTRL+V on Windows or Command+V on macOS.
You can send this link while composing a new email and include it inside the message.
To send the link to external collaborators:
Select the Files feature from your left sidebar.
Navigate to the folder that contains the file.
Select the file.
On the right side of the Main Panel, you will find three tabs. Click Sharing.
Under the Public download links section, click on the ADD LINK button.
Insert a description for the link and an expiration date.
Click the GENERATE LINK button on the right.
Copy the generated link by clicking on it. The link will be saved to your clipboard and can be pasted anywhere by right-clicking and selecting Paste, or by using the keyboard shortcut CTRL+V on Windows or Command+V on macOS.
You can send this link while composing a new email and include it inside the message.
Sharing Files and Folders#
One of the most important and useful features of Files is its sharing capabilities. Sharing allows you to grant others access to files and folders. You can specify which items to share, and the level of access granted. When you invite a user to share, they have the option to accept or decline the invitation.
To manage sharing properties of a file or folder:
Select the Files feature from your left sidebar.
Click on the folder or file you want to share.
On the right side of the Main Panel, you will find different tabs. Click Sharing.
Under the Collaborators, Collaboration links, and Public download links sections, you can manage various sharing properties.
Collaboration:
This section enables you to include multiple colleagues for collaboration on a file or folder, granting them different privileges such as the ability to view, download, share, and edit the file.
Collaboration links:
This section allows you to generate different links for a file or folder, enabling you to send these links to colleagues. Those with accounts on the same system (i.e., your colleagues) can use the links to access or edit the file or folder based on the privileges you grant them by generating the respective links.
Public download links:
This section allows you to generate different links for a file or folder, enabling you to send these links to external users. The generated link provides access for anyone with the link to view and download the content of the file or folder. It is now also possible for external users to download the entire folder as a compressed ZIP archive.
Adding Collaborators to a File / Folder#
To add collaborators to a file or folder in Files:
Select the Files feature from your left sidebar.
Click on the folder or folder to which you want to grant access.
On the right side of the Main Panel, you will find different tabs. Click Sharing.
In the Collaborators section, begin entering the email addresses of the colleagues you wish to share the item with and select them from the suggestions.
Click on the eye icon next to the name of the colleague you have just inserted.
Choose the access level you want to give, like Viewer or Editor, from the menu. You can also decide whether this user can share the item with others by checking the Sharing allowed checkbox.
Click the SHARE button.

Removing Collaborators from a File / Folder#
Select the Files feature from your left sidebar.
Click on the folder or folder to which you want to grant access.
On the right side of the Main Panel, you will find different tabs. Click Sharing.
In the Collaborators section, hover your mouse cursor over the name of the colleague. Small buttons will appear next to their name.
Click on the x button to remove them from the list.
Generating Collaboration Links for Colleagues#
To generate a collaboration link for your colleagues:
Select the Files feature from your left sidebar.
Navigate to the folder that contains the file.
Navigate to the file or folder and click on it.
On the right side of the Main Panel, you will find different tabs. Click Sharing.
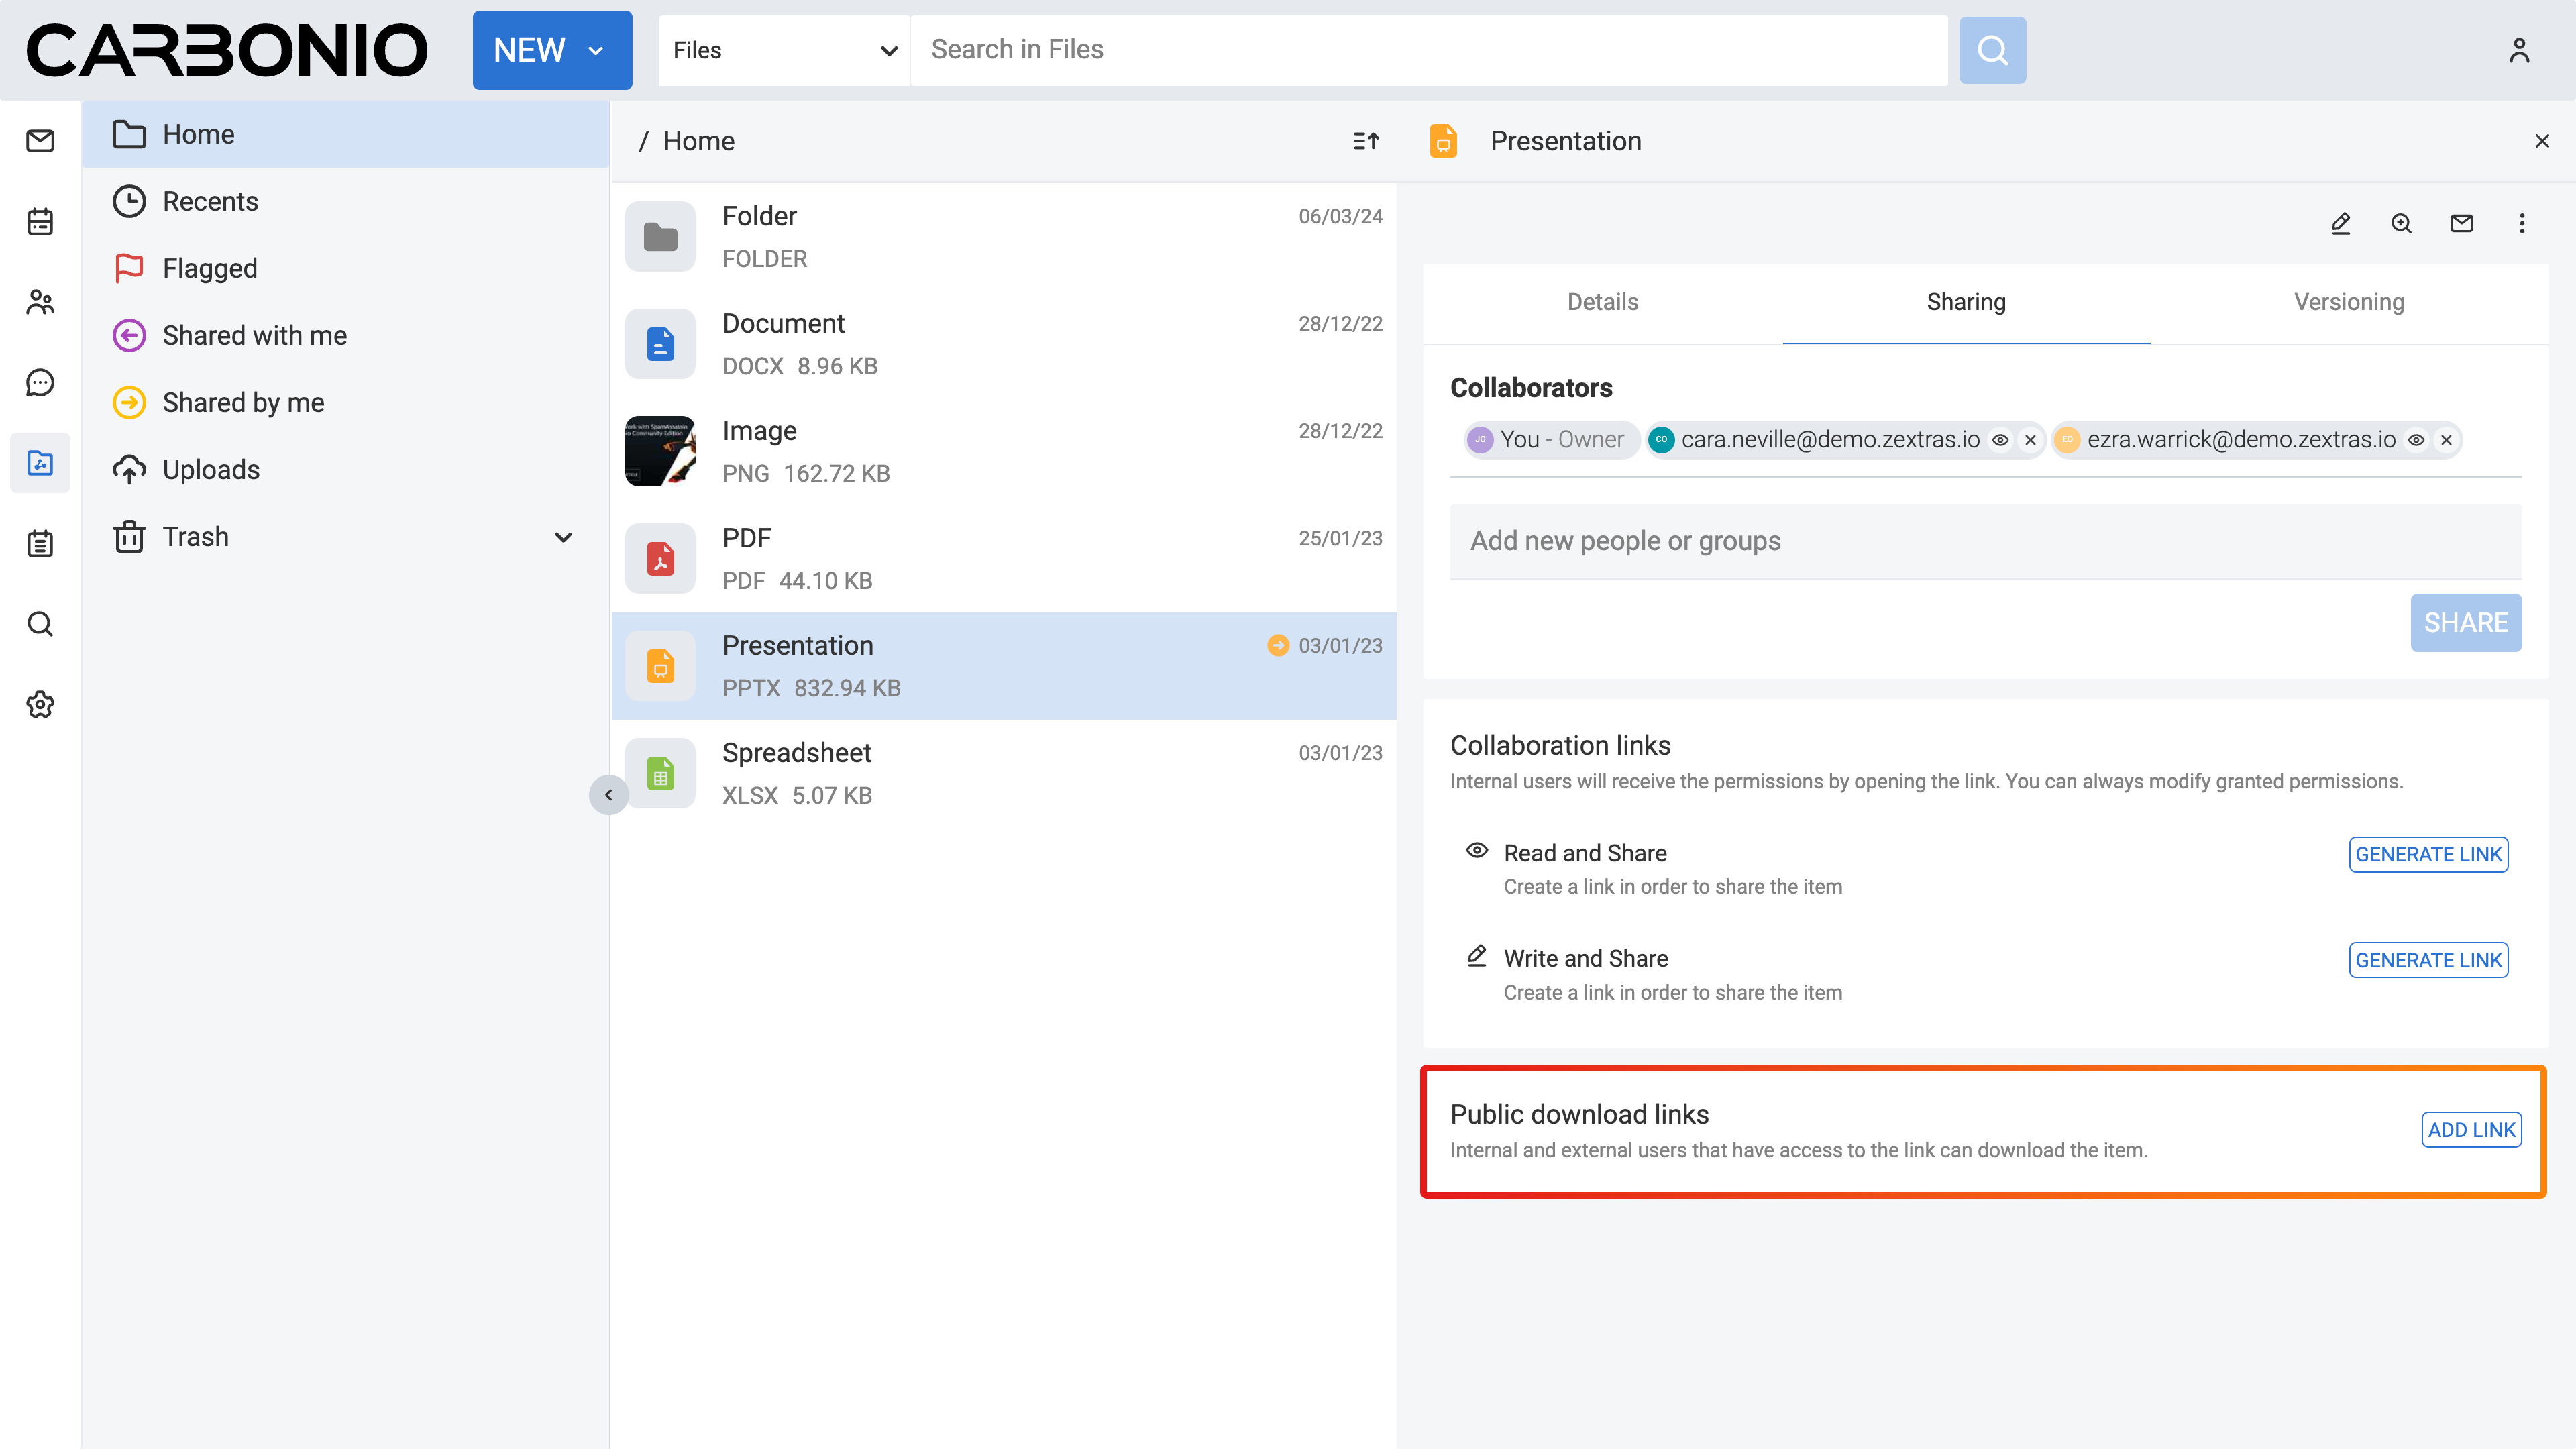
Under the Collaboration links section, click on the GENERATE LINK button next to either Read and Share or Write and Share depending on the privileges you want to grant to the recipient.
You can copy the generated link by clicking on it. The link will be saved to your clipboard and can be pasted anywhere by right-clicking and selecting Paste, or by using the keyboard shortcut CTRL+V on Windows or Command+V on macOS. In the current release, you can generate up to a maximum of 50 public links for each file you want to share. If you have any doubts, please contact your system administrator. The public link has been extended to enhance security.
Generating Public Download Links for External Users#
To generate a sharing link external user:
Select the Files feature from your left sidebar.
Navigate to the file or folder and click on it.
On the right side of the Main Panel, you will find different tabs. Click Sharing.
Under the Public download links section, click on the ADD LINK button.
Insert a description for the link and an expiration date.
Click the GENERATE LINK button on the right.
Copy the generated link by clicking on it. The link will be saved to your clipboard and can be pasted anywhere by right-clicking and selecting Paste, or by using the keyboard shortcut CTRL+V on Windows or Command+V on macOS.
Extending the Expiration Date of a Public Access Link#
To extend the expiration date for a public access link:
Select the Files feature from your left sidebar.
Navigate to the file or folder and click on it.
On the right side of the Main Panel, you will find different tabs. Click Sharing.
Under the Public download links section, click on the EDIT button.
Edit the expiration date.
Click the EDIT LINK button on the right.
Revoking Public Access Links#
To revoke a public access link:
Select the Files feature from your left sidebar.
Navigate to the file or folder and click on it.
On the right side of the Main Panel, you will find different tabs. Click Sharing.
Under the Public download links section, click on the REVOKE button.
Click the REVOKE button to confirm.
Access Code Protection for Public File Links#
Access Code Protection adds an additional security layer to public file download links, allowing you to restrict access with a generated code that recipients must enter before downloading files.
To enable access code protection for a public download link:
Select the Files feature from your left sidebar.
Navigate to the file or folder and click on it.
On the right side of the Main Panel, you will find different tabs. Click Sharing.
Under the Public download links section, click on the ADD LINK button.
Insert a description for the link and an expiration date.
Enable the Access code protection toggle.
Click the GENERATE LINK button on the right.
Copy the generated link by clicking on it. The link will be saved to your clipboard and can be pasted anywhere by right-clicking and selecting Paste, or by using the keyboard shortcut CTRL+V on Windows or Command+V on macOS.
For You (File Owner)
Enable access code protection when creating public download links View, copy, or regenerate the access code as needed Share both the link and access code with your intended recipients
For Your Recipients
Click the protected public link you shared Enter the access code in the modal prompt Proceed with file download once correct code is provided
Exceeding Files quota limit#
If you overcome the quota limit for Files, documents will be opened in read-only mode: this will also be enforced by a label that appears on the bottom of the opened document. This behaviour holds also for shared documents: if the document is open by another user who has write access on your document, the second user will also see the Read-only label on the bottom of the document so he will not be able to save changes made to the document.
While editing a shared document, if the file quota limit is reached or changed, a warning message will appear on saving. You can still proceed by downloading the document and saving your changes locally.
Note
For the Files quota limitation, you should contact your system administrator.