

Basic Email Management#
In this section, we will delve into the versatile functionalities of Carbonio, focusing on its efficient organizational tools such as folders, tags, and sharing capabilities.
Using Tags#
Tags in Carbonio offer a versatile solution for classifying and organizing emails. For instance, you might designate tags like “Medium Priority” to swiftly categorize items according to their urgency or importance.
Tags enable seamless organization, allowing users to easily locate items associated with specific tags through efficient search functionality.
Moreover, the flexibility extends to the ability to apply multiple tags to a single item, ensuring thorough categorization and enhanced accessibility within the platform.
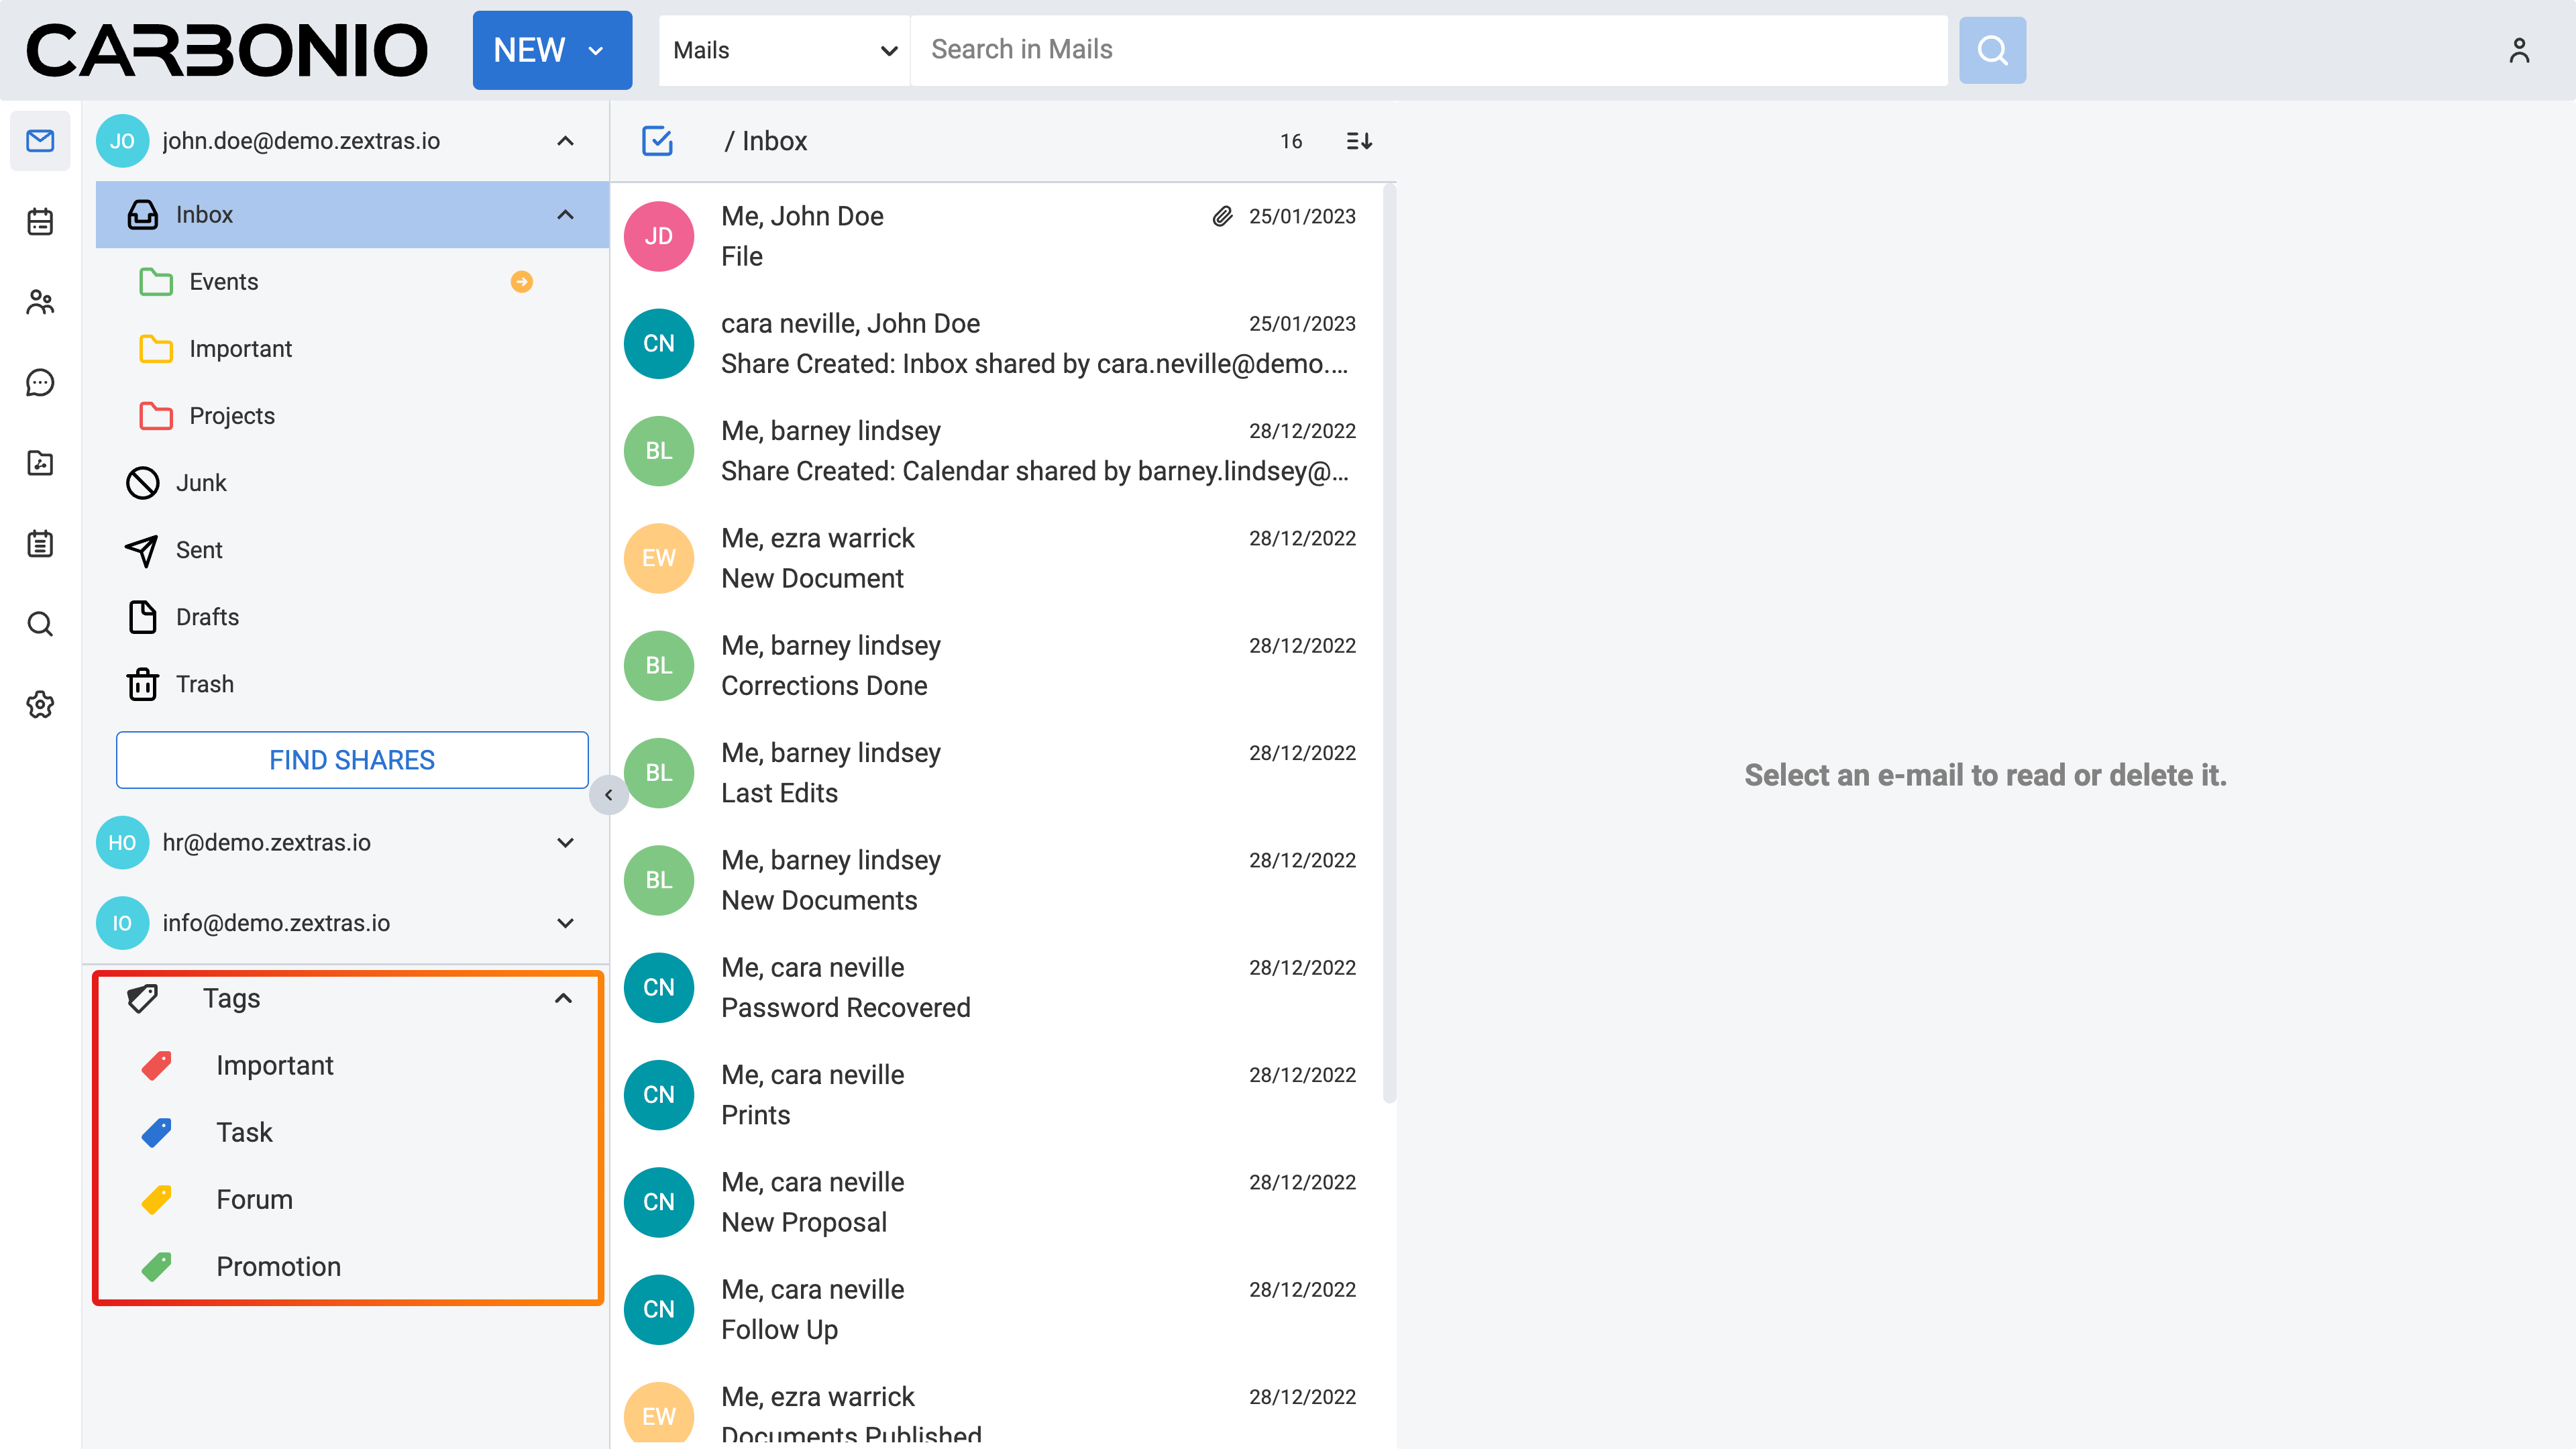
Your tags are located under the Tags section of the Mails. To view your current tags:
From the left sidebar click on the Mails section.
In the Navigation Panel of the mails section, locate the Tags section.
Click on the downward arrow icon located next to the Tags section.
This action will expand or reveal your tags.
Creating a Tag#
From the left sidebar click on the Mails section.
In the Navigation Panel of the mails section, locate the Tags option.
Right-click on the Tags option.
From the dropdown menu, select Create Tag.
A dialog box will appear. Insert a name for the new tag.
Choose a color for the tag from the options provided.
Click on the CREATE button to finalize the creation of the new tag.
To see your tags, you should click on the downward arrow icon located next to the Tags section.
Assigning a Tag to an Email#
To assign a tag to an email simply:
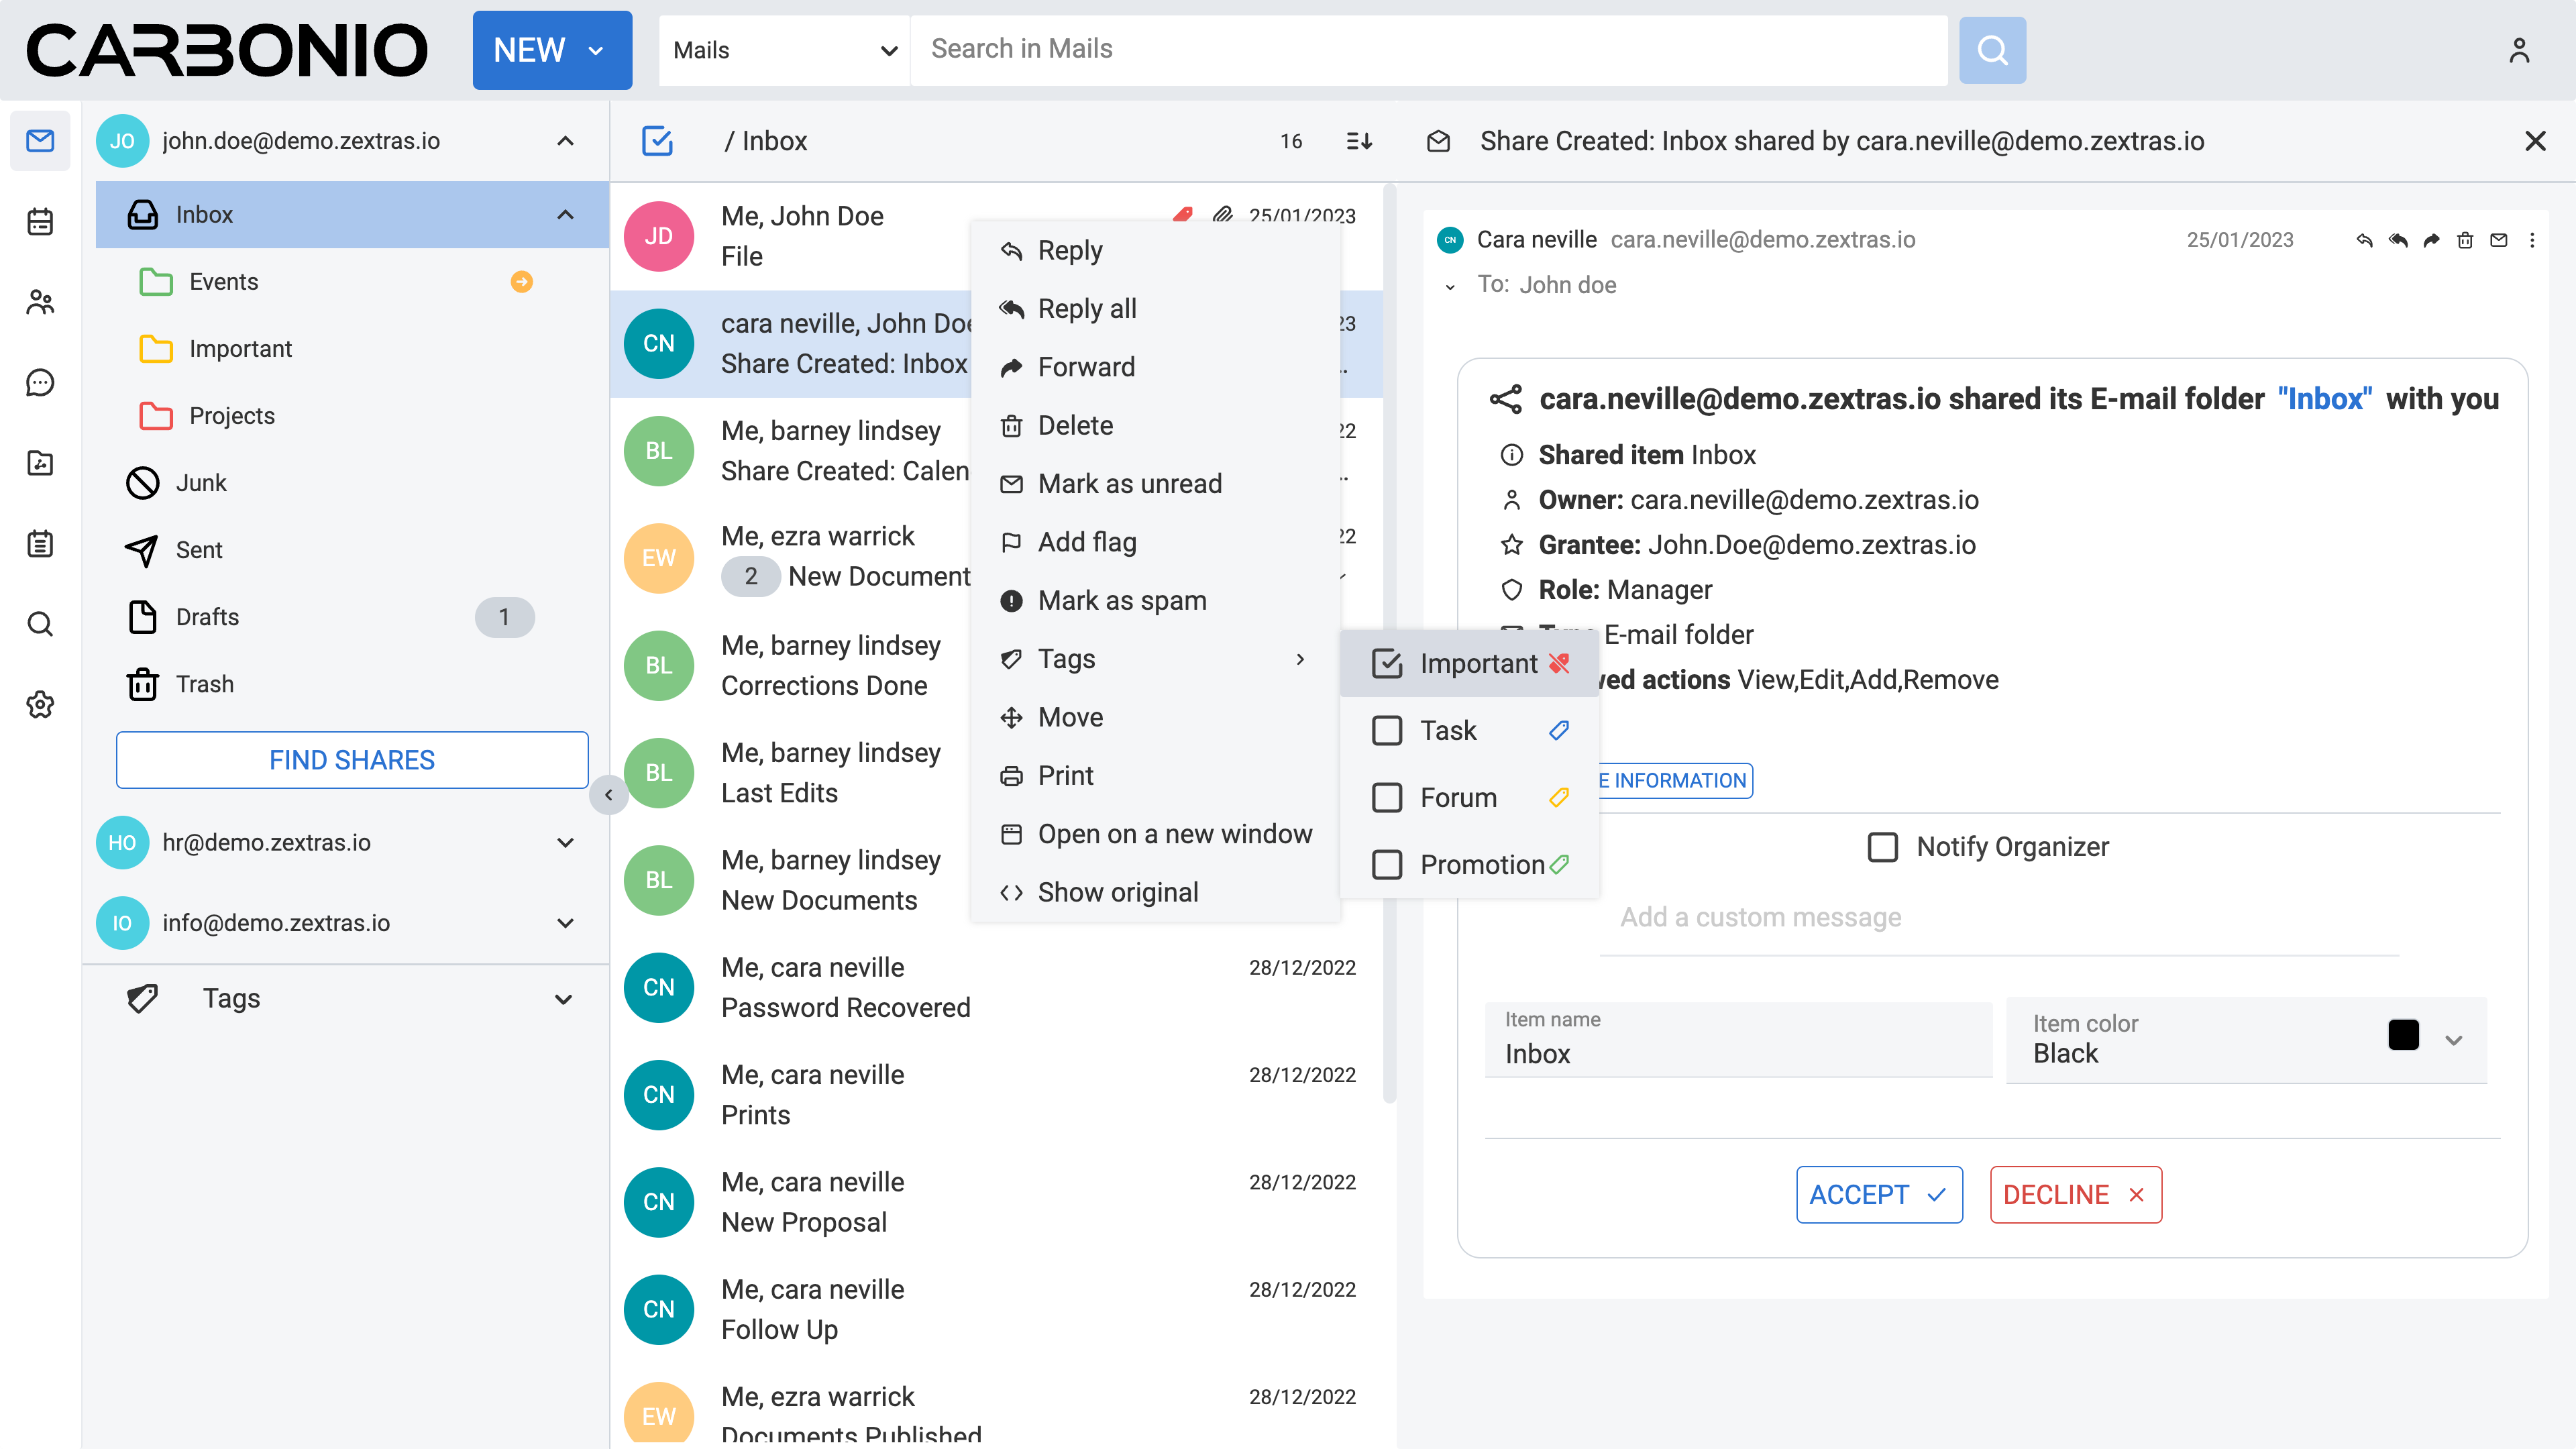
Right-click on the email to open the dropdown menu.
Navigate to the Tags option within the dropdown menu.
Select one or multiple tags from the list.
Displaying Emails with a Specific Tag#
To display emails with a specific tag:
From the left sidebar click on the Mails section.
Locate the Tags section within the Navigation Panel.
Click on the downward arrow icon located next to the Tags section to open the list of tags.
Click on the tag that you want to find emails for.
All messages with the selected tag will be displayed in the Main Panel.
Removing a Tag from an Email#
To remove a tag from an email simply:
Right-click on the email to open the dropdown menu.
Navigate to the Tags option within the dropdown menu.
Uncheck one or multiple tags from the list.
Changing a Tag Color#
Right-click on the tag you need to edit from the Tags section.
From the dropdown menu, select Edit Tag.
A dialog box will appear. Choose a color for the tag from the options provided.
Click on the EDIT button.
Renaming a Tag#
Right-click on the tag you need to edit from the Tags section.
From the dropdown menu, select Edit Tag.
A dialog box will appear. Edit the name.
Click on the EDIT button.
Deleting a Tag#
Right-click on the tag you need to delete from the Tags section.
From the dropdown menu, select Delete Tag.
Marking an Email with a Flag#
A flag acts like a special tag for important emails, showing up with a red flag icon next to the subject line.
Flagging emails is handy for various reasons. For instance, it helps you quickly find important emails you will need to refer to later. It is also useful for highlighting specific emails in shared folders so your colleagues can easily find them.
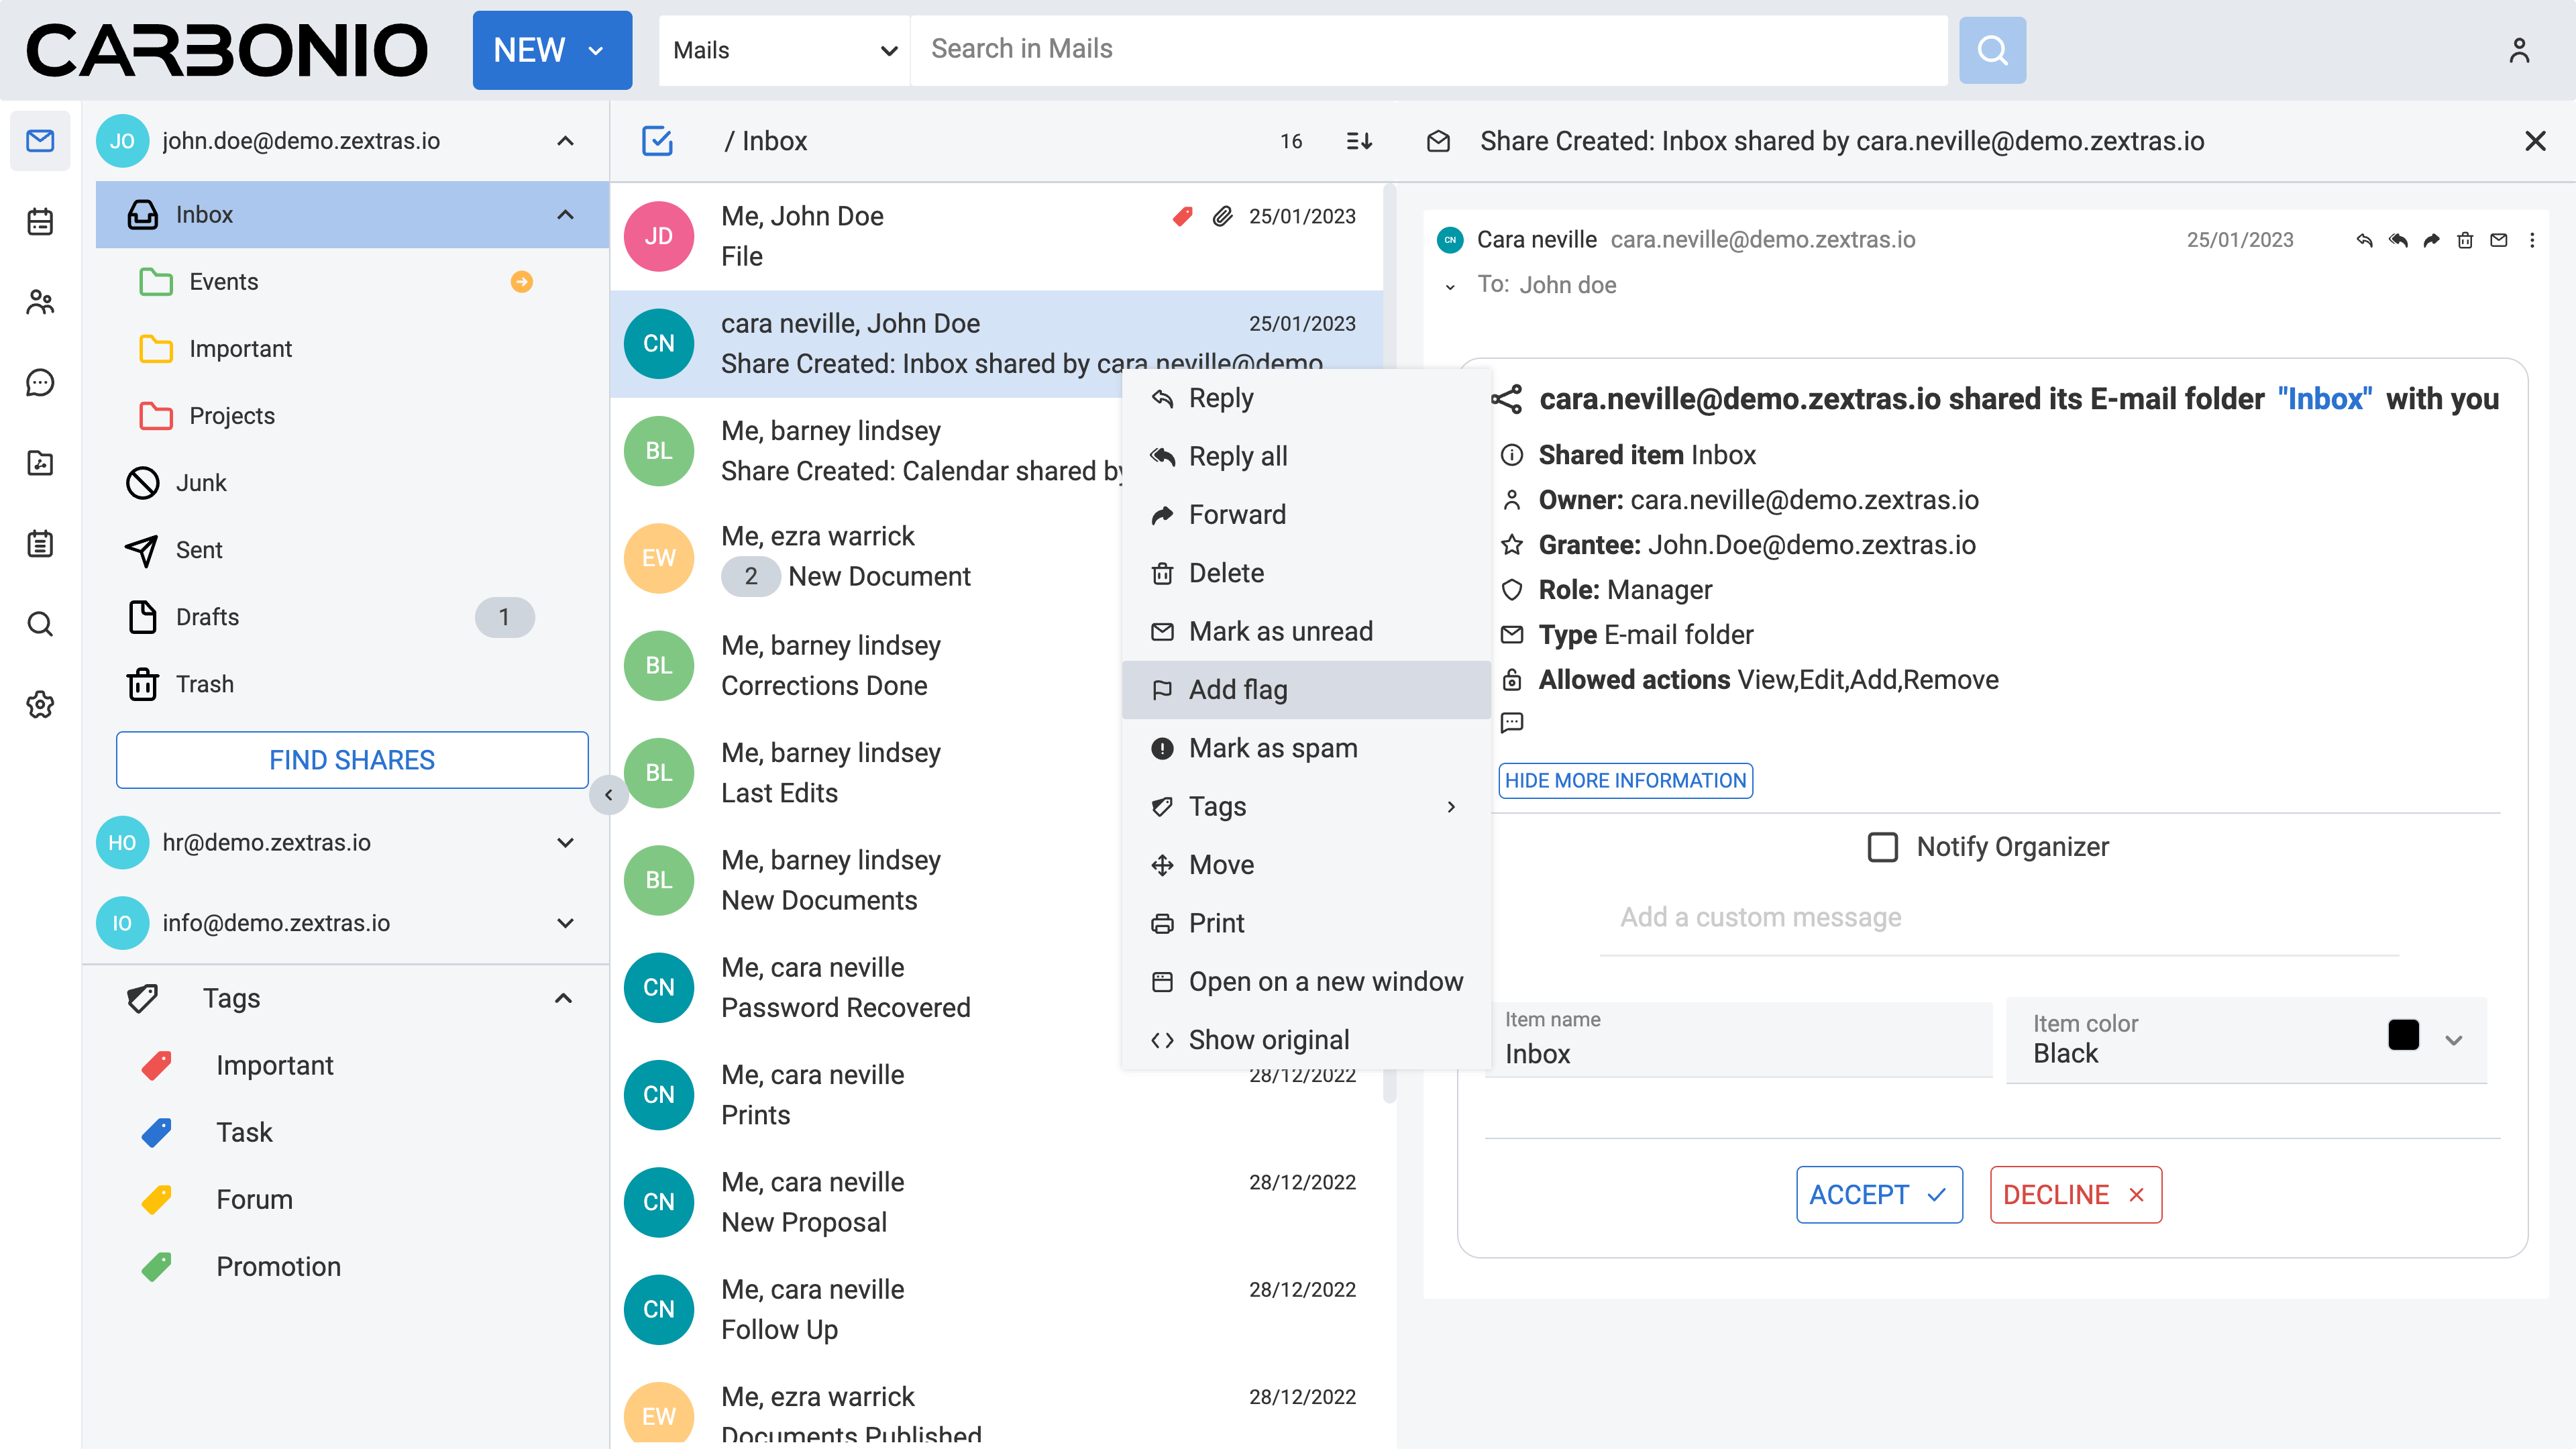
To mark an email with a flag, simply:
Right-click on the email.
From the dropdown menu select Add Flag.
Your email will have a red flag displayed on the right side of the subject line.
Removing Flag from an Email#
To remove the flag from an email, simply:
Right-click on the email.
From the dropdown menu select Remove Flag.
Using Folders#
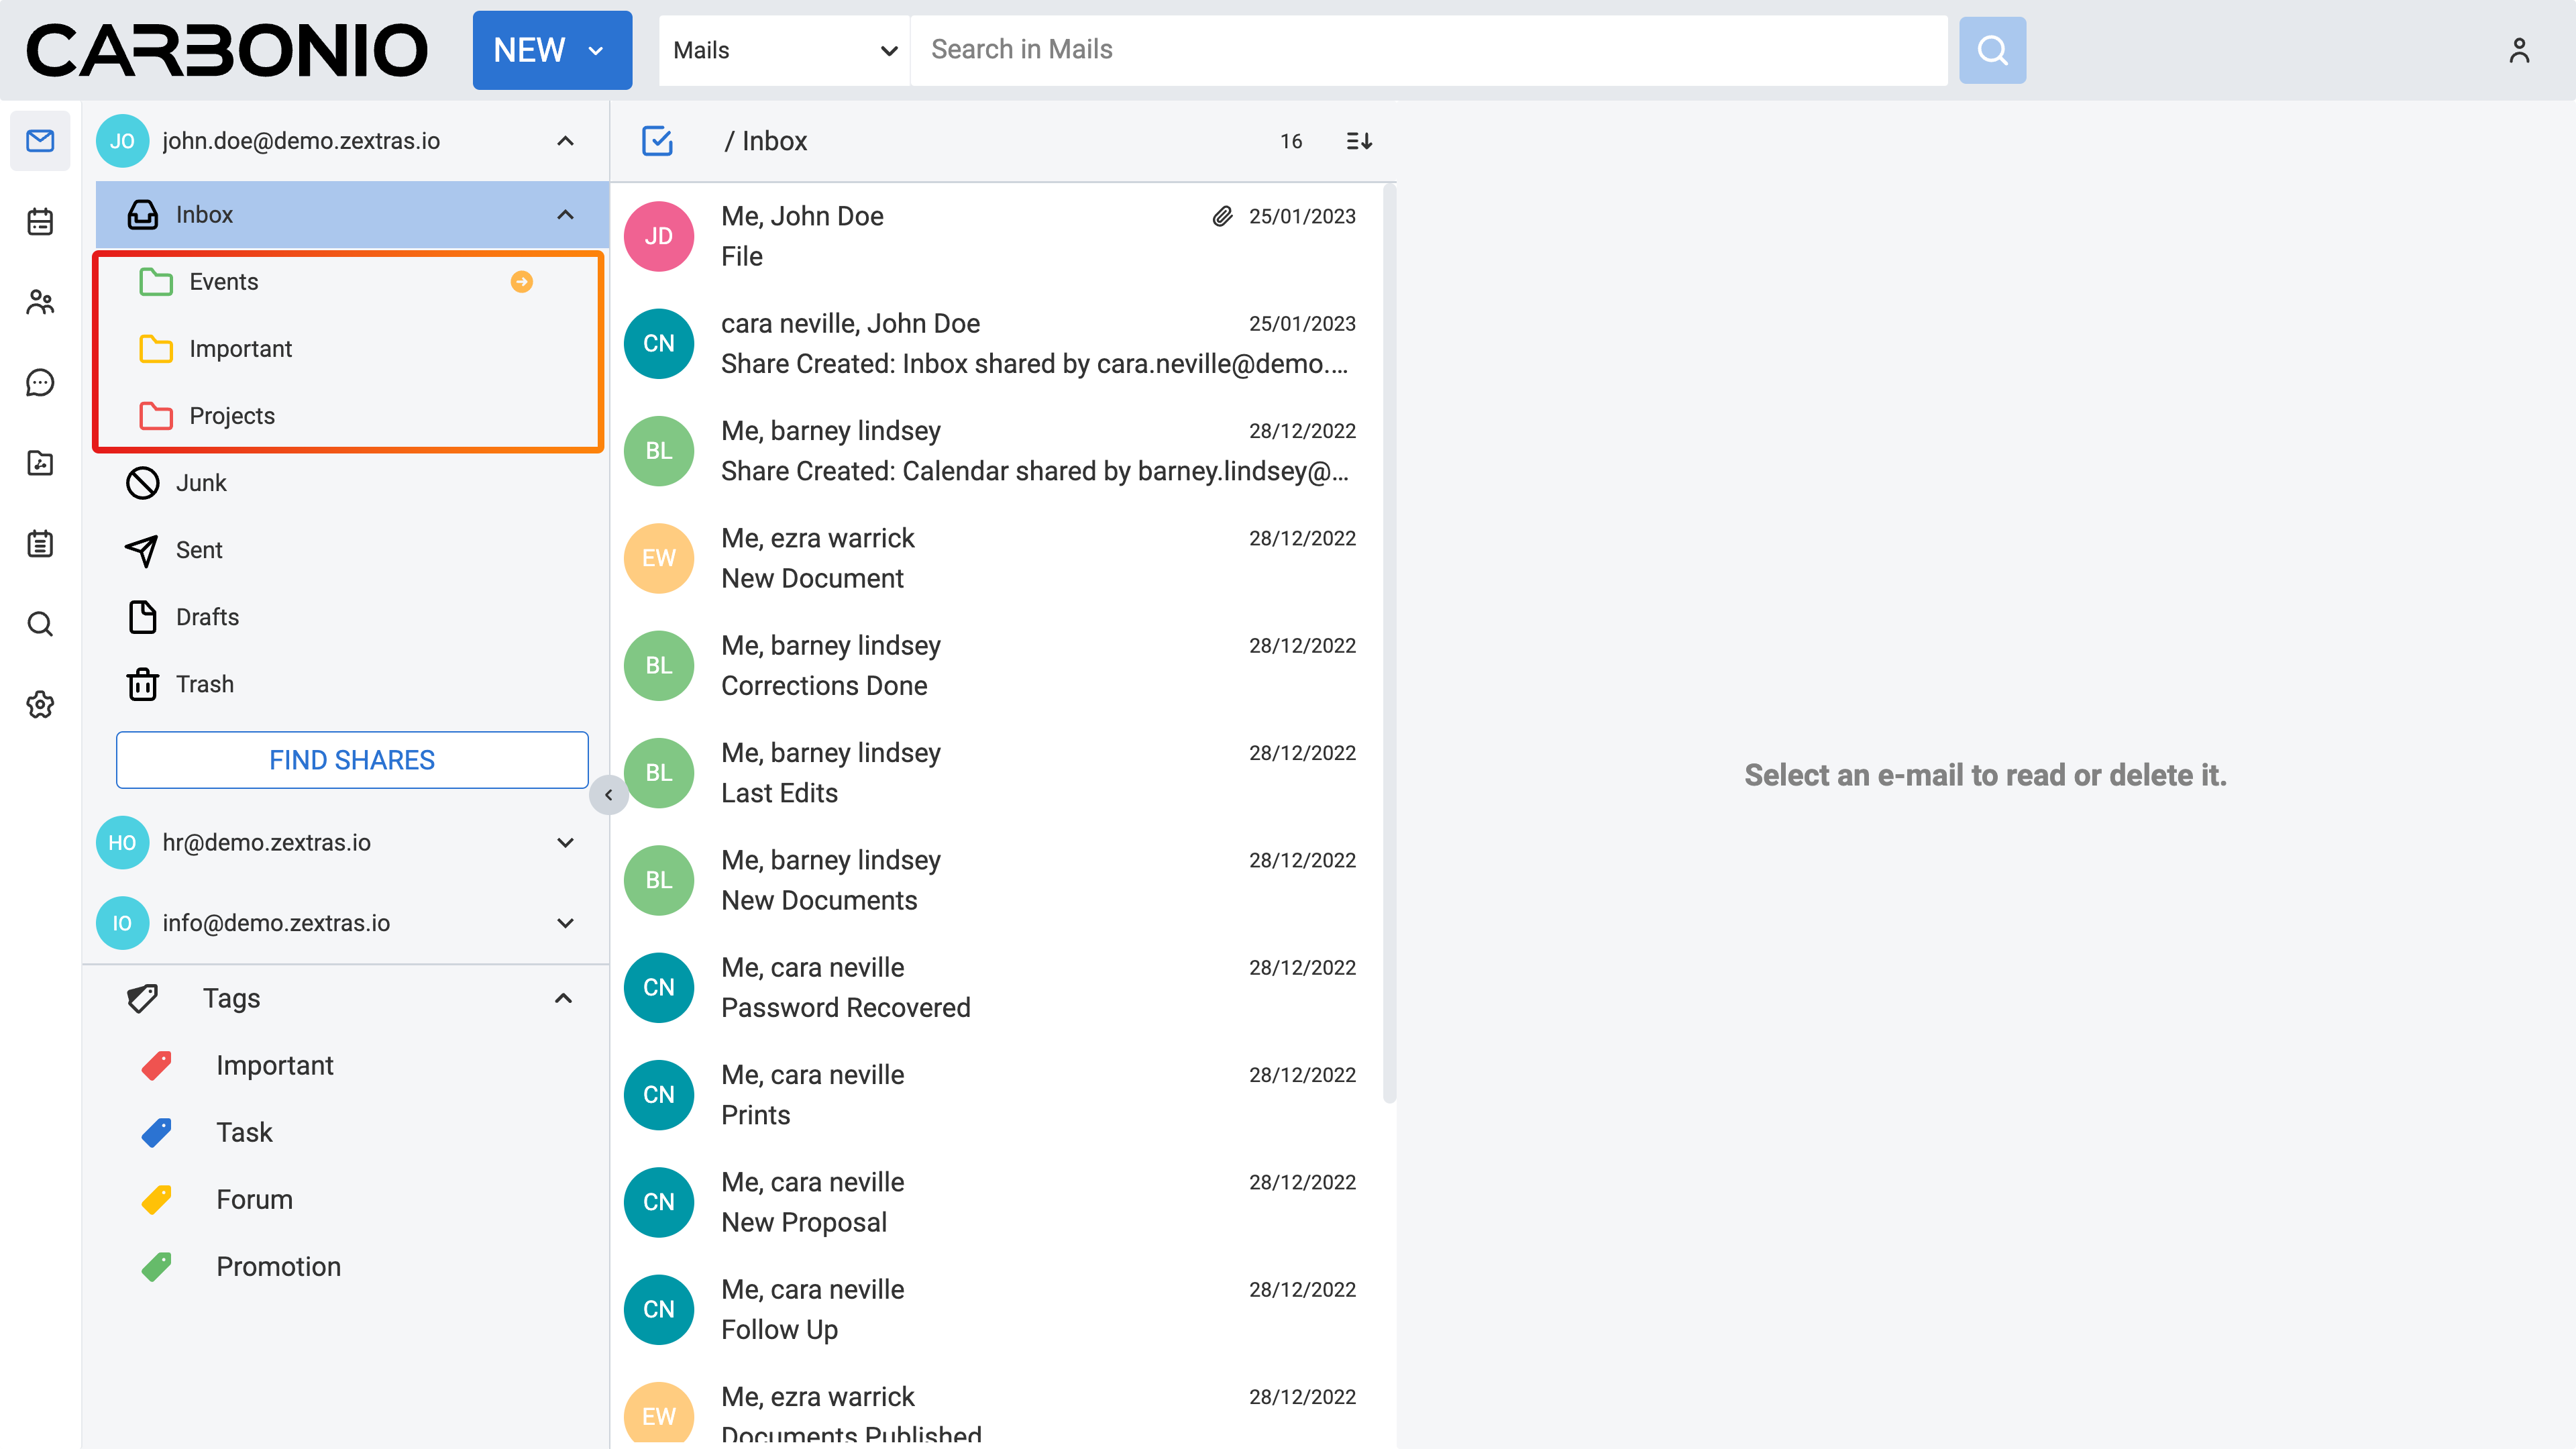
Folders serve to arrange both incoming and outgoing email correspondence. You have the option to create your folders or utilize predefined system folders:
System folders - These folders are immutable; they cannot be relocated, renamed, or erased. The system includes the following folders:
Inbox: The primary destination for new incoming email messages.
Sent: Contains a copy of all outgoing emails.
Drafts: Emails you have composed but not yet sent.
Junk: Incoming emails suspected to be spam or junk, although not definitively, are directed here. You can sift through these messages, moving or deleting them as necessary. If left untouched, they are automatically purged according to the administrator’s settings.
Trash: Deleted items are relocated here and remain until you manually empty the trash or until automated purging occurs.
User-defined folders: These folders, which you create to structure your email, appear in the Folder list within the Overview pane. It is important to note that top-level folder names must be unique and cannot match any other top-level folder within your inbox.
Creating New Folder#
You can create either a standalone user-defined folder or a subfolder within another folder, including system folders.
It is not possible to create two folders with identical names within the same parent folder.
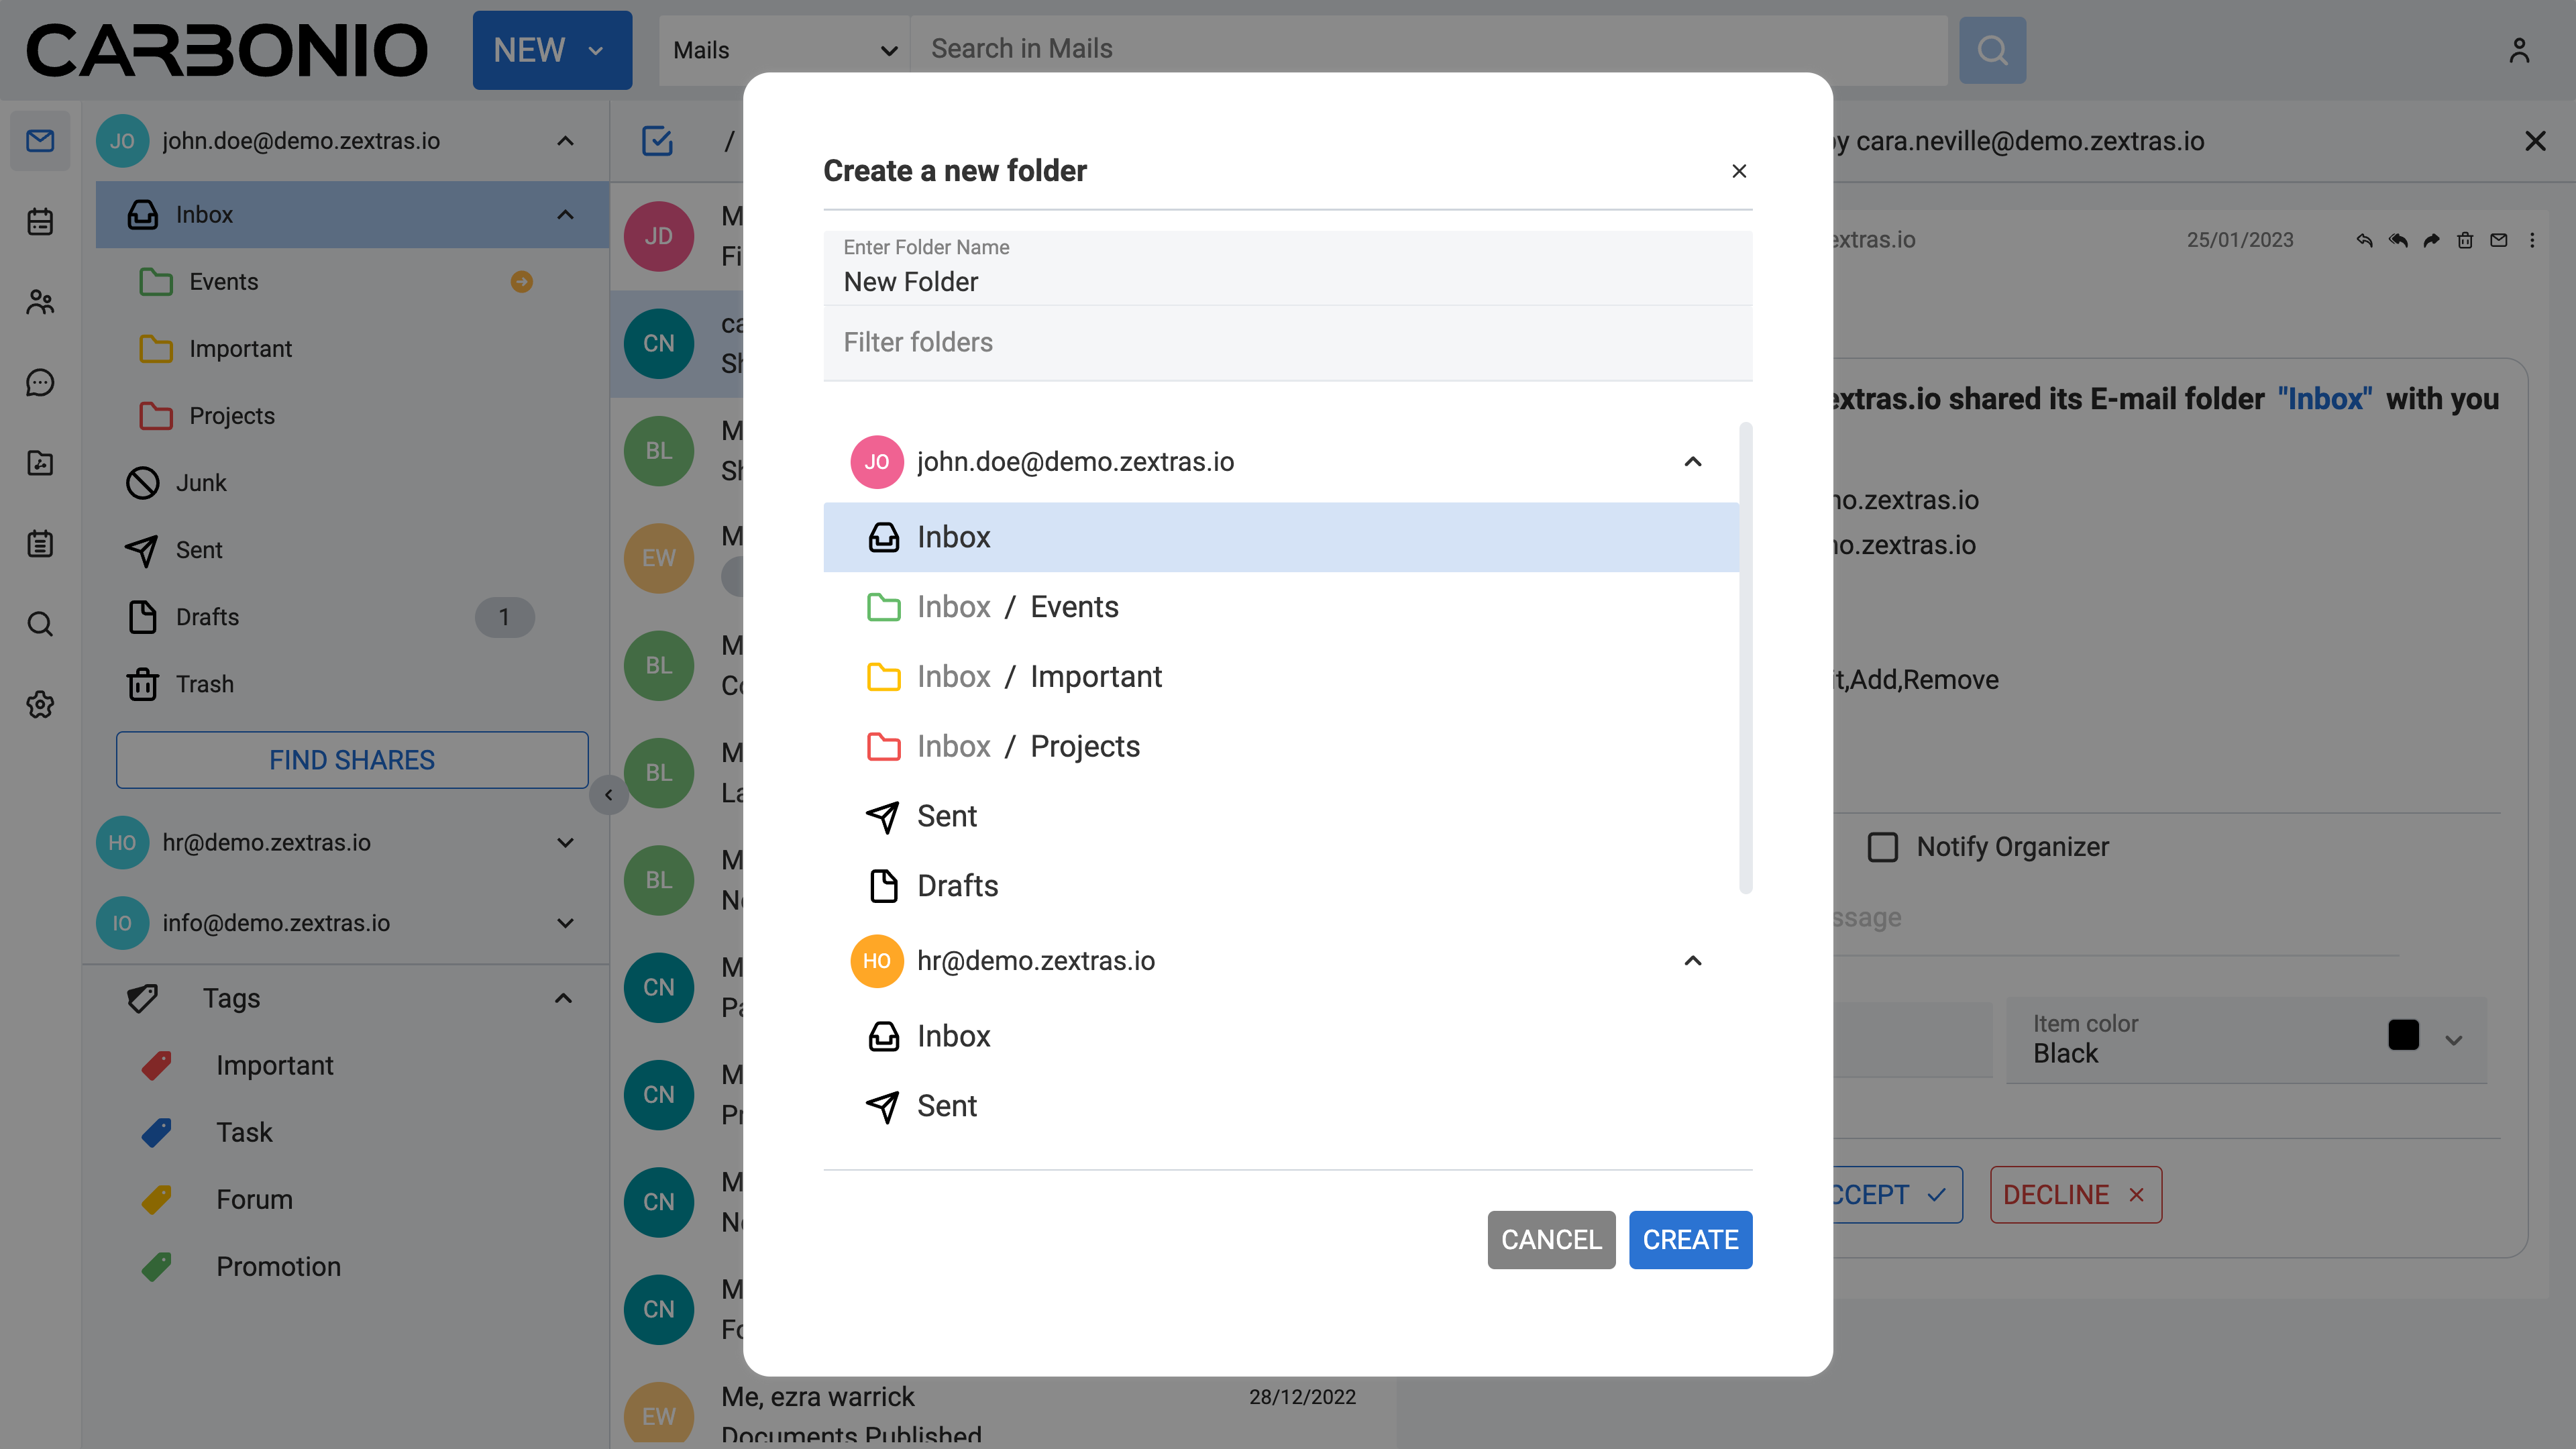
To create a new folder:
Navigate to the Mail section from the left sidebar.
Right-click on a folder.
Select New Folder from the dropdown menu.
Provide a name for the new folder.
Finally, click CREATE to confirm your folder creation.
Assigning a Color to a Folder#
You can customize folders with different colors. To assign a color to a folder:
Navigate to the Mail section from the left sidebar.
Right-click on a folder.
Click on Edit.
A new dialogue box will appear. Click on the Select Color field and select a color from the dropdown menu.
Click EDIT to confirm the change.
Wiping Folder#
Wiping a folder permanently removes all emails. To wipe a folder:
Navigate to the Mail section from the left sidebar.
Right-click on a folder.
Select Wipe Folder from the dropdown menu.
Finally, click WIPE to confirm.
Deleting Folder#
Deleting a folder moves it to the Trash folder. To delete a folder:
Navigate to the Mail section from the left sidebar.
Right-click on a folder.
Select Delete from the dropdown menu.
Finally, click OK to confirm.
Editing a Folder#
You can edit the folder’s name, color, and retention policy. To edit a folder:
Navigate to the Mail section from the left sidebar.
Right-click on a folder.
Click on Edit.
A new dialogue box will appear. Perform changes.
Click EDIT to confirm the change.
Moving Emails Between Folders#
To move emails between folders:
Right-click on an email.
A new dialogue box will appear. Choose the folder where you wish to relocate the email.
Click MOVE to confirm.
Alternatively, you can click, hold, and drag an email directly onto a folder for quick relocation.
Working with Email Folder Sharing#
Sharing allows you to give your colleagues access to email folders in your account. You decide which items you want to share and what level of access those people will have. You can send an invitation to someone to share an email folder with them, and they can either accept or decline it.
You have the option to share your email folders with colleagues or make them public for external people who have the link to your folder.
Public users are limited to viewing content; they cannot make any changes. For colleagues, you have control over the type of access privileges granted.
You retain the ability to modify access rights and revoke permissions whenever necessary.
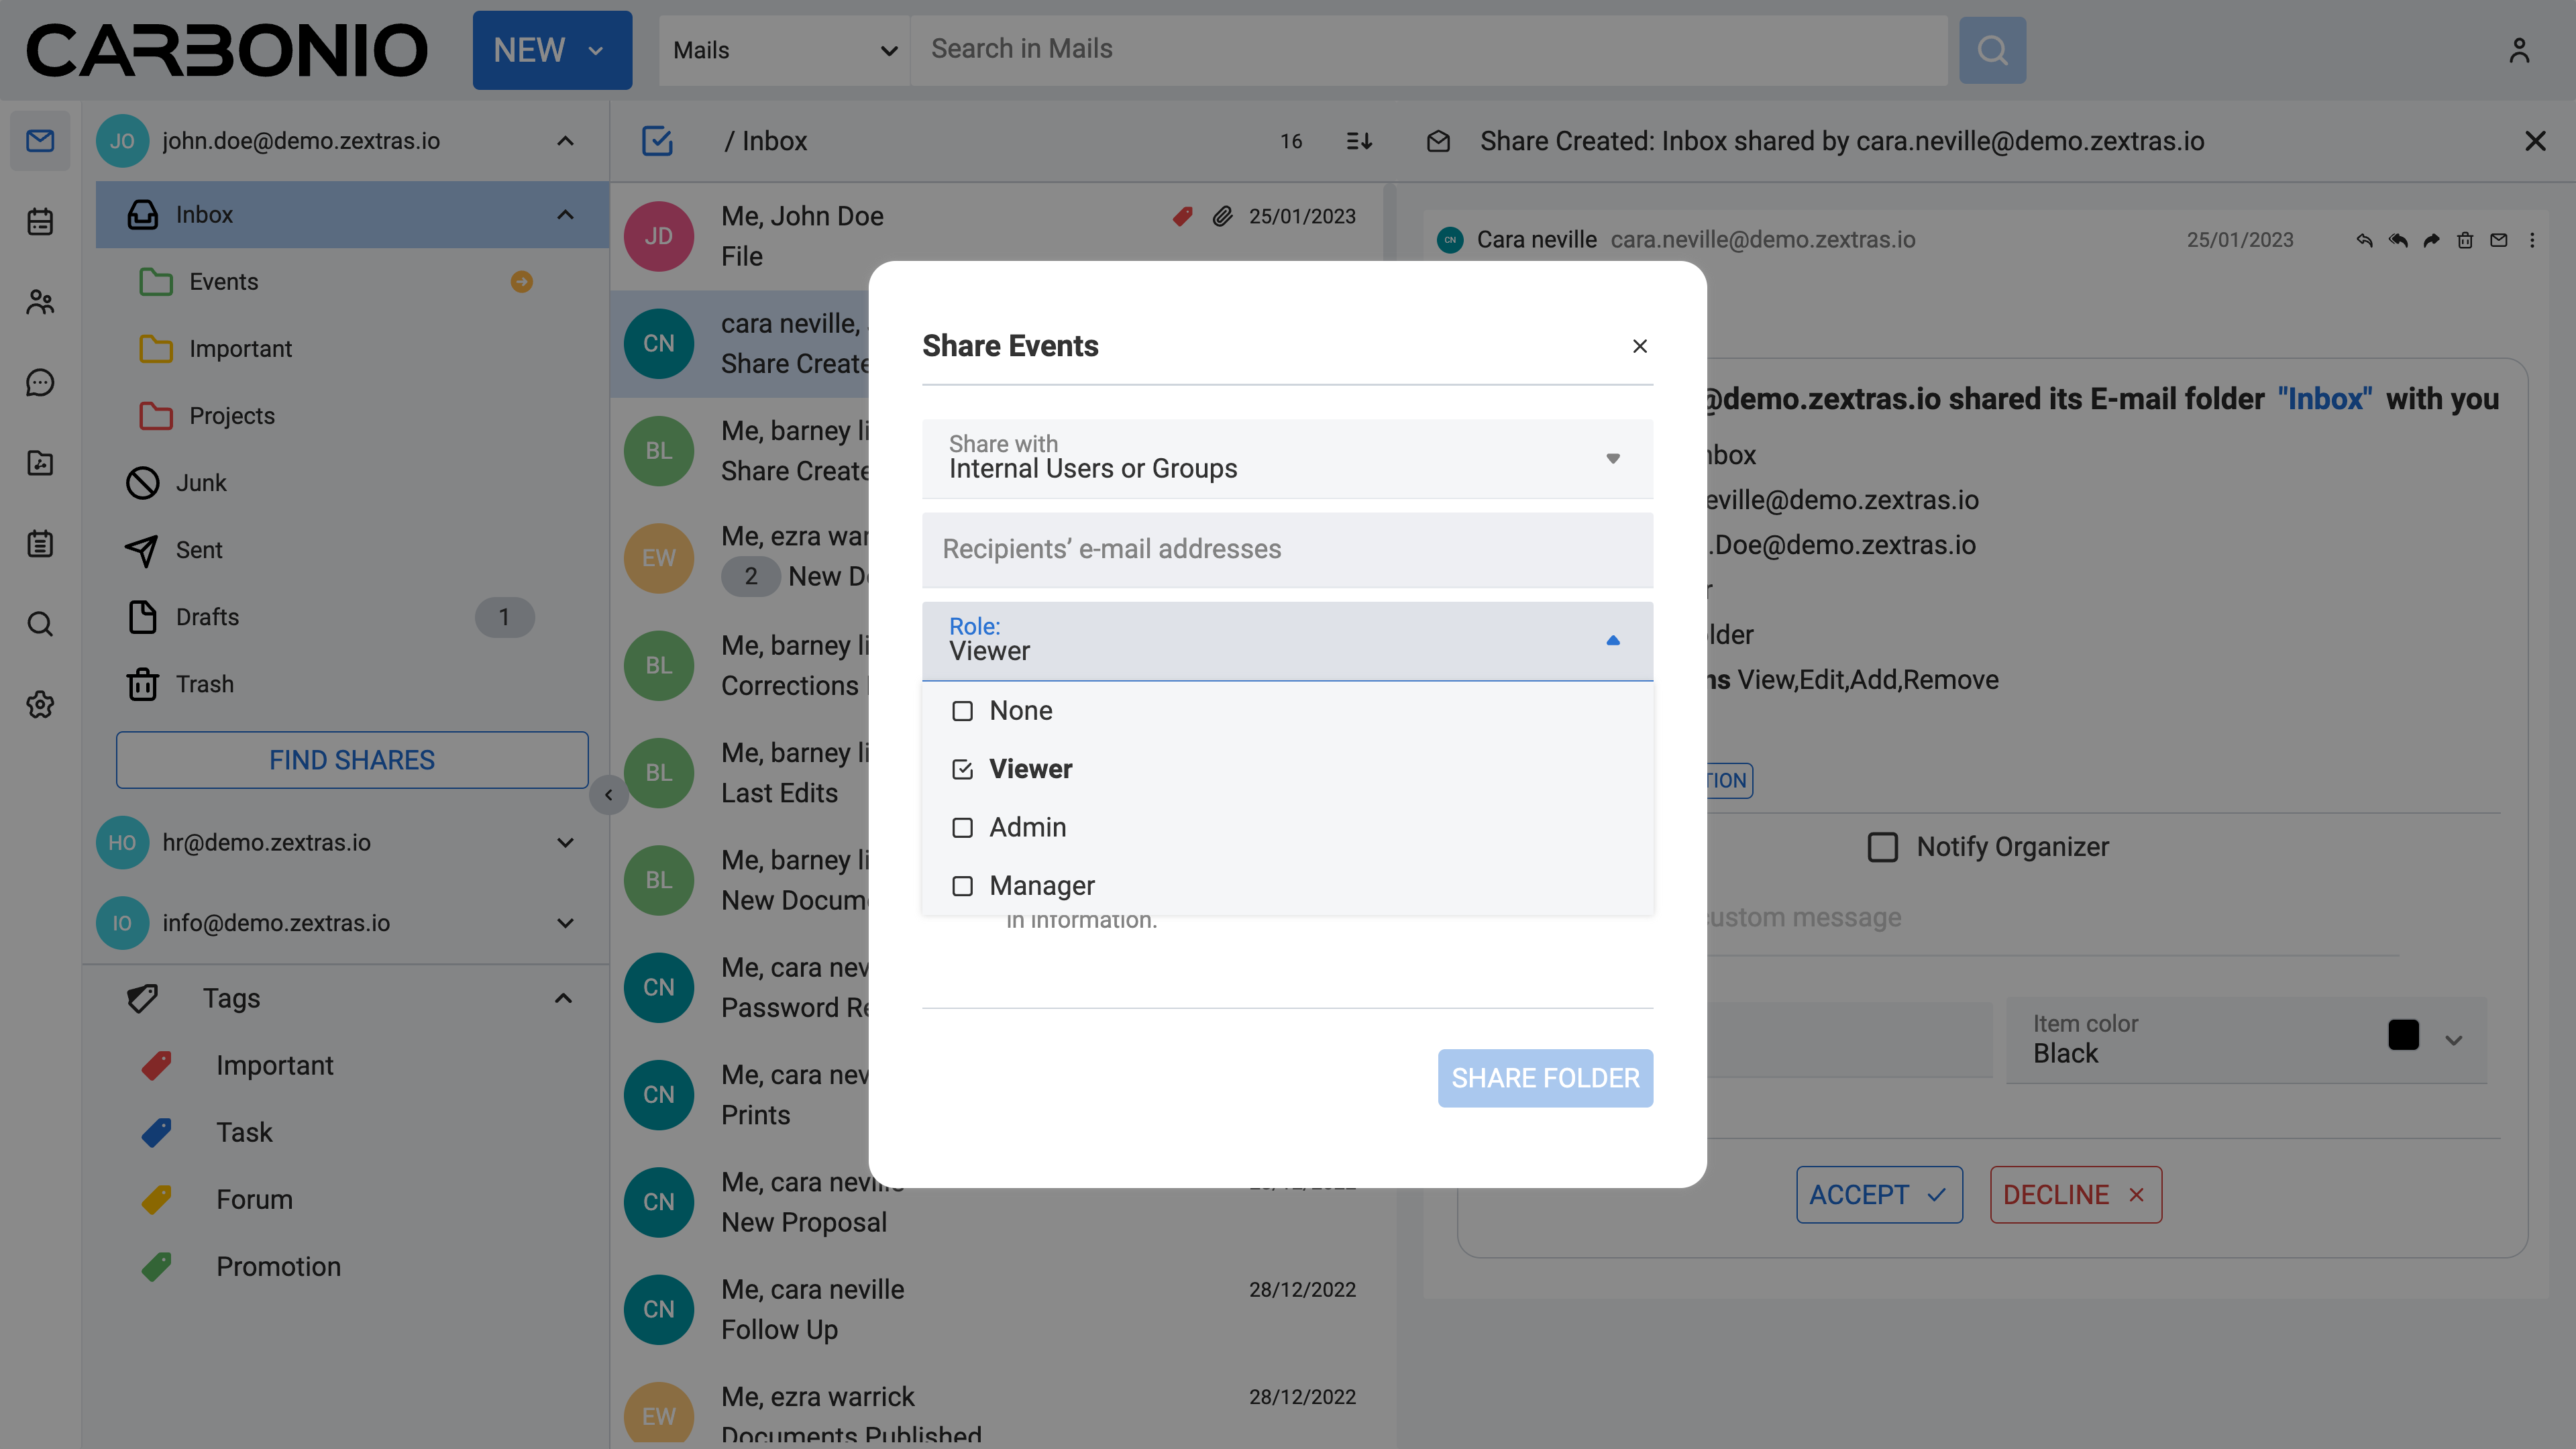
Shared Email Folder Roles#
You can assign privileges to individuals or groups of colleagues using roles.
Viewer: Can read the contents of the shared email folder but cannot make changes to the content.
Manager: Can view and edit the content of the shared folder, create new subfolders, and edit and delete files within the shared folder.
Admin: Has full control, including viewing, editing, adding, removing, accepting, declining, and administering content.
Sharing an Email Folder with a Colleague#
To share an email folder with a colleague:
Navigate to the Mails section from the left sidebar.
Right-click on the email folder you wish to share.
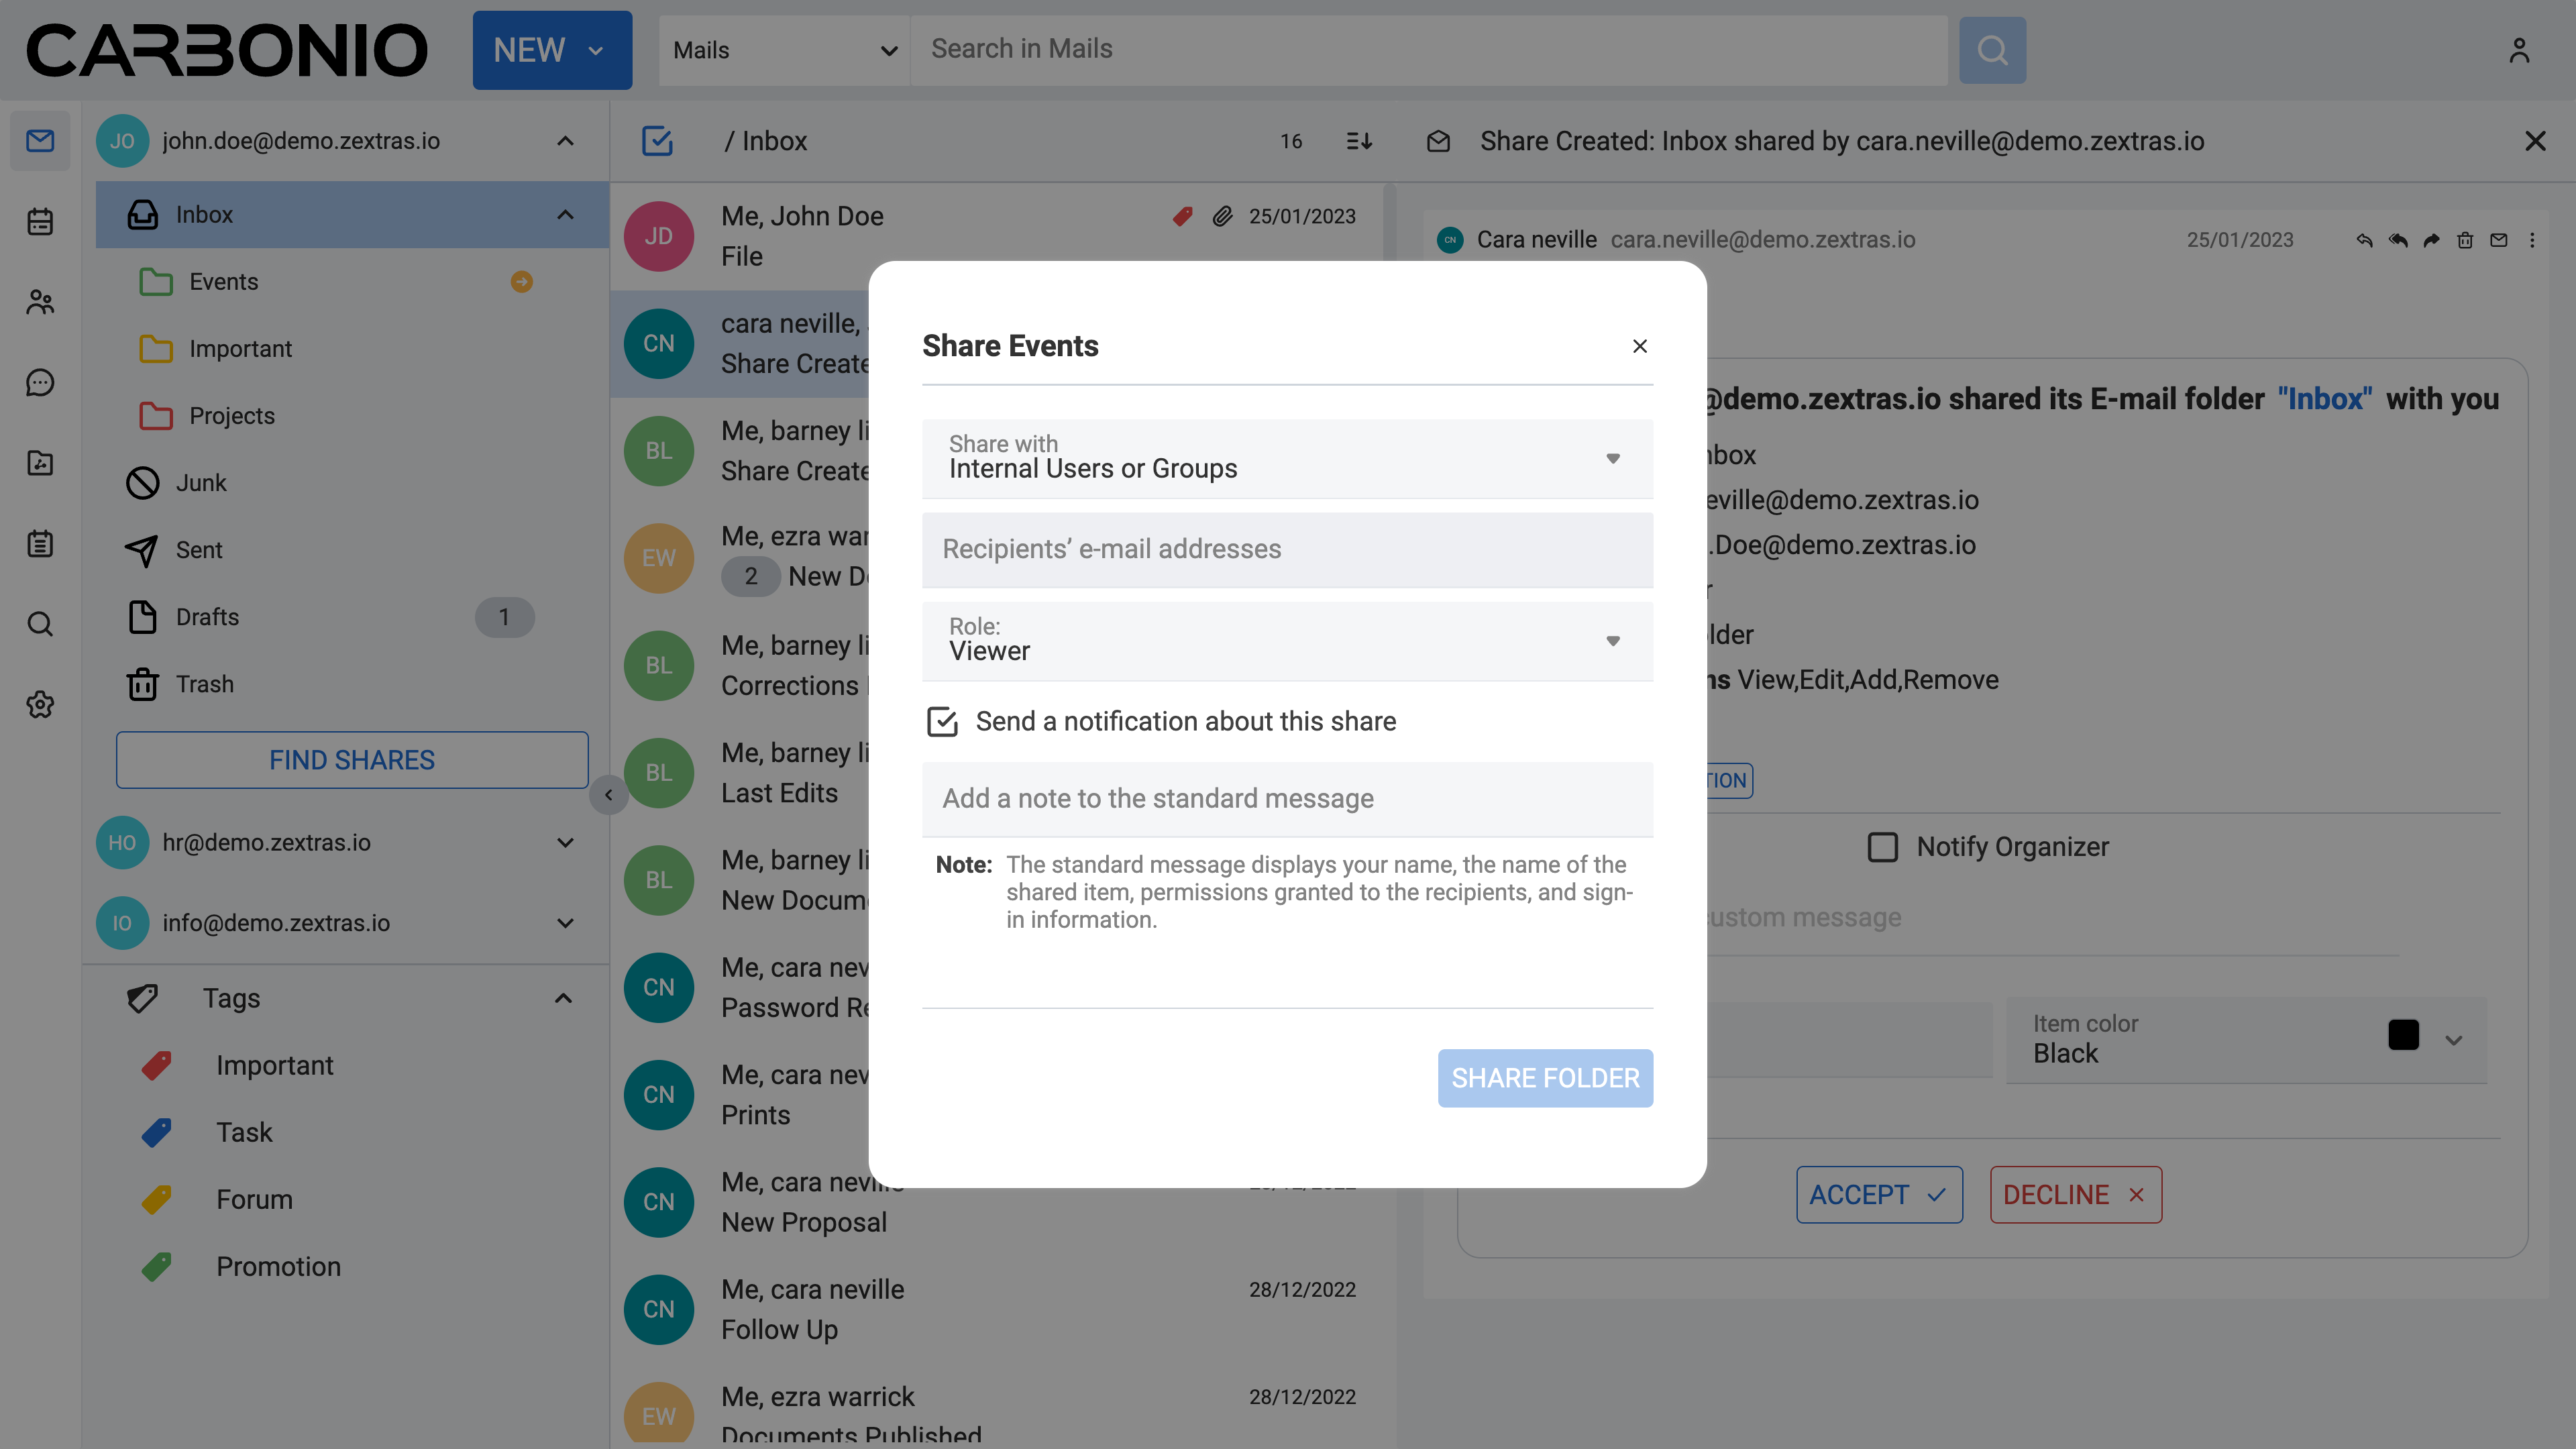
From the drop-down menu select Share folder.
From the Share with field, select Internal Users or Groups.
Enter the email addresses of your colleagues with whom you wish to share the folder into the Recipients’ e-mail addresses field.
Select the role from the Role field.
Click the SHARE FOLDER button.
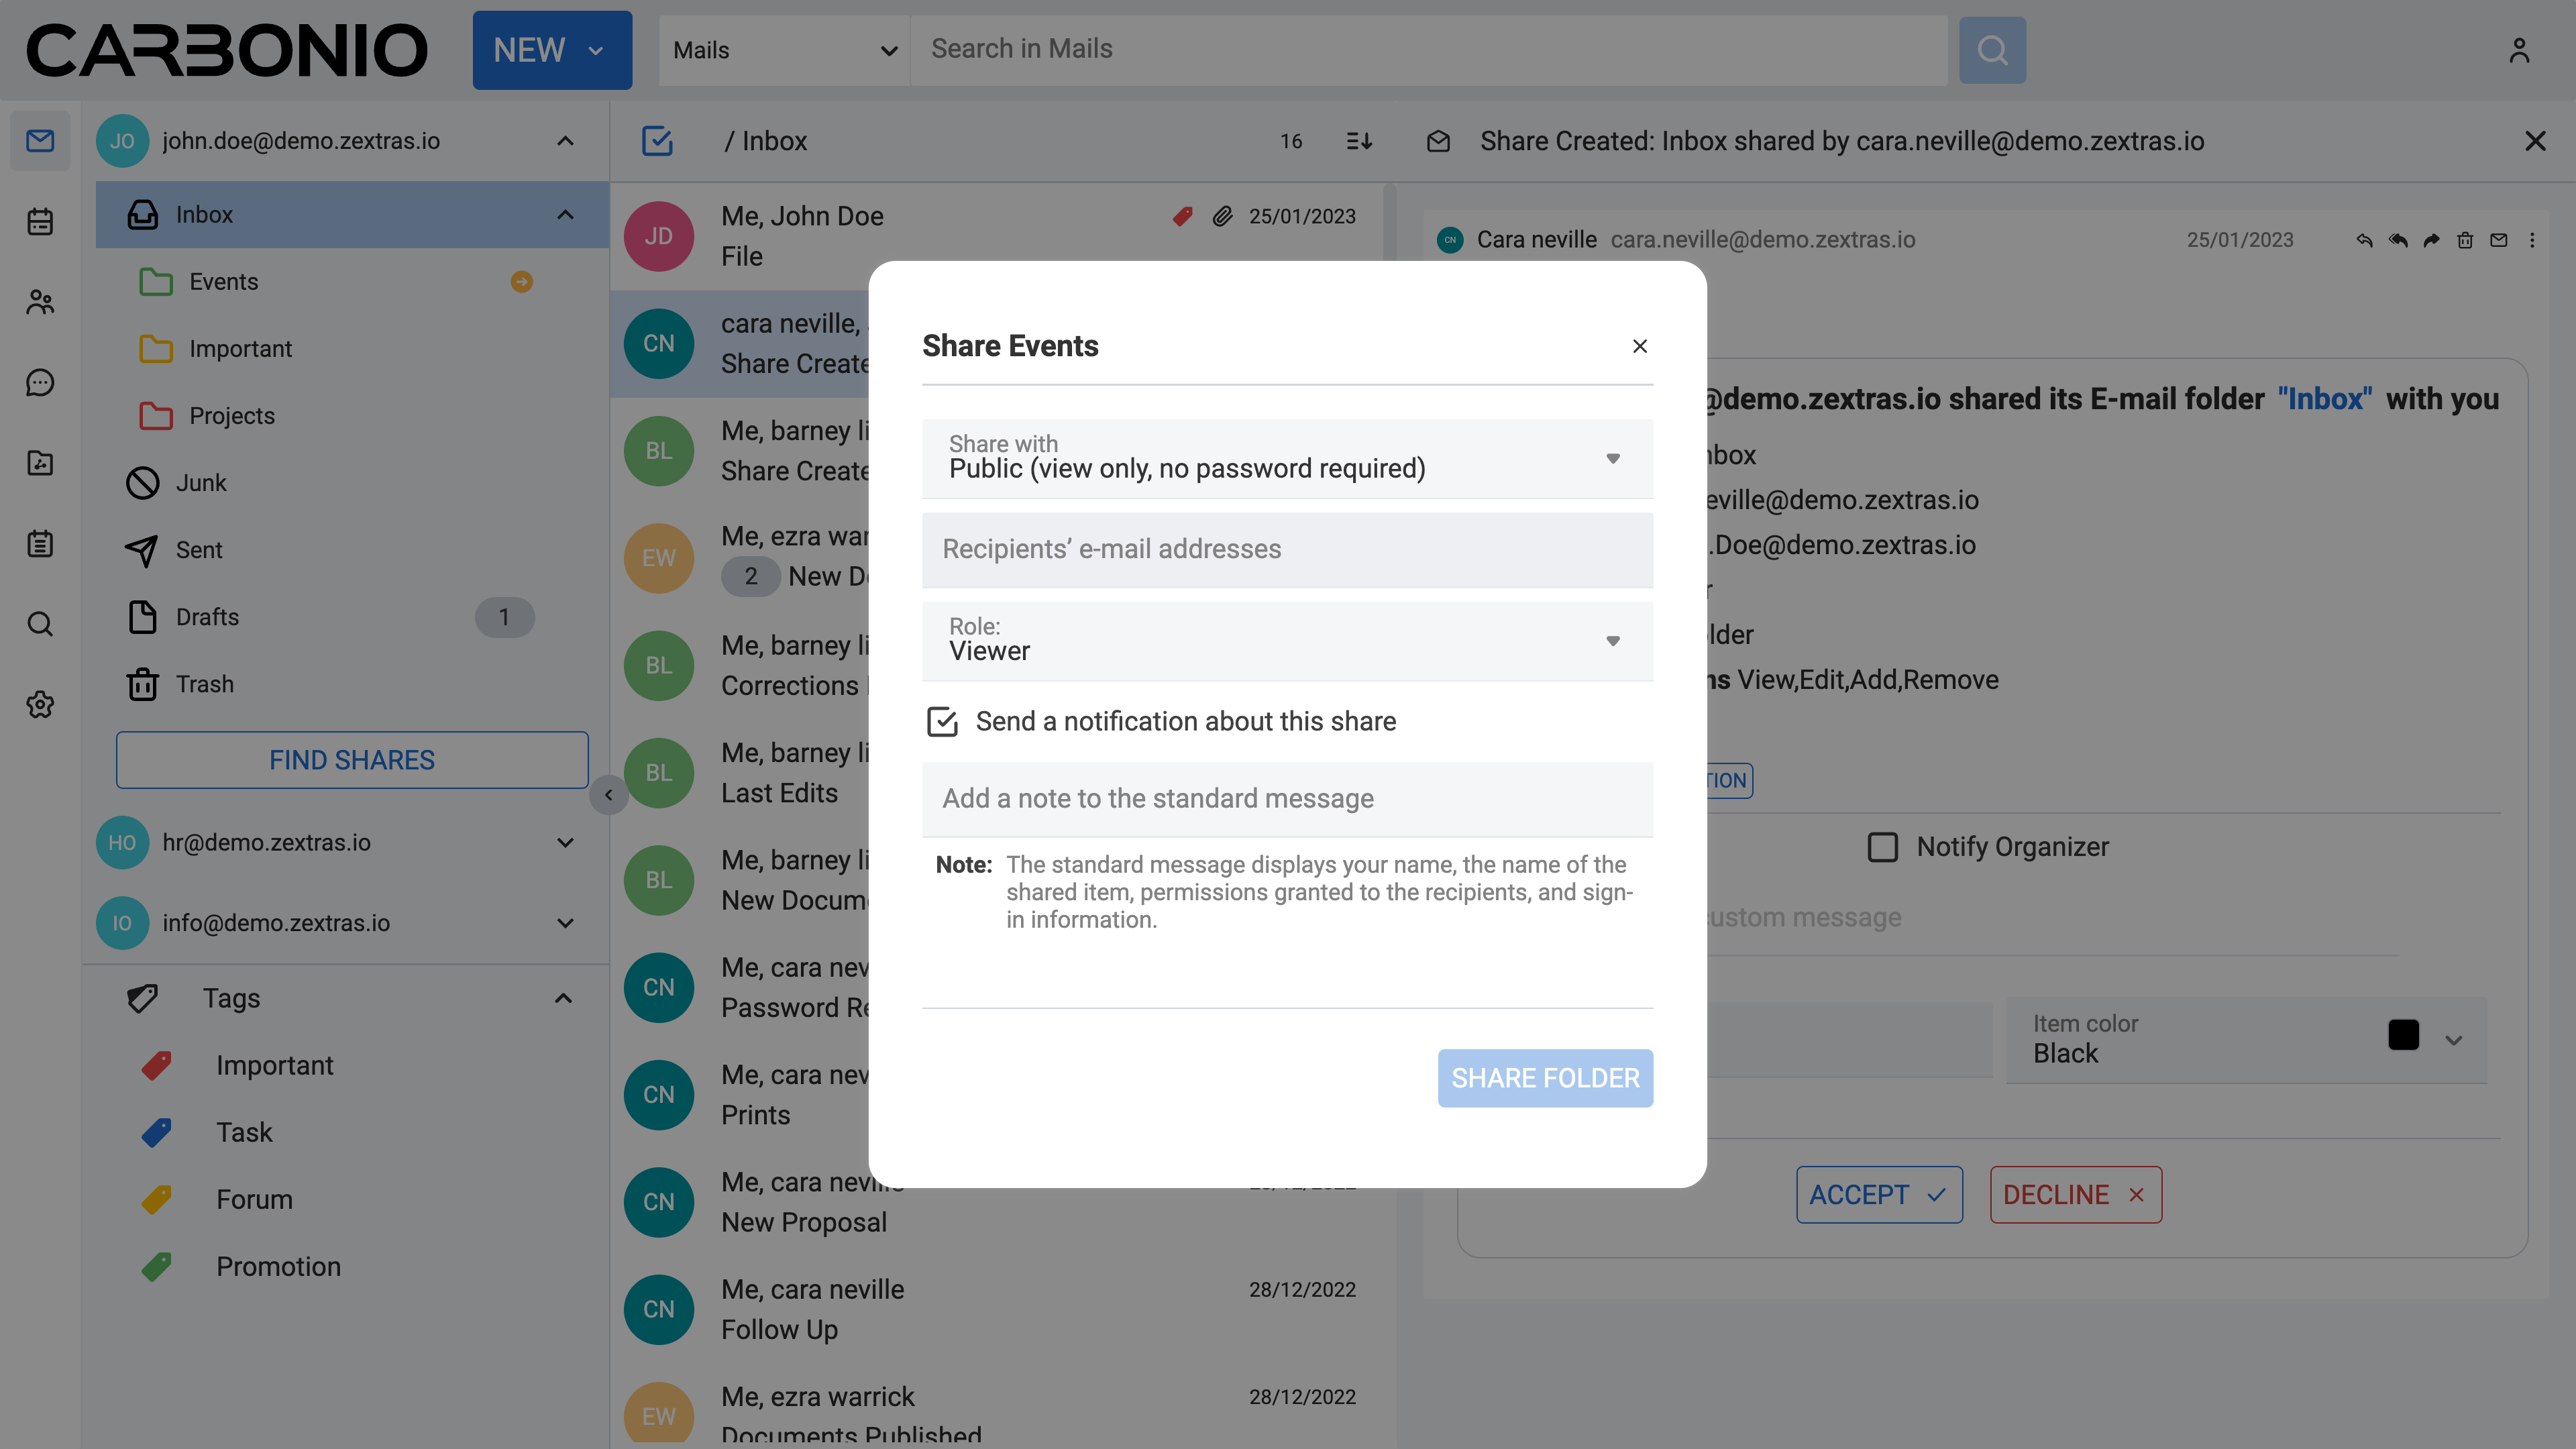
Sharing an Email Folder with External Users#
If you share folders with external users, whoever has the link to your folder can access it. To share an email folder with external users:
Navigate to the Mails section from the left sidebar.
Right-click on the email folder you wish to share.
From the drop-down menu select Share folder.
From the Share with field, select Public (view only, no password required).
Enter the email addresses of recipients into the Recipients’ e-mail addresses field.
Click the SHARE FOLDER button.
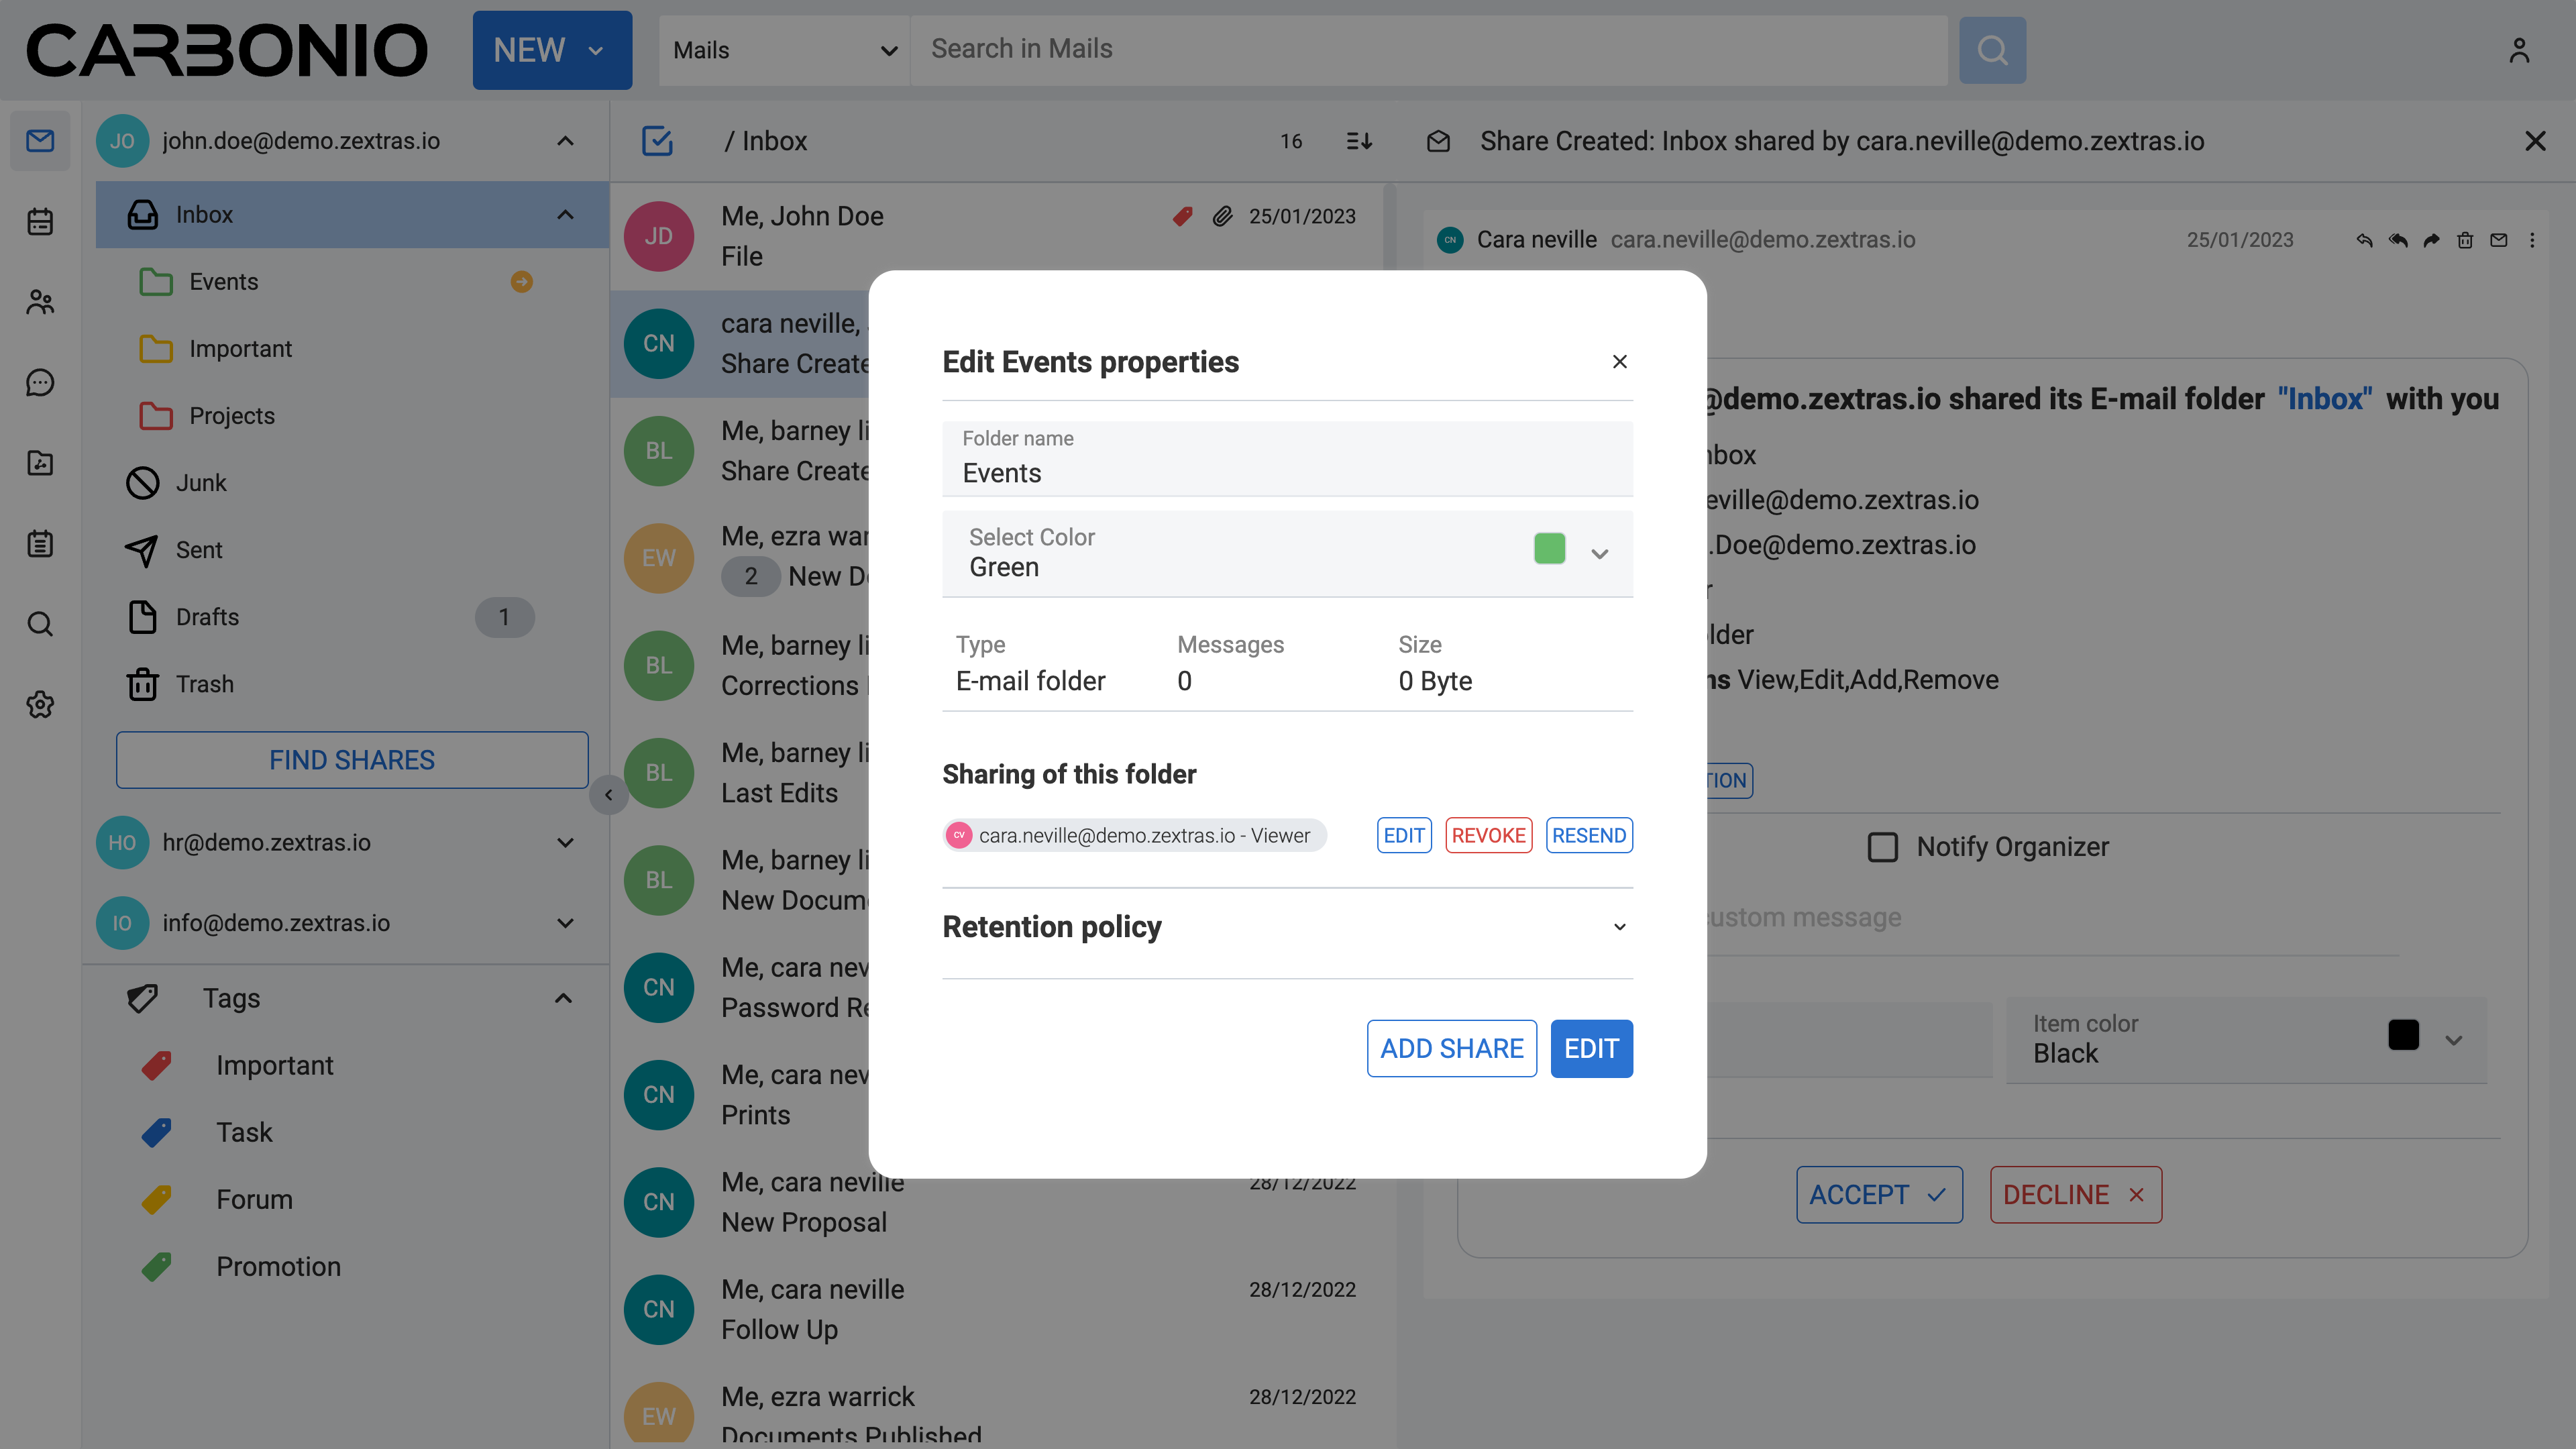
Revoking Email Folder Sharing#
To revoke sharing an email folder:
Right-click on the email folder you wish to revoke share.
From the drop-down menu select Edit.
Under the Sharing of this folder section, click REVOKE.
Click the REVOKE button to confirm.
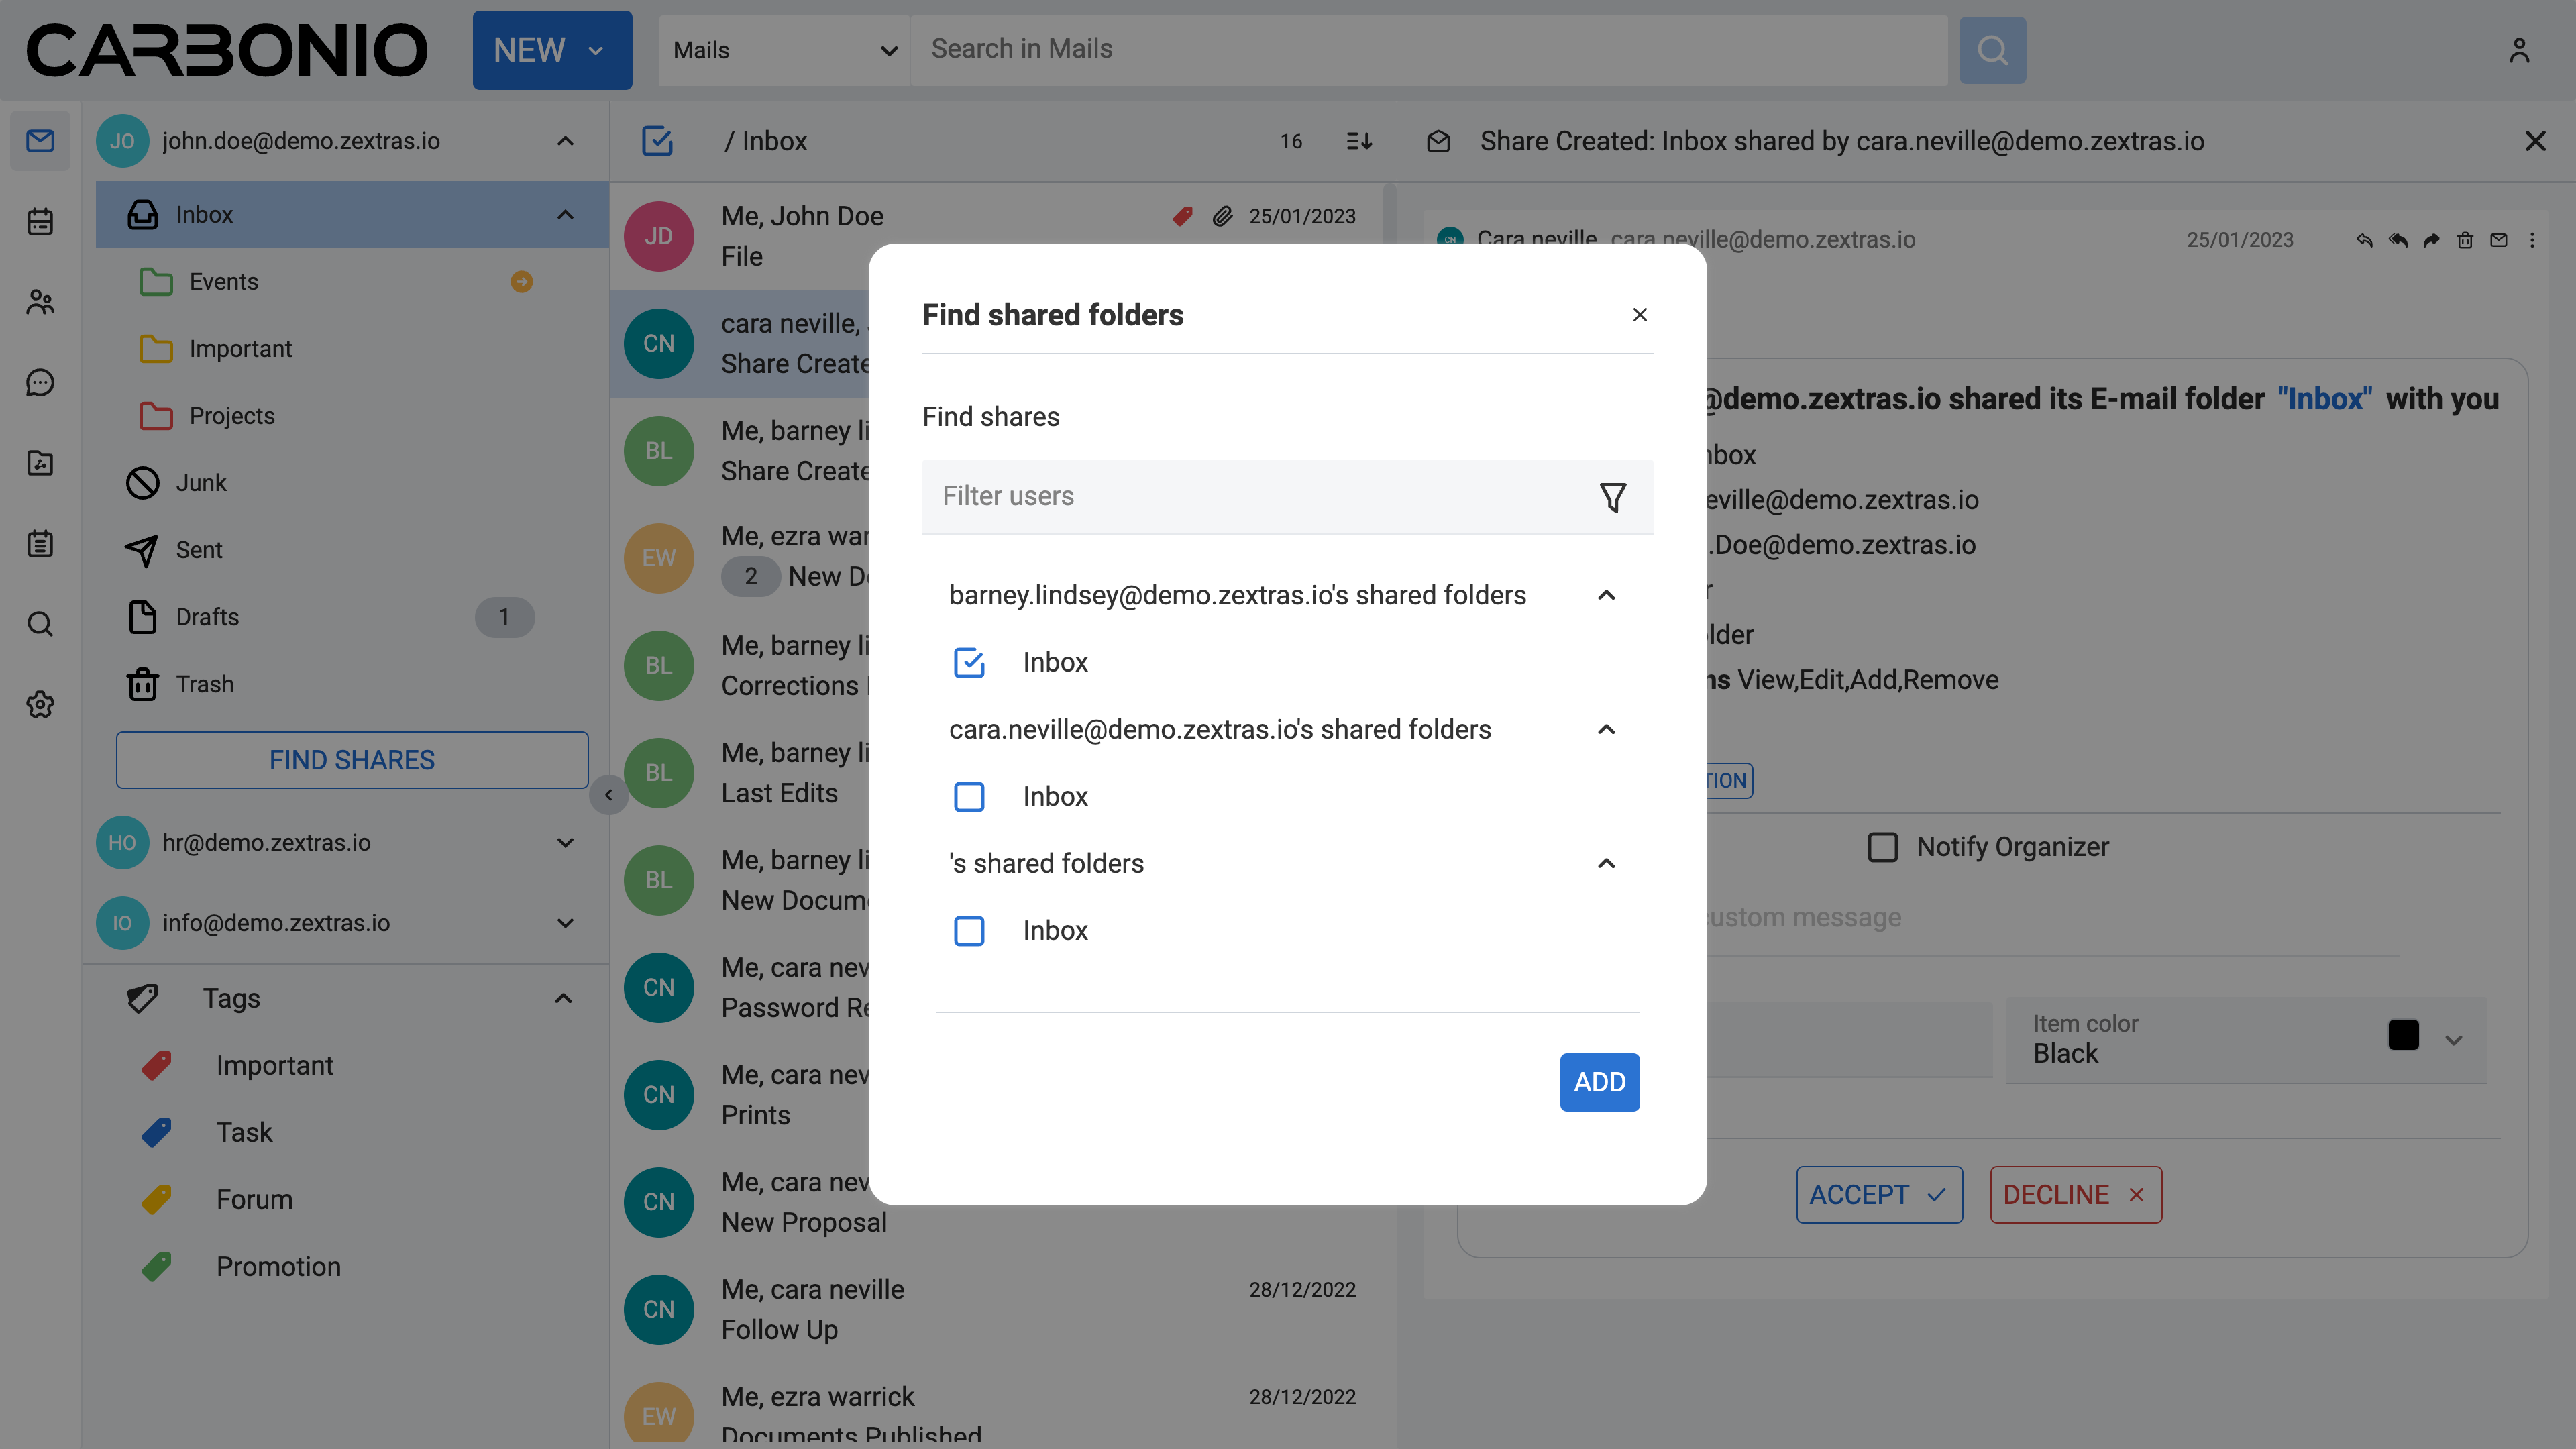
Accepting Email Folder Sharing from Colleagues#
When a colleague shares an email folder with you and opts to send a notification, you will receive an automatic email. Simply click the ACCEPT button at the end of the email to seamlessly add the folder to your inbox. If your colleague did not select the notification option, you can manually add the share by following these steps:
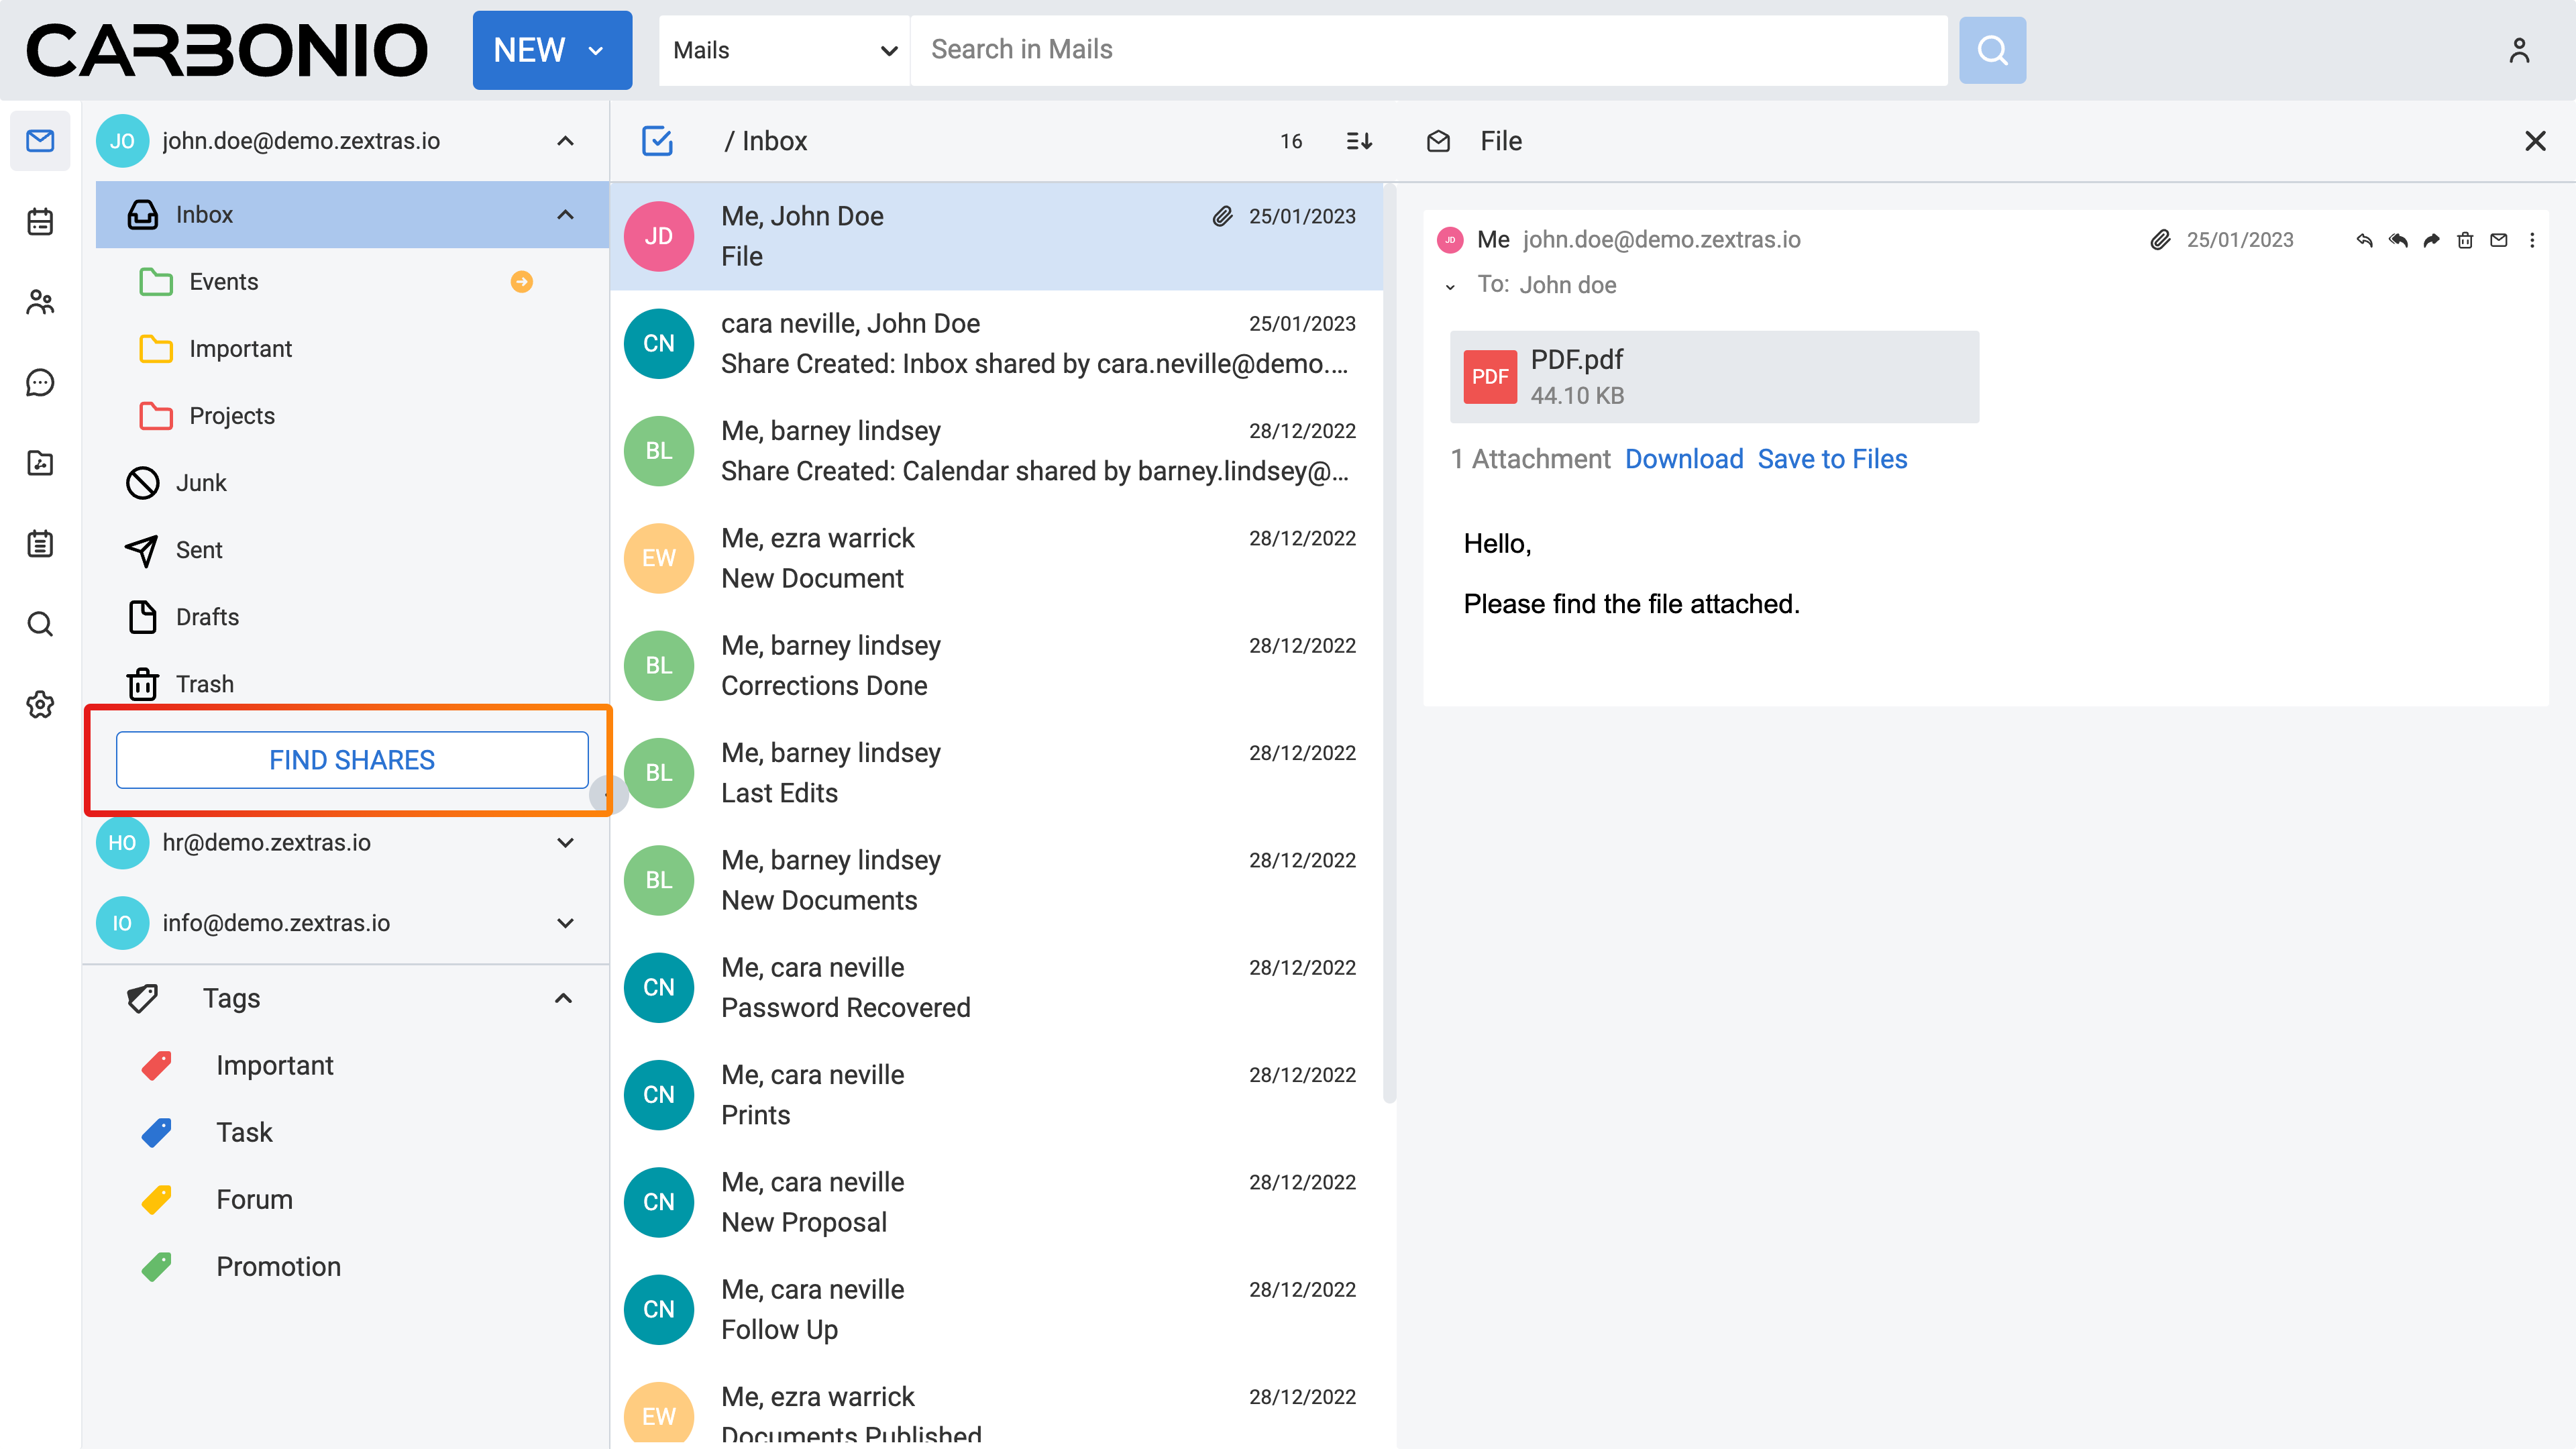
Navigate to the Mails section from the left sidebar.
Click on the FIND SHARES button.
Check the shared folder you want to add from the available shared items list.
Click the ADD button.
Working with Archive#
The Archive feature in Carbonio allows you to quickly move emails and conversations out of your current folders without deleting them. Archived items are stored in a dedicated Archive system folder, making it easier to keep your mailbox organized while still keeping important messages available for future reference.
You can archive a single email, an entire conversation, or multiple items at once. The Archive folder behaves like the other system folders in Carbonio and can display the number of unread items it contains.
Archiving a Single Email or Conversation#
You can archive an email or a conversation directly from the mail list.
To do so:
Select Mails from the left sidebar.
Locate the email or conversation you want to archive.
Right-click the item to open the contextual menu.
Select Archive.
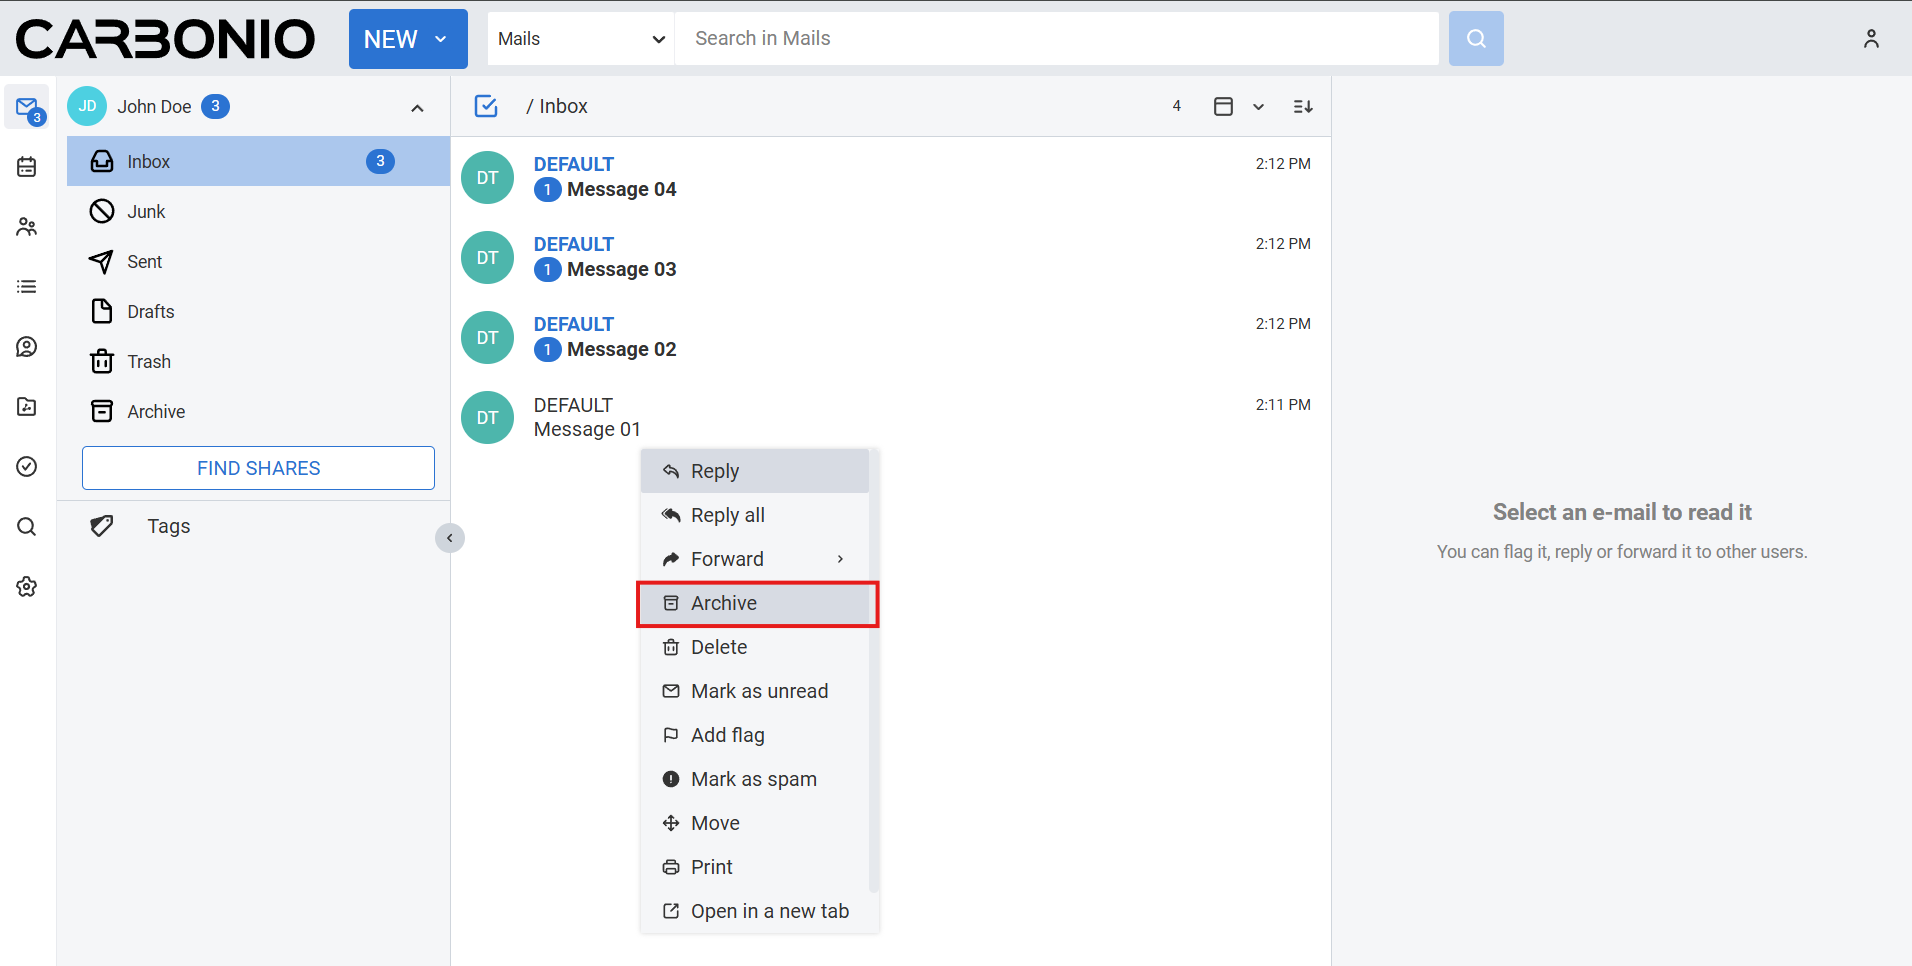
Tip
Alternatively, you can drag and drop one or multiple messages and conversations between folders, including the Archive folder
The selected item is immediately moved to the Archive folder. Carbonio shows a confirmation message on the bottom left of the page after the operation is completed.
Working with the Archive Folder#
The Archive folder is a system folder in Carbonio. It is automatically used to store archived emails and conversations. Like other system folders, it is part of the standard mailbox structure.
When the Archive folder contains unread items, Carbonio can display an unread count badge next to the folder name. Archived emails and conversations can still be managed like other mail items. For example, you can open them, move them, or empty the folder when needed.
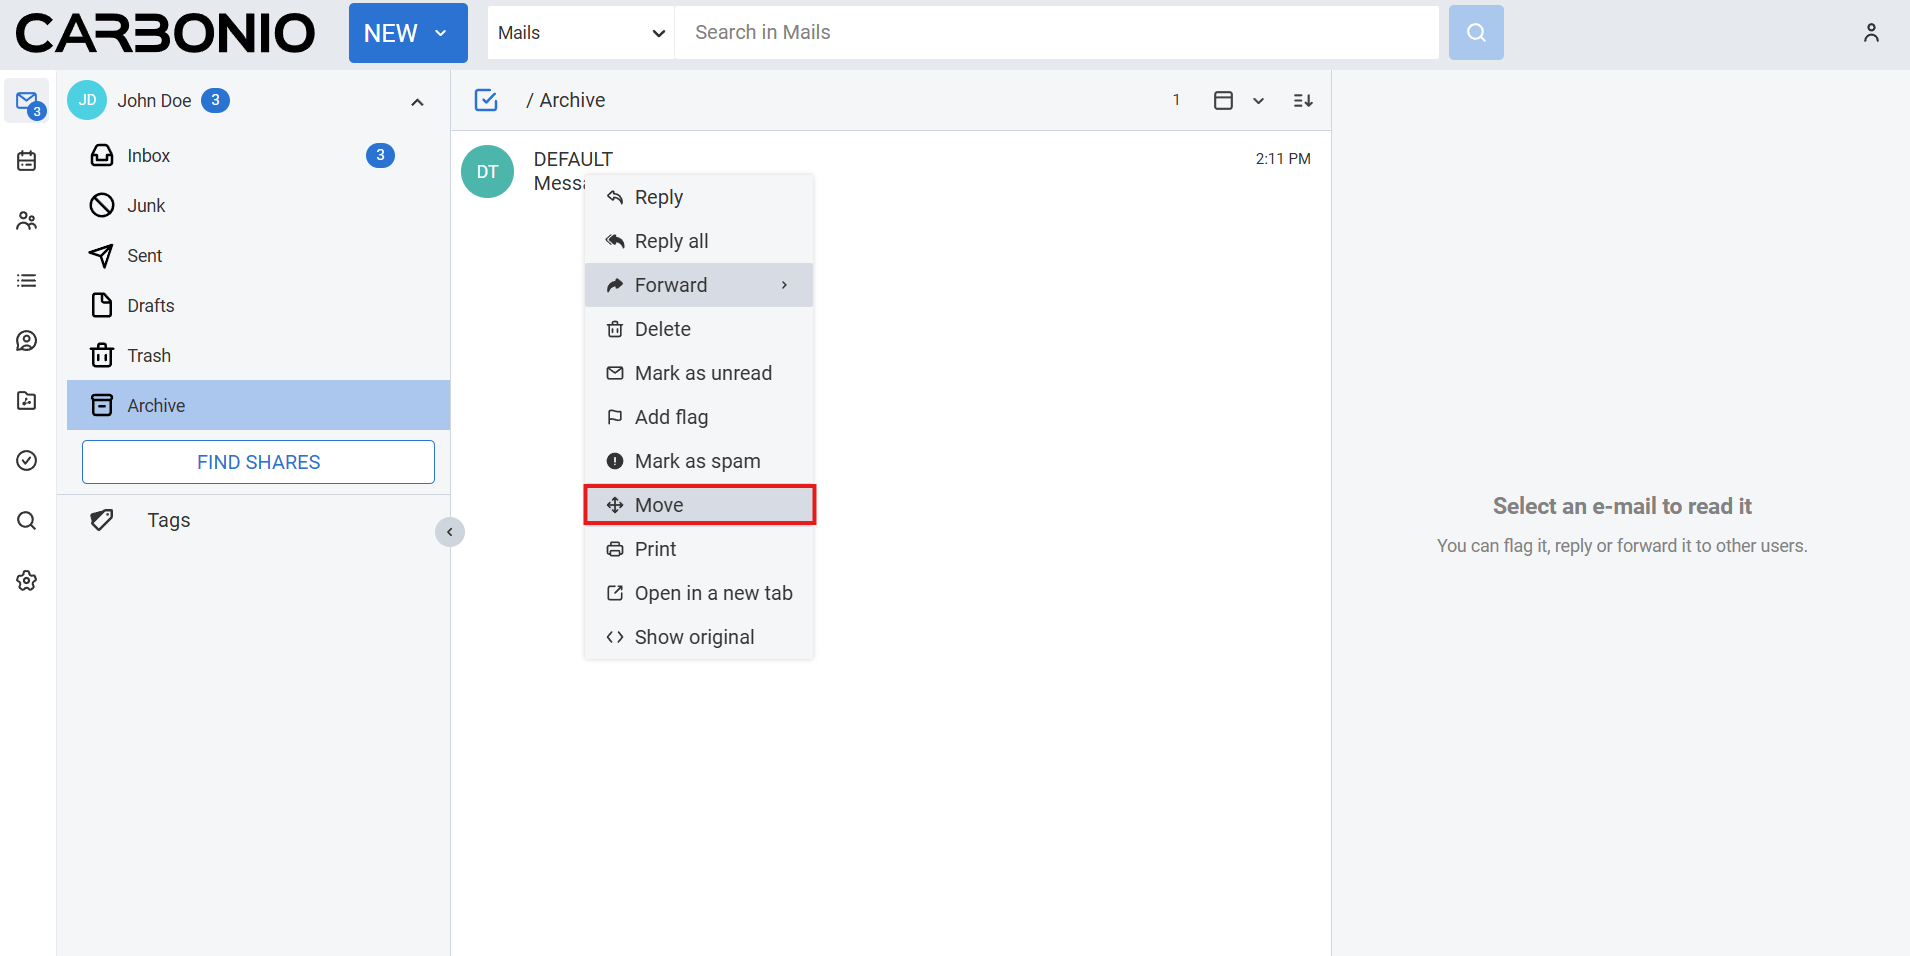
Restoring Archived Items#
If you want to move an archived email or conversation out of the Archive folder, you can use the Move action.
To do so:
Select Mails from the left sidebar.
Open the Archive folder.
Locate the email or conversation you want to restore.
Right-click the item.
Select Move.
Tip
Alternatively, you can also use the drag and drop functionality on the Archive folder
Choose the destination folder and click the Move button.
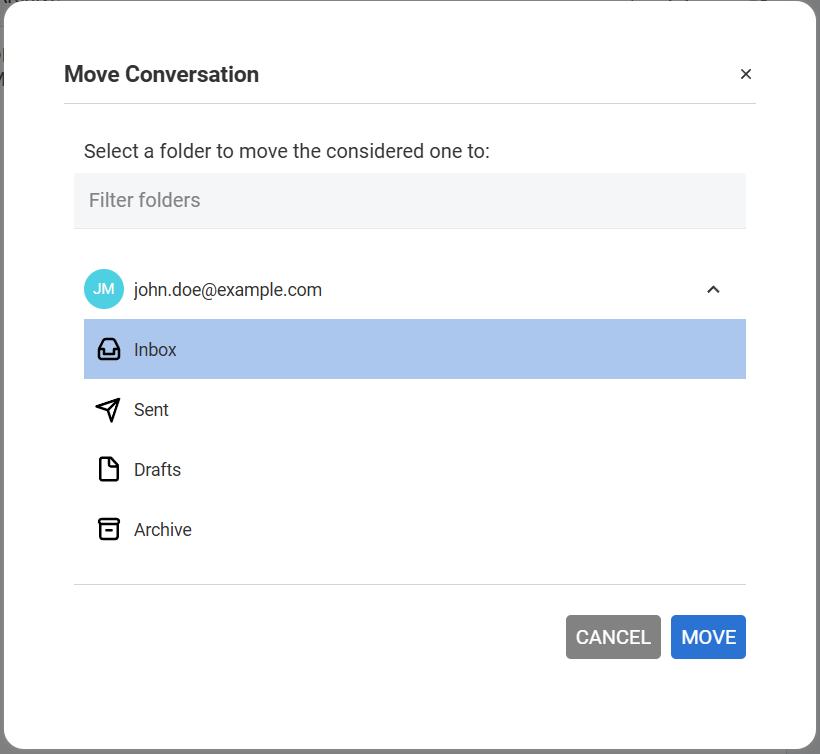
The selected item is moved to the folder you choose.
Note
The Archive feature is available starting in Carbonio 26.3.0. For some upgraded accounts, the feature may not appear if a personal folder named Archive already existed before the system Archive folder was introduced. If you do not see the Archive option in your mailbox, contact your system administrator or support team.