

Browsing Emails#
Reading Emails#
To read an email simply:
Select Mails with the email icon from the left sidebar.
Click on a folder on the navigation panel.
Select the email from the main panel.
Within the Carbonio web client, there are two distinct methods for displaying emails:
Message View: In this mode, emails are displayed individually in your main panel. Each email is listed separately, allowing you to view them one by one.
Conversation View: When utilizing this option, emails are grouped based on threads. If multiple emails are part of a conversation or have been replied to together, they will appear grouped as a single thread in your main panel.
Note that in case of small screens, you have the chance to to resize the columns that separate the email list from the one with the email preview. Furthermore you can easily change the layout from vertical to horizontal, just by clicking on the tab icon, right beside the sorting icon.
These options allow you to have more space to preview the email and to choose the best layout for your email readability.
You can also choose to resize the columns separating the emails list from the preview. Moreover you can switch between vertical and horizontal layouts: the “change view” icon, in the right side of the emails header bar, updates the layout according to the selected choice, allowing you to easily switch between the views. If you choose no split option, you can easily hide emails list.
In this way you can avoid sidebar distractions, focusing just on the email at hand, with the chance to browse between emails simply clicking the navigation arrows in the header bar.
Using Message View#
Message view provides a straightforward approach to managing emails. Users can easily locate a desired email in their inbox and read it directly in the main panel. However, when dealing with email replies, users must manually search for each reply separately from their email list, which can be cumbersome and time-consuming.
Message view can be useful for users who prefer to deal with emails on a one-by-one basis. It provides a clear and focused way to address each email individually, making it easier to manage and respond to messages without the distraction of other emails in the same thread. This mode is particularly beneficial for users who receive a moderate volume of emails and want to maintain a linear workflow without getting overwhelmed by grouped conversations.
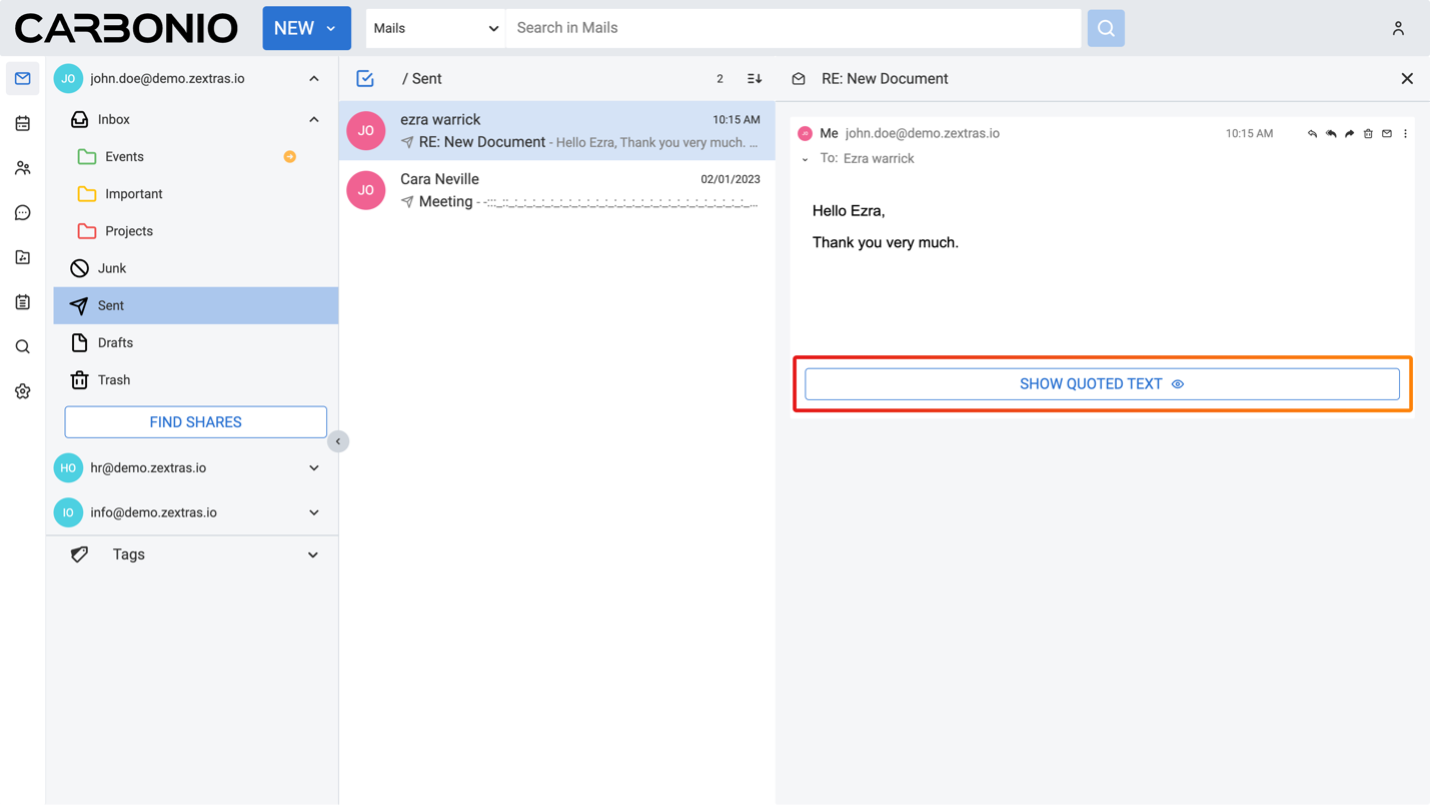
When you are reading an email, there is a button labeled SHOW QUOTED TEXT If you click it, you can see the earlier emails that this one is replying to. But remember, you can only see those earlier messages if the person who replied did not delete them when they wrote their reply.
Using Conversation View#
Conversation view offers a comprehensive way to track email exchanges within a thread. Users can conveniently access an email and its related replies by selecting the corresponding thread from the list displayed in the main panel. To locate a specific reply, users simply need to expand the thread by clicking on the downward arrow next to the original email. This action reveals all the replies nested underneath, allowing users to review the entire conversation in a single, organized view.
Conversations can extend across multiple folders. For instance, one conversation might be in your Inbox, another in your Sent folder, and additional ones in a different folder altogether. When you move a conversation from one folder to another, all the messages within that conversation are relocated to the new folder. However, messages in the Sent and Trash folders remain unaffected by this action and are not moved.
To initiate a new conversation thread, you need to compose a new email rather than replying to or forwarding an existing email.
The conversation view is advantageous for users who frequently engage in email exchanges with multiple participants. Grouping related emails into threads allows users to follow the flow of conversation more easily, making it simpler to track the context and progression of discussions over time. This mode is especially helpful for users who collaborate on projects, participate in group discussions, or communicate with multiple stakeholders, as it facilitates better organization and comprehension of complex email interactions. Additionally, the conversation view can help users save time by reducing the need to search for related emails scattered throughout their inbox.

Reading Email Header Security Information#
You will now receive visual notifications within the email body and the header will display specific security and informational criteria. This includes notifications for:
External domain origins
Signatures, such as DMARC and DKIM
Confidentiality markers
Distribution-list origins
These enhancements are designed to increase your awareness of potential security risks and improve content integrity.
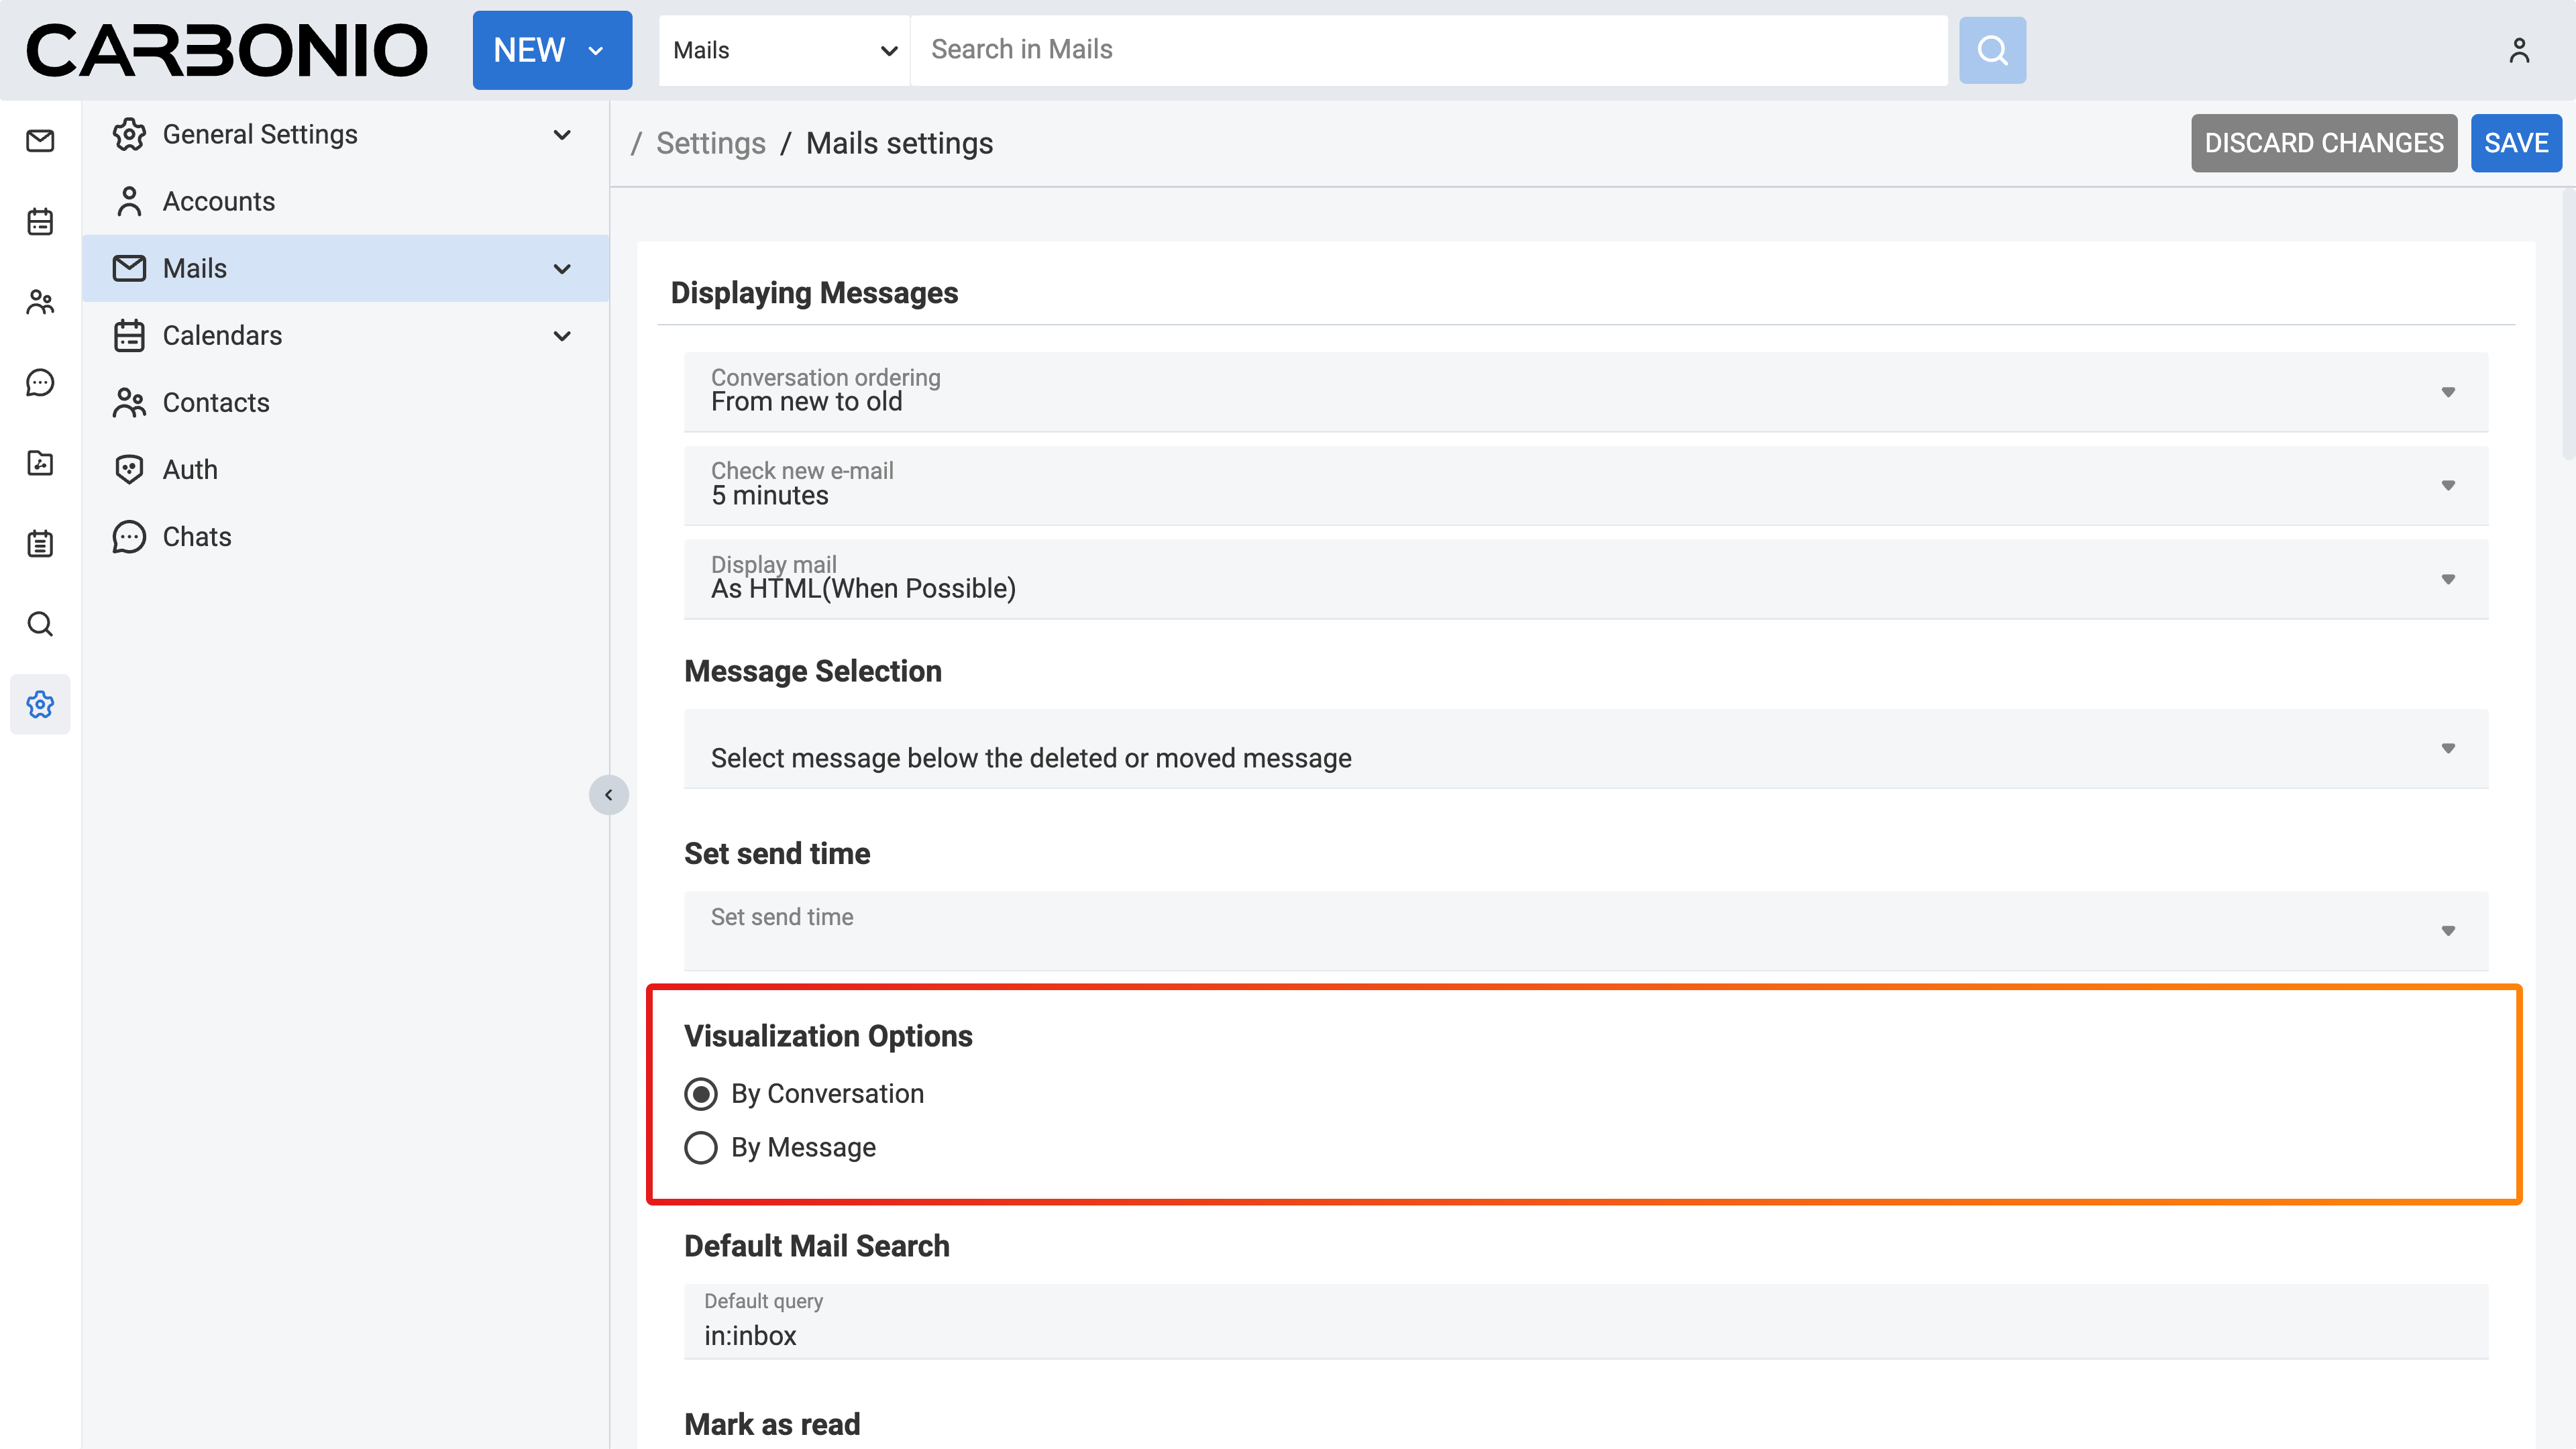
Changing Email Visualization Method#
To adjust Carbonio’s email visualization, whether opting for threaded conversations or individual messages:
Navigate to the Settings (Gear icon) from the left sidebar.
Access the Mails section.
Under the Visualization Options select your preferred viewing mode, either By Conversation or By Message.
Email Attachment Files#
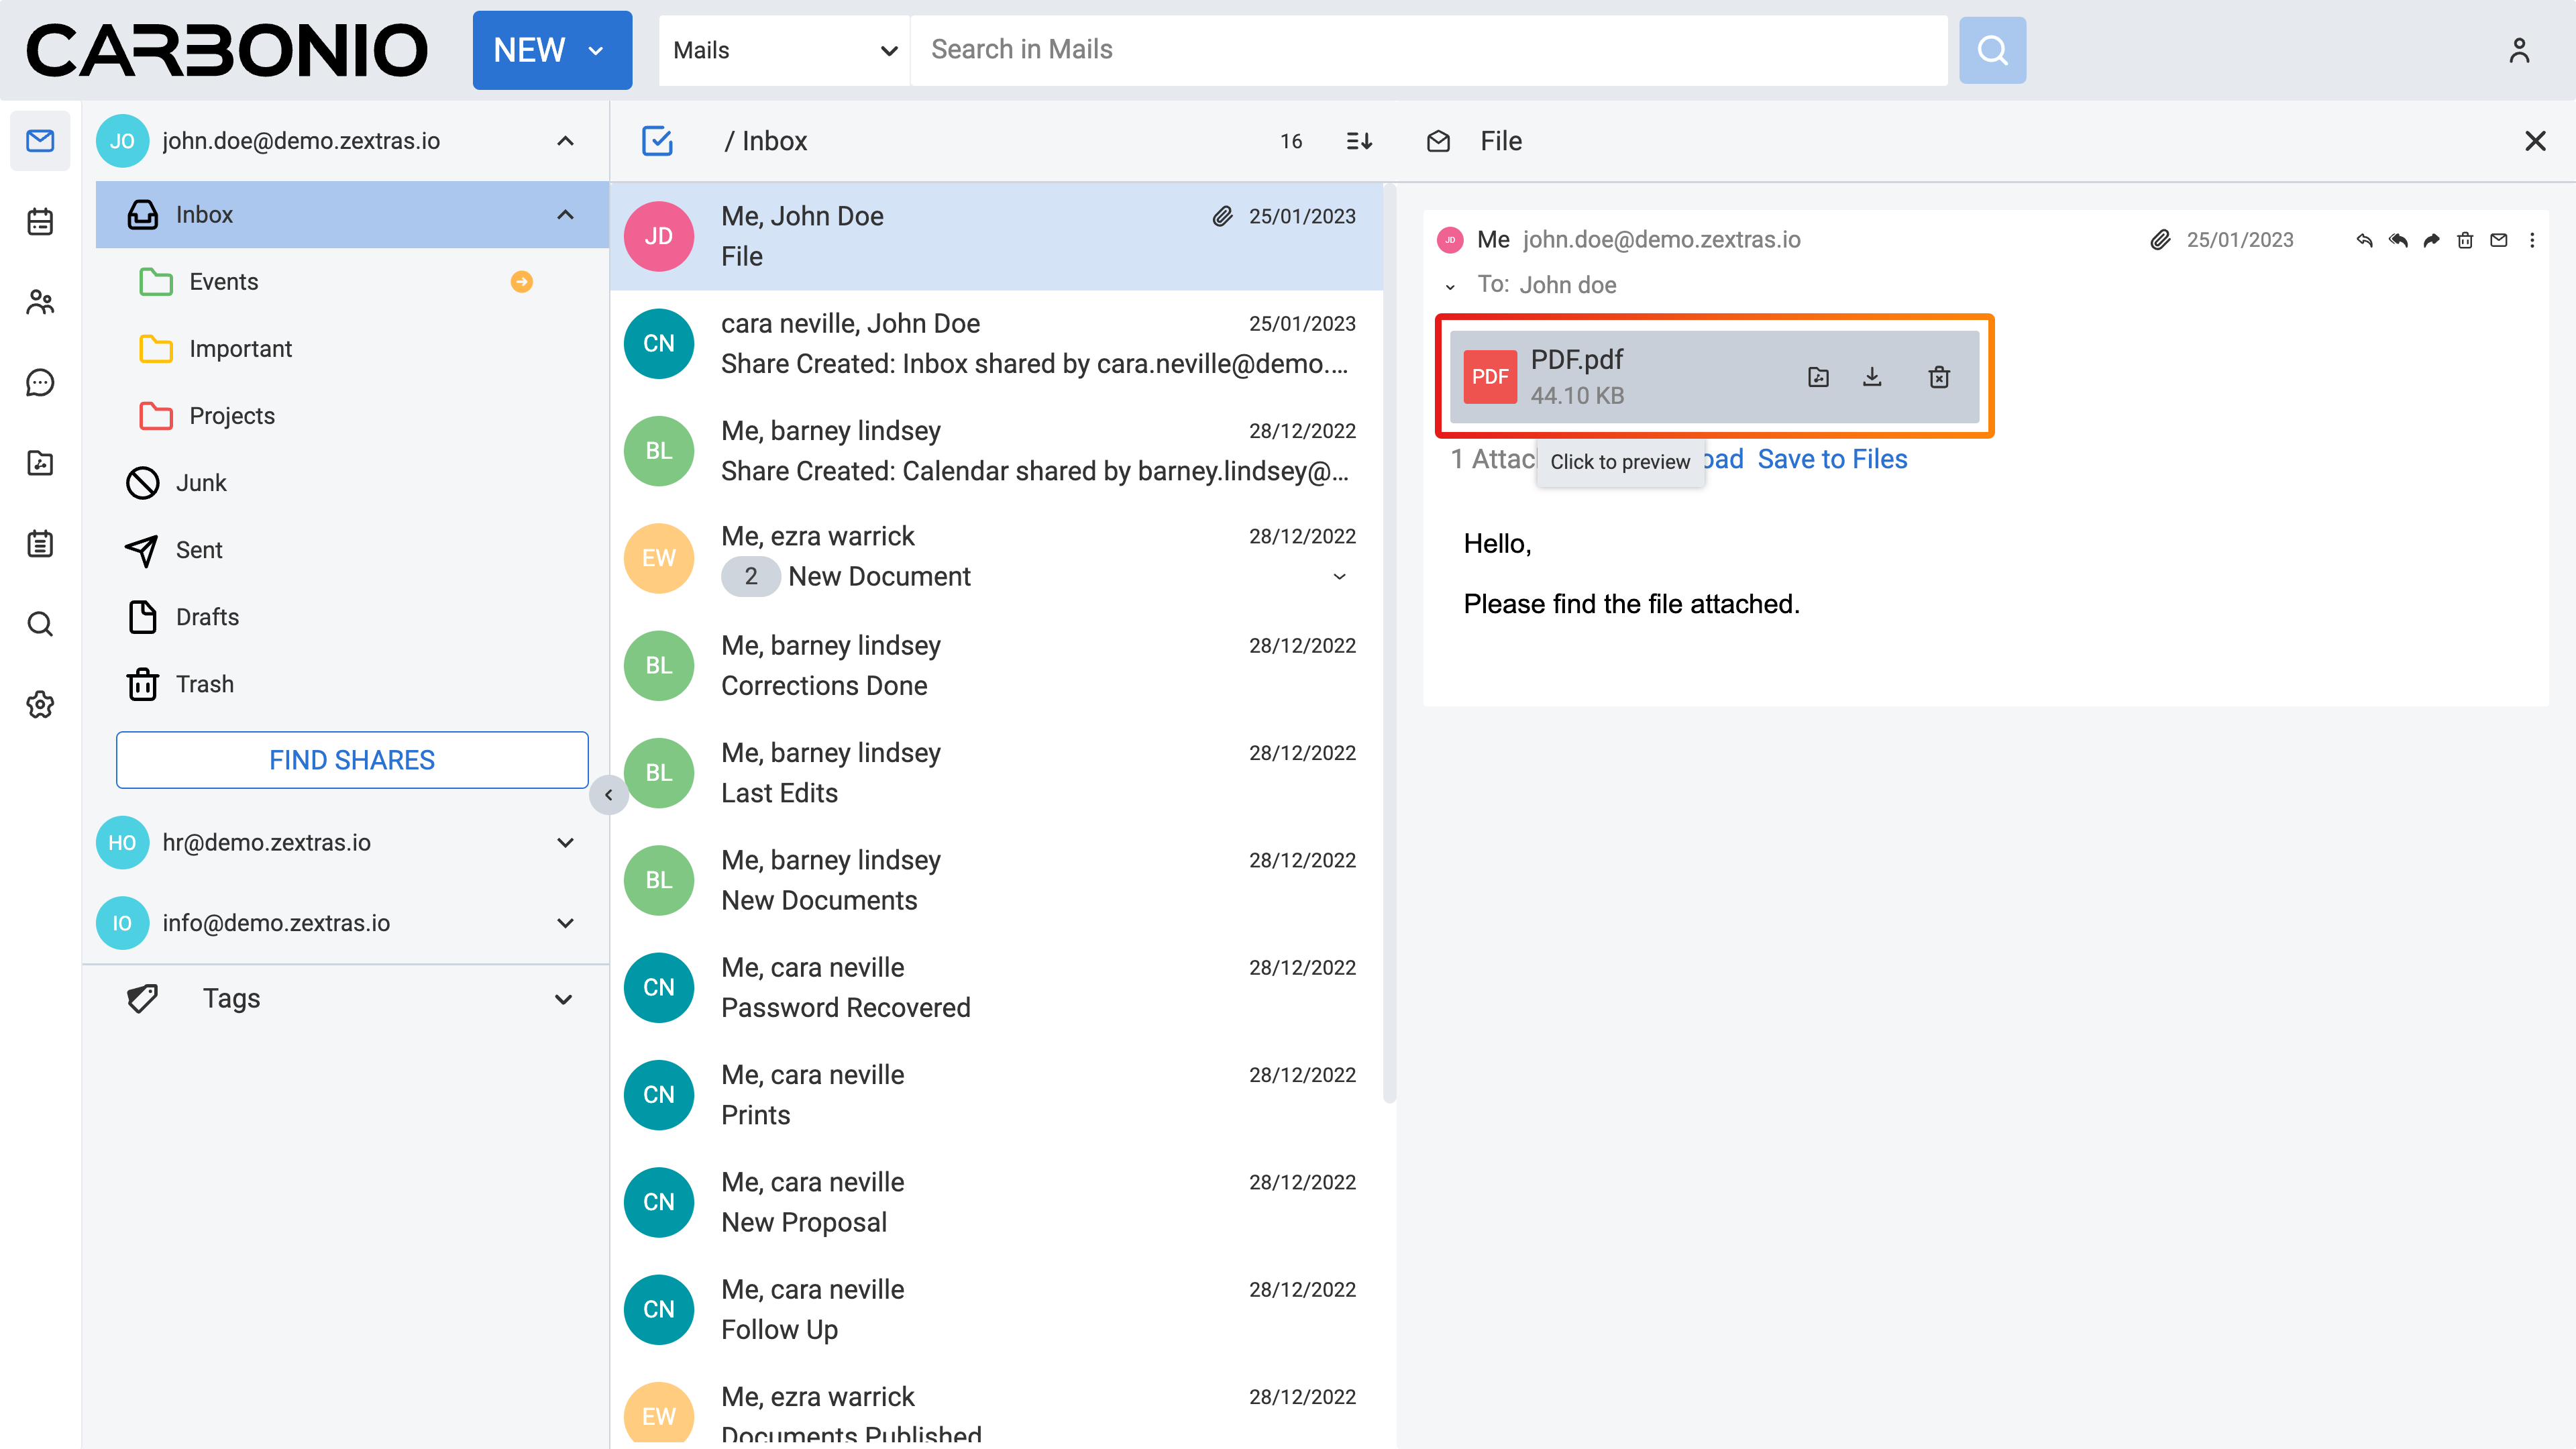
Emails can contain various types of attached files, such as word processing documents, spreadsheets, text files, ZIP archives, images, executable applications, or any other computer file stored on the sender’s network. Messages with attachments are indicated by a paper clip icon next to the subject line.
You can directly access any attached file from your account, provided you have the appropriate application, and the file extension is not blocked by your system administrator.
If your computer has compatible software installed, simply downloading, and double-clicking on the file will open it in the correct application for viewing.
File attachments are a common vector for spreading computer viruses. To mitigate this risk, system administrators often block incoming emails containing certain attachment types, such as those with .EXE or .ZIP extensions. If you need to receive such attachments, you can ask your system administrators to allow such files.
Virus filtering for incoming emails and regular virus scans for personal computers are standard practices among system administrators. However, there is always a possibility of a virus slipping through these defenses.
Email viruses are typically activated when the infected attachment is opened or viewed. Many of these viruses propagate themselves by exploiting entries in users’ address books. Therefore, it is advisable to exercise caution when opening attachments, even from seemingly familiar senders.
Previewing Attachments#
To access an attachment, follow these steps:
Open the message containing the attachment.
Click on the attachment’s name to open it, provided it is one of the following file formats: PDF, ODT, ODS, ODP, DOC, XLS, PPT, DOCX, XLSX, PPTX.
Alternatively, if the attachment has a different file format, hover your mouse cursor over the attachment’s name to reveal the Download icon. Click on it to initiate the download process. This will open a dialog box, enabling you to specify the destination folder. Remember that the attachment remains associated with the email until you choose to remove it.
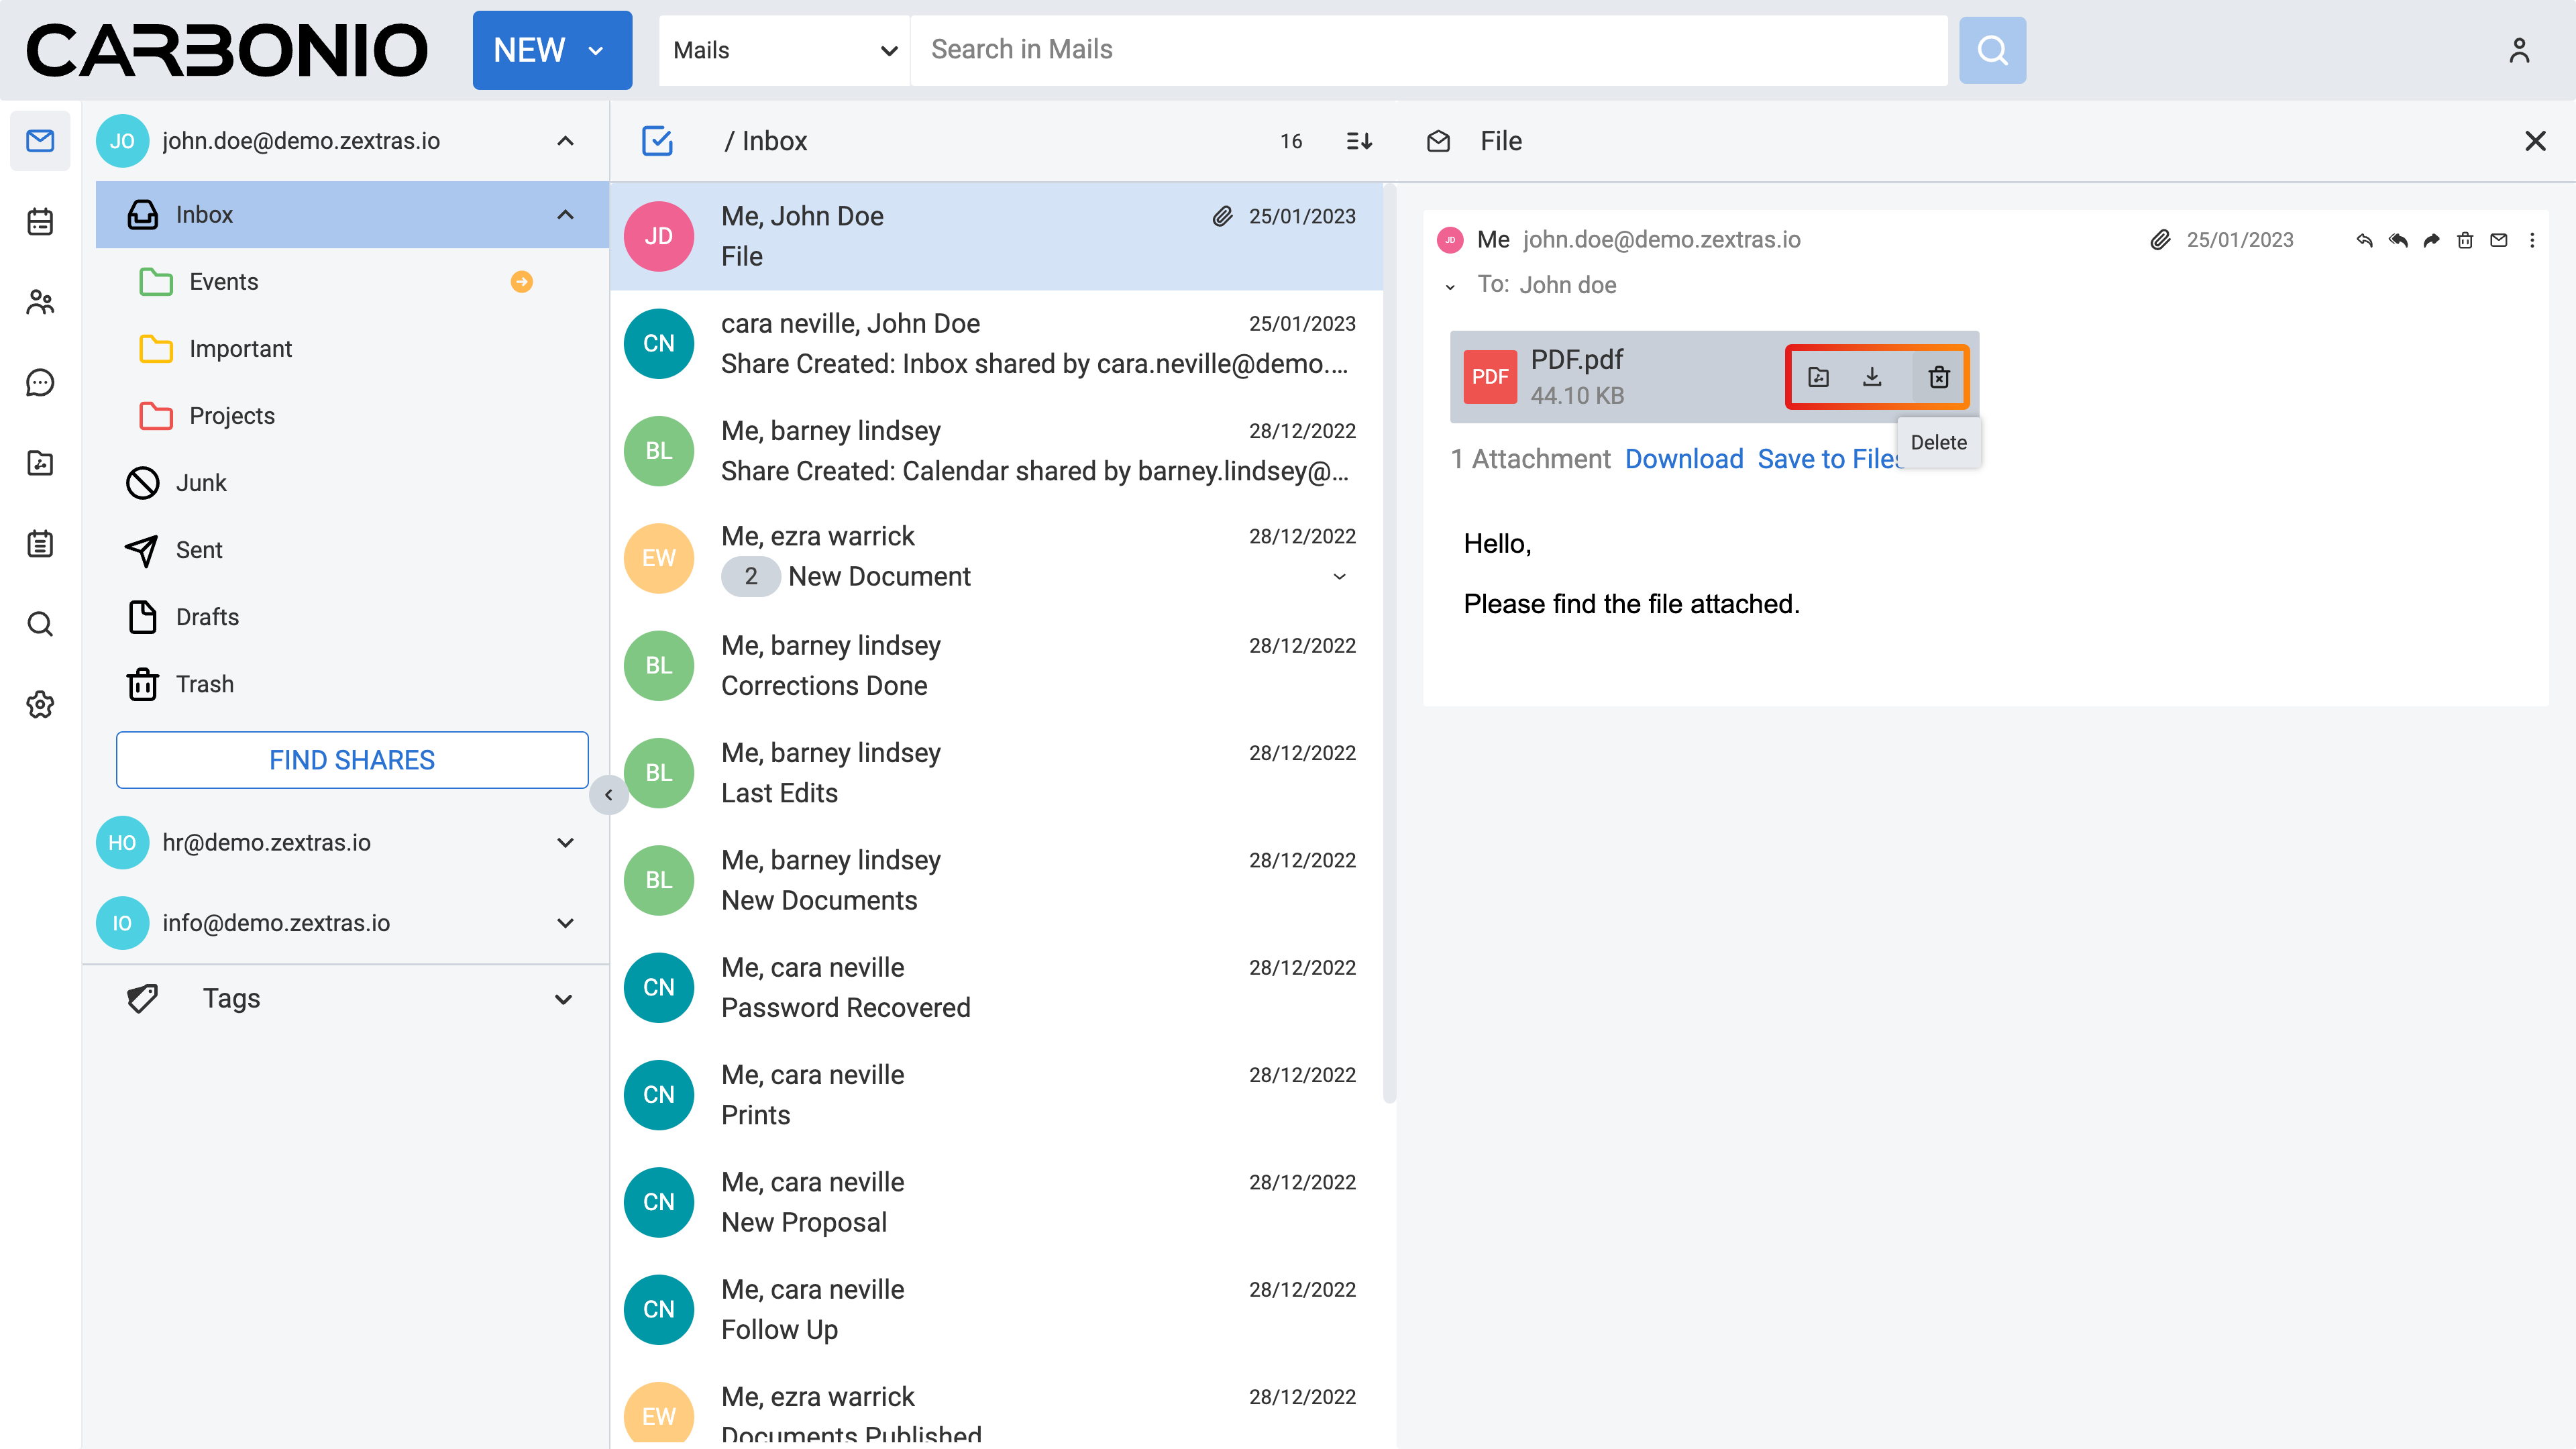
Removing Attachments#
Attachments included in your email contribute to your storage quota. Consider removing larger attachments to free up space. Deleting the attachment from the message removes the file from your mailbox. However, if you have already downloaded the file, you will still have a copy saved on your device.
To remove an attachment:
Open the email that includes the attachment.
Hover your mouse cursor on the attachment to reveal the Delete icon. Click on it to remove the attachment.
Downloading / Saving Attachments on Your Computer#
To download an attachment to your computer:
Open the email containing the attachment.
Under the attachment, click Download to initiate the download process. This will open a window, enabling you to specify the destination folder.
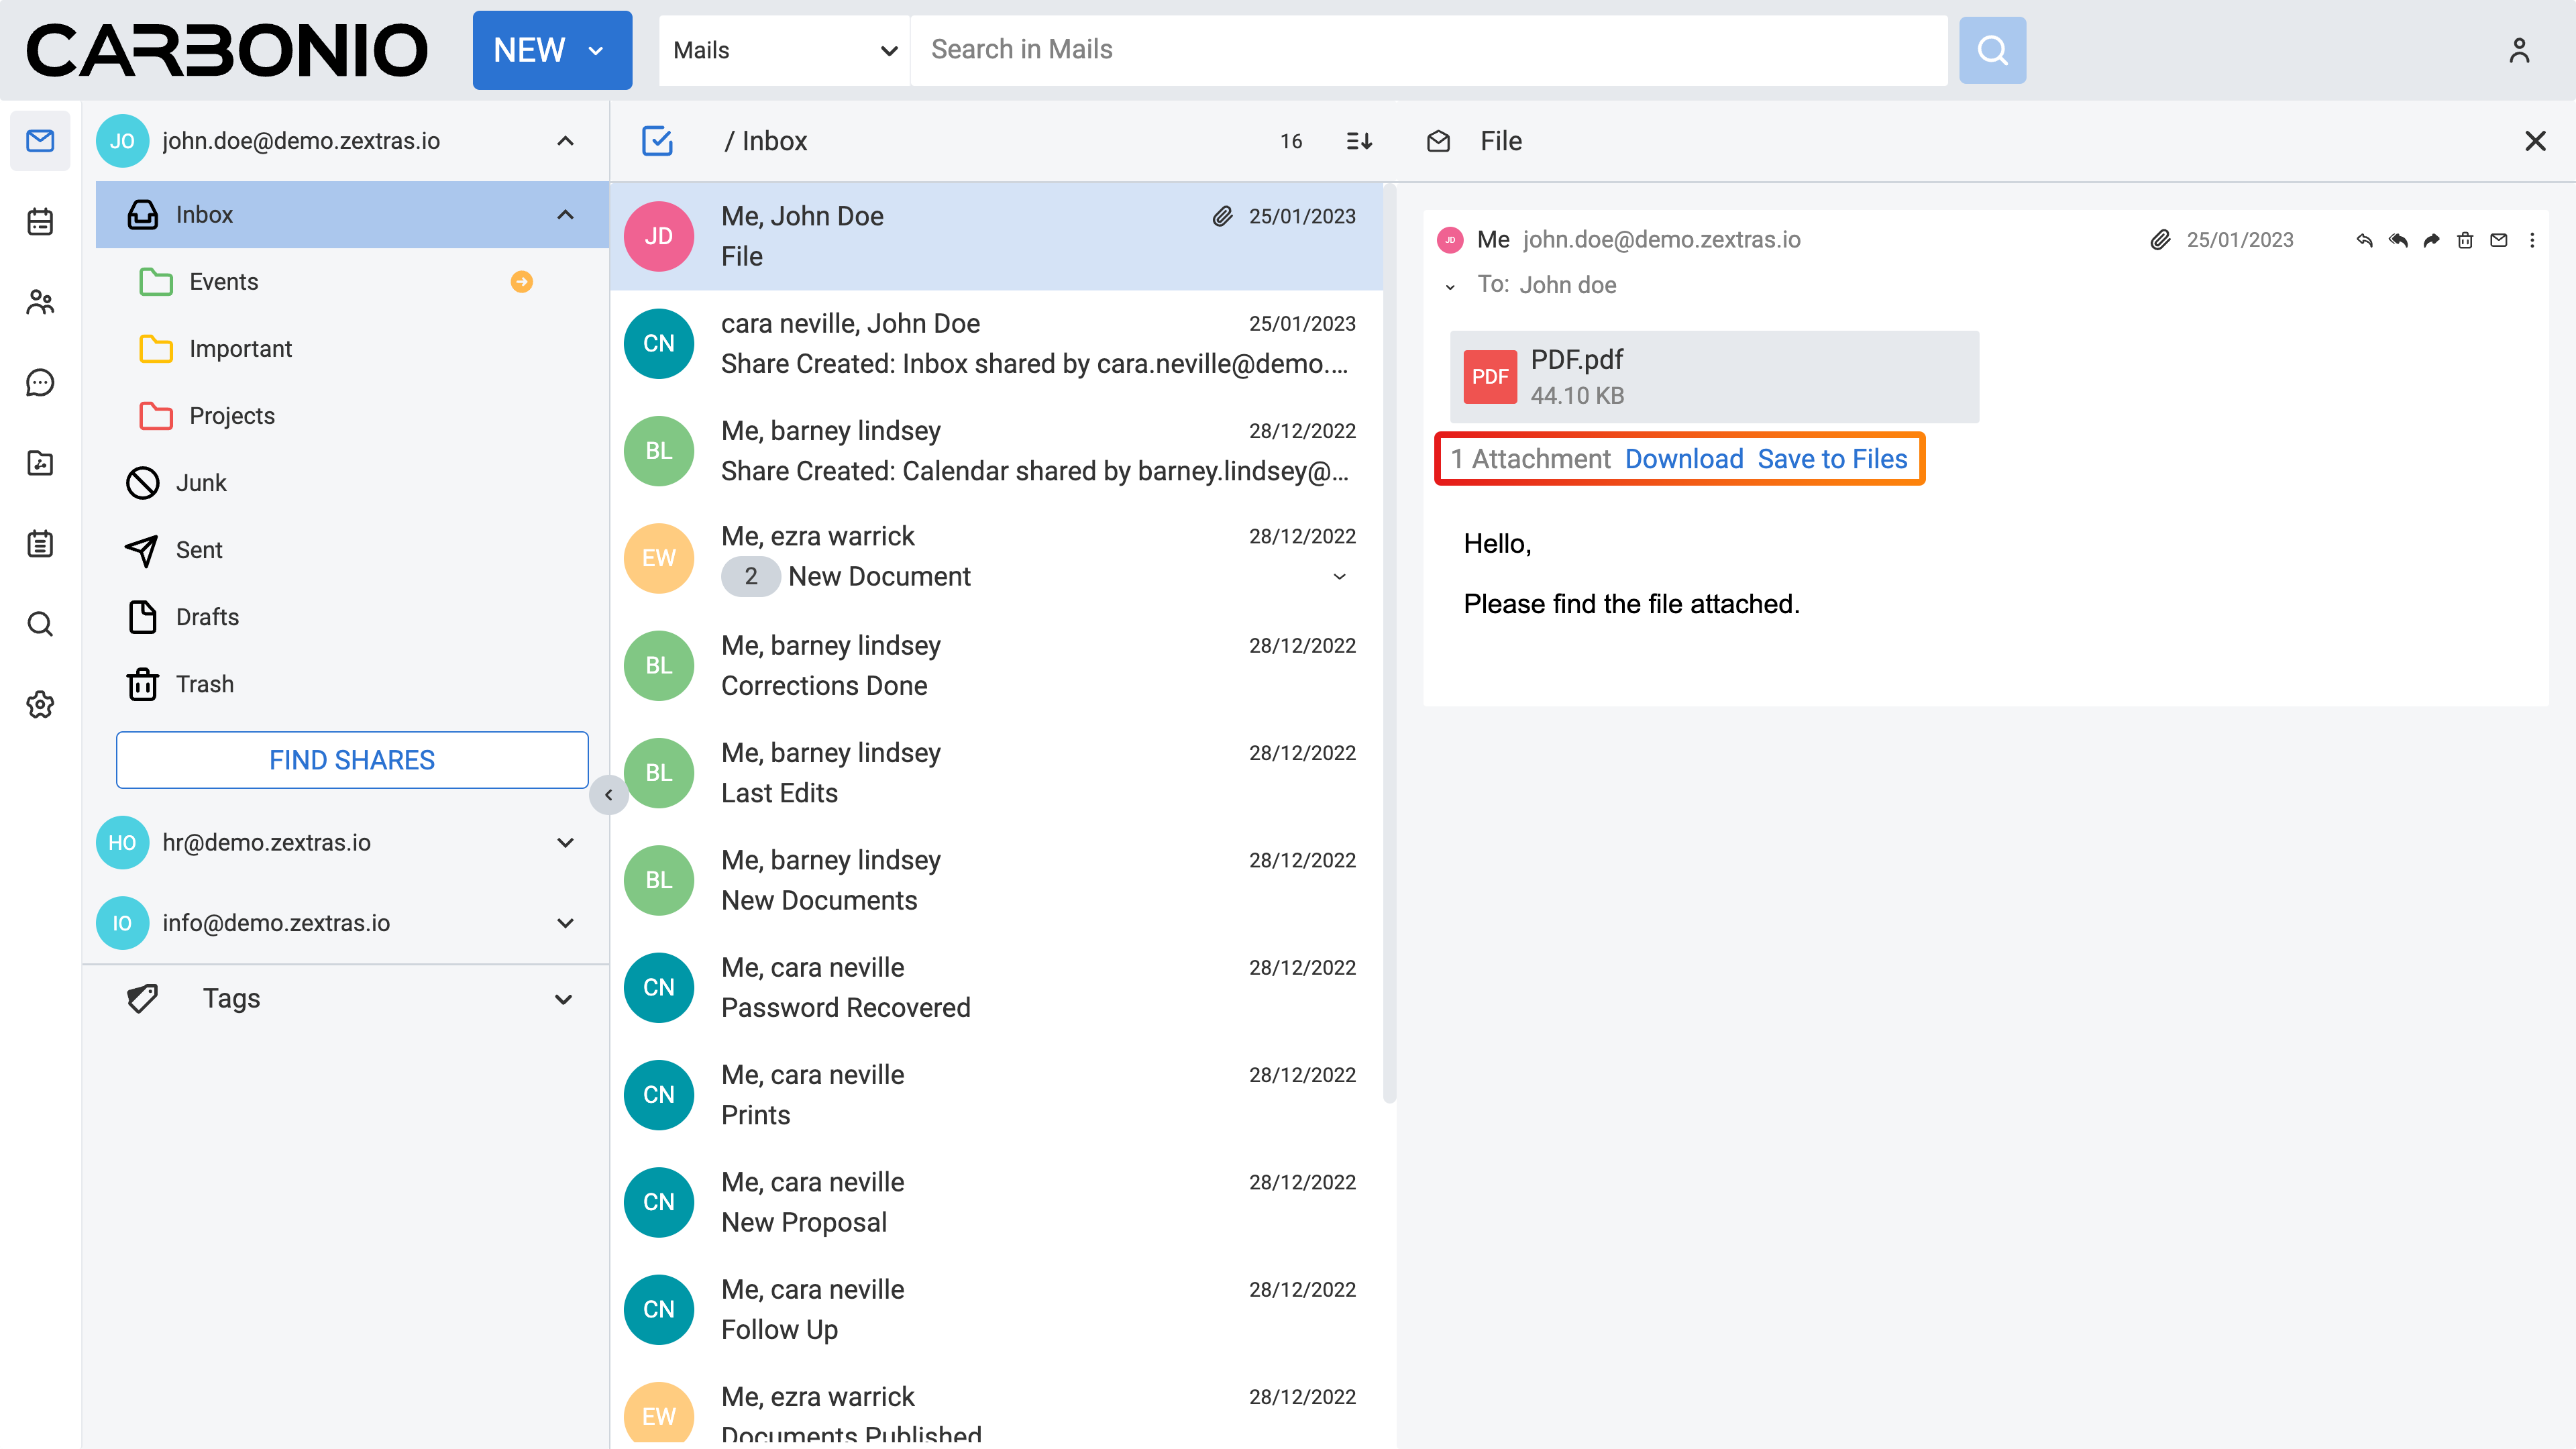
Saving Attachments in Your Carbonio Files#
To save an attachment in your Carbonio Files:
Open the email containing the attachment.
Under the attachment, click Save to Files. This will open a window, enabling you to specify the destination folder on your Files.

Deleting an Email#
You have the option to remove an individual email or entire conversation thread. For that:
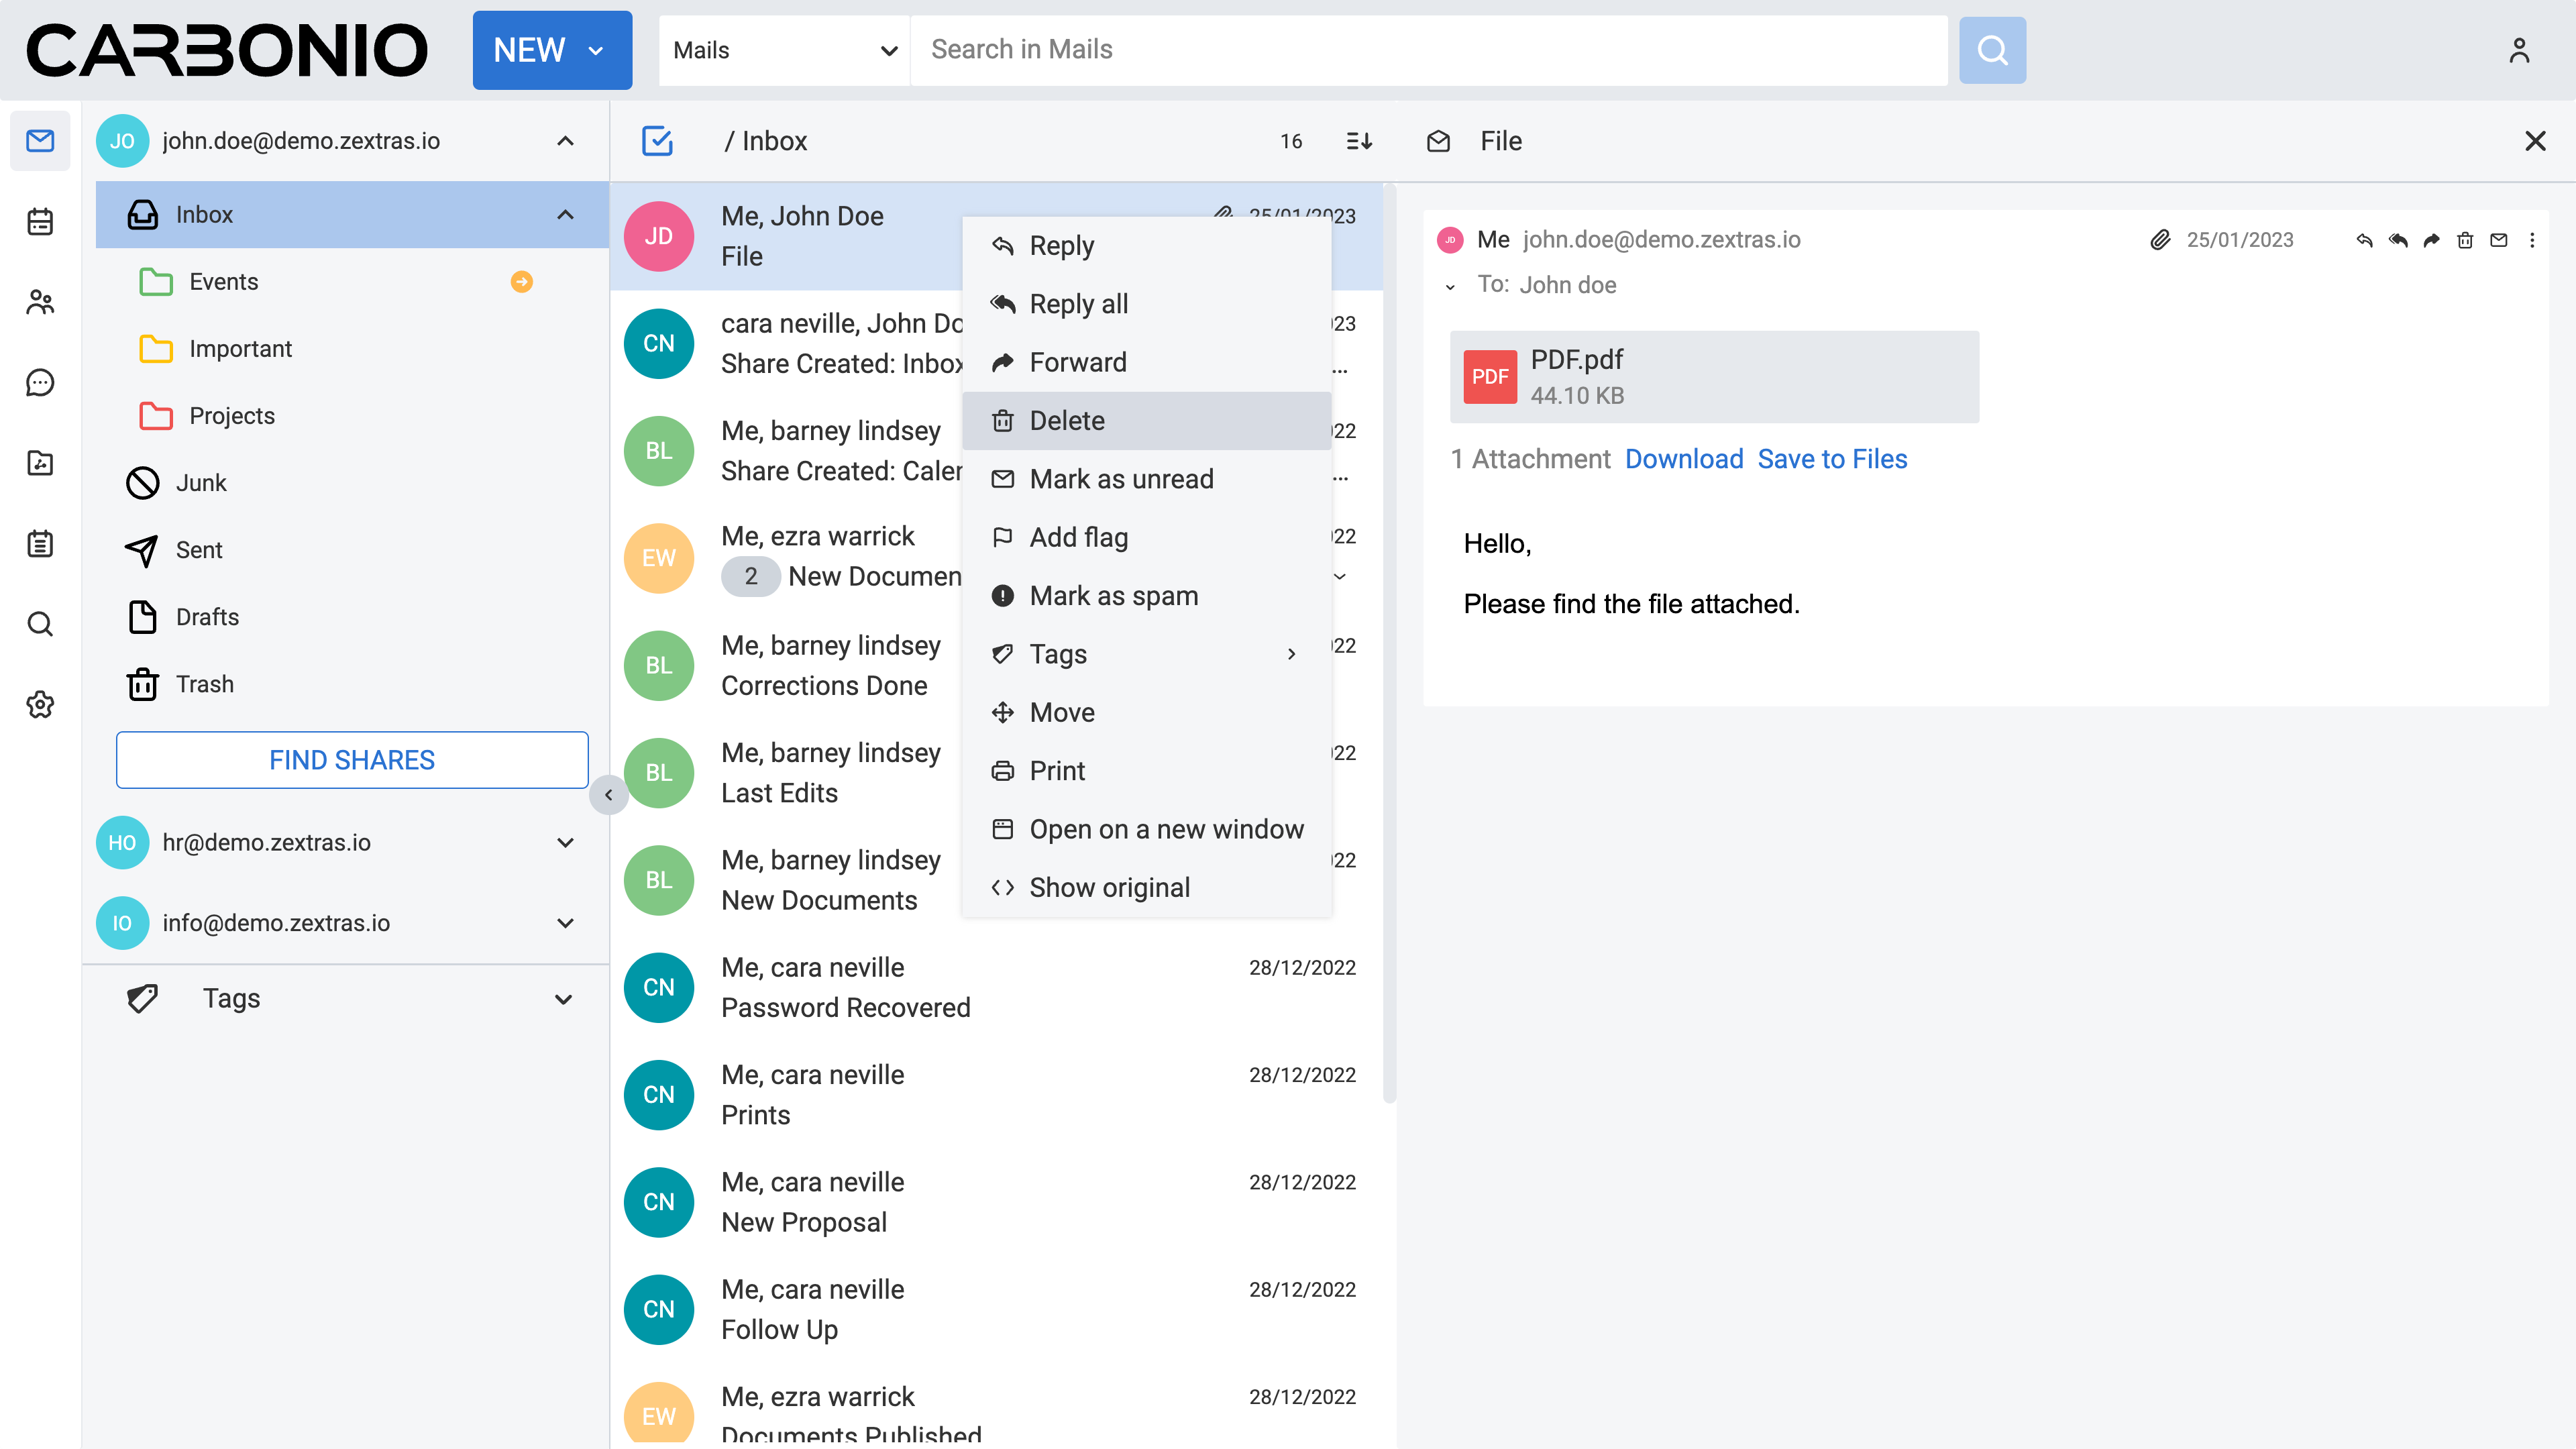
Right-click on the email or conversation you want to remove.
Choose the Delete option from the menu.
The deleted emails will then be moved to your Trash folder.
You can alternatively deleting an email by selecting it and use the shortcut key Delete on your keyboard. Deleted emails will then be moved to your Trash folder. You can retrieve items from the Trash within a 30-day window after deletion (unless your system administrator sets it otherwise). Beyond this period, the items will be permanently removed.
Additionally, you can manually access your Trash folder and permanently erase the email by right-clicking on it and selecting Delete Permanently.
Recovering Messages#
There is the chance, if enabled by your system administrator, to recover even permanently deleted emails. To do so, you will need to follow these steps:
Click on the gear icon in the left panel.
Click on the ‘Mails’ option and scroll down to the ‘Recover Messages’ section.
Enter a keyword and/or the date of the email you wish to recover.
Click on ‘Search E-mails’ and then on ‘Start Search’ in the pop-up window that will appear.
Select the email you intend to recover by ticking the flag and click the ‘Recover Selected E-mails’ button in the top-right corner.
Click on ‘Start Recovery’ in the pop-up window that appears.
You will find the recovered email inside a folder in your inbox, renamed with the date and time details of the recovery.
You will also receive a notification in your inbox with the details of the recovery process outcome.
Please note that the ability to perform this operation strictly depends on the backup settings configured by your system administrator.
Marking an Email as Unread#
Marking emails as unread can be particularly helpful when you need to revisit an email for future reference or further reading, especially if you have already opened it but have not had the chance to fully engage with its content.
The key distinction between a read and unread email lies in their appearance within your inbox: read emails typically display with regular text, while unread emails stand out with bold subject lines, making them easier to spot.
To mark an email as unread, follow these steps:
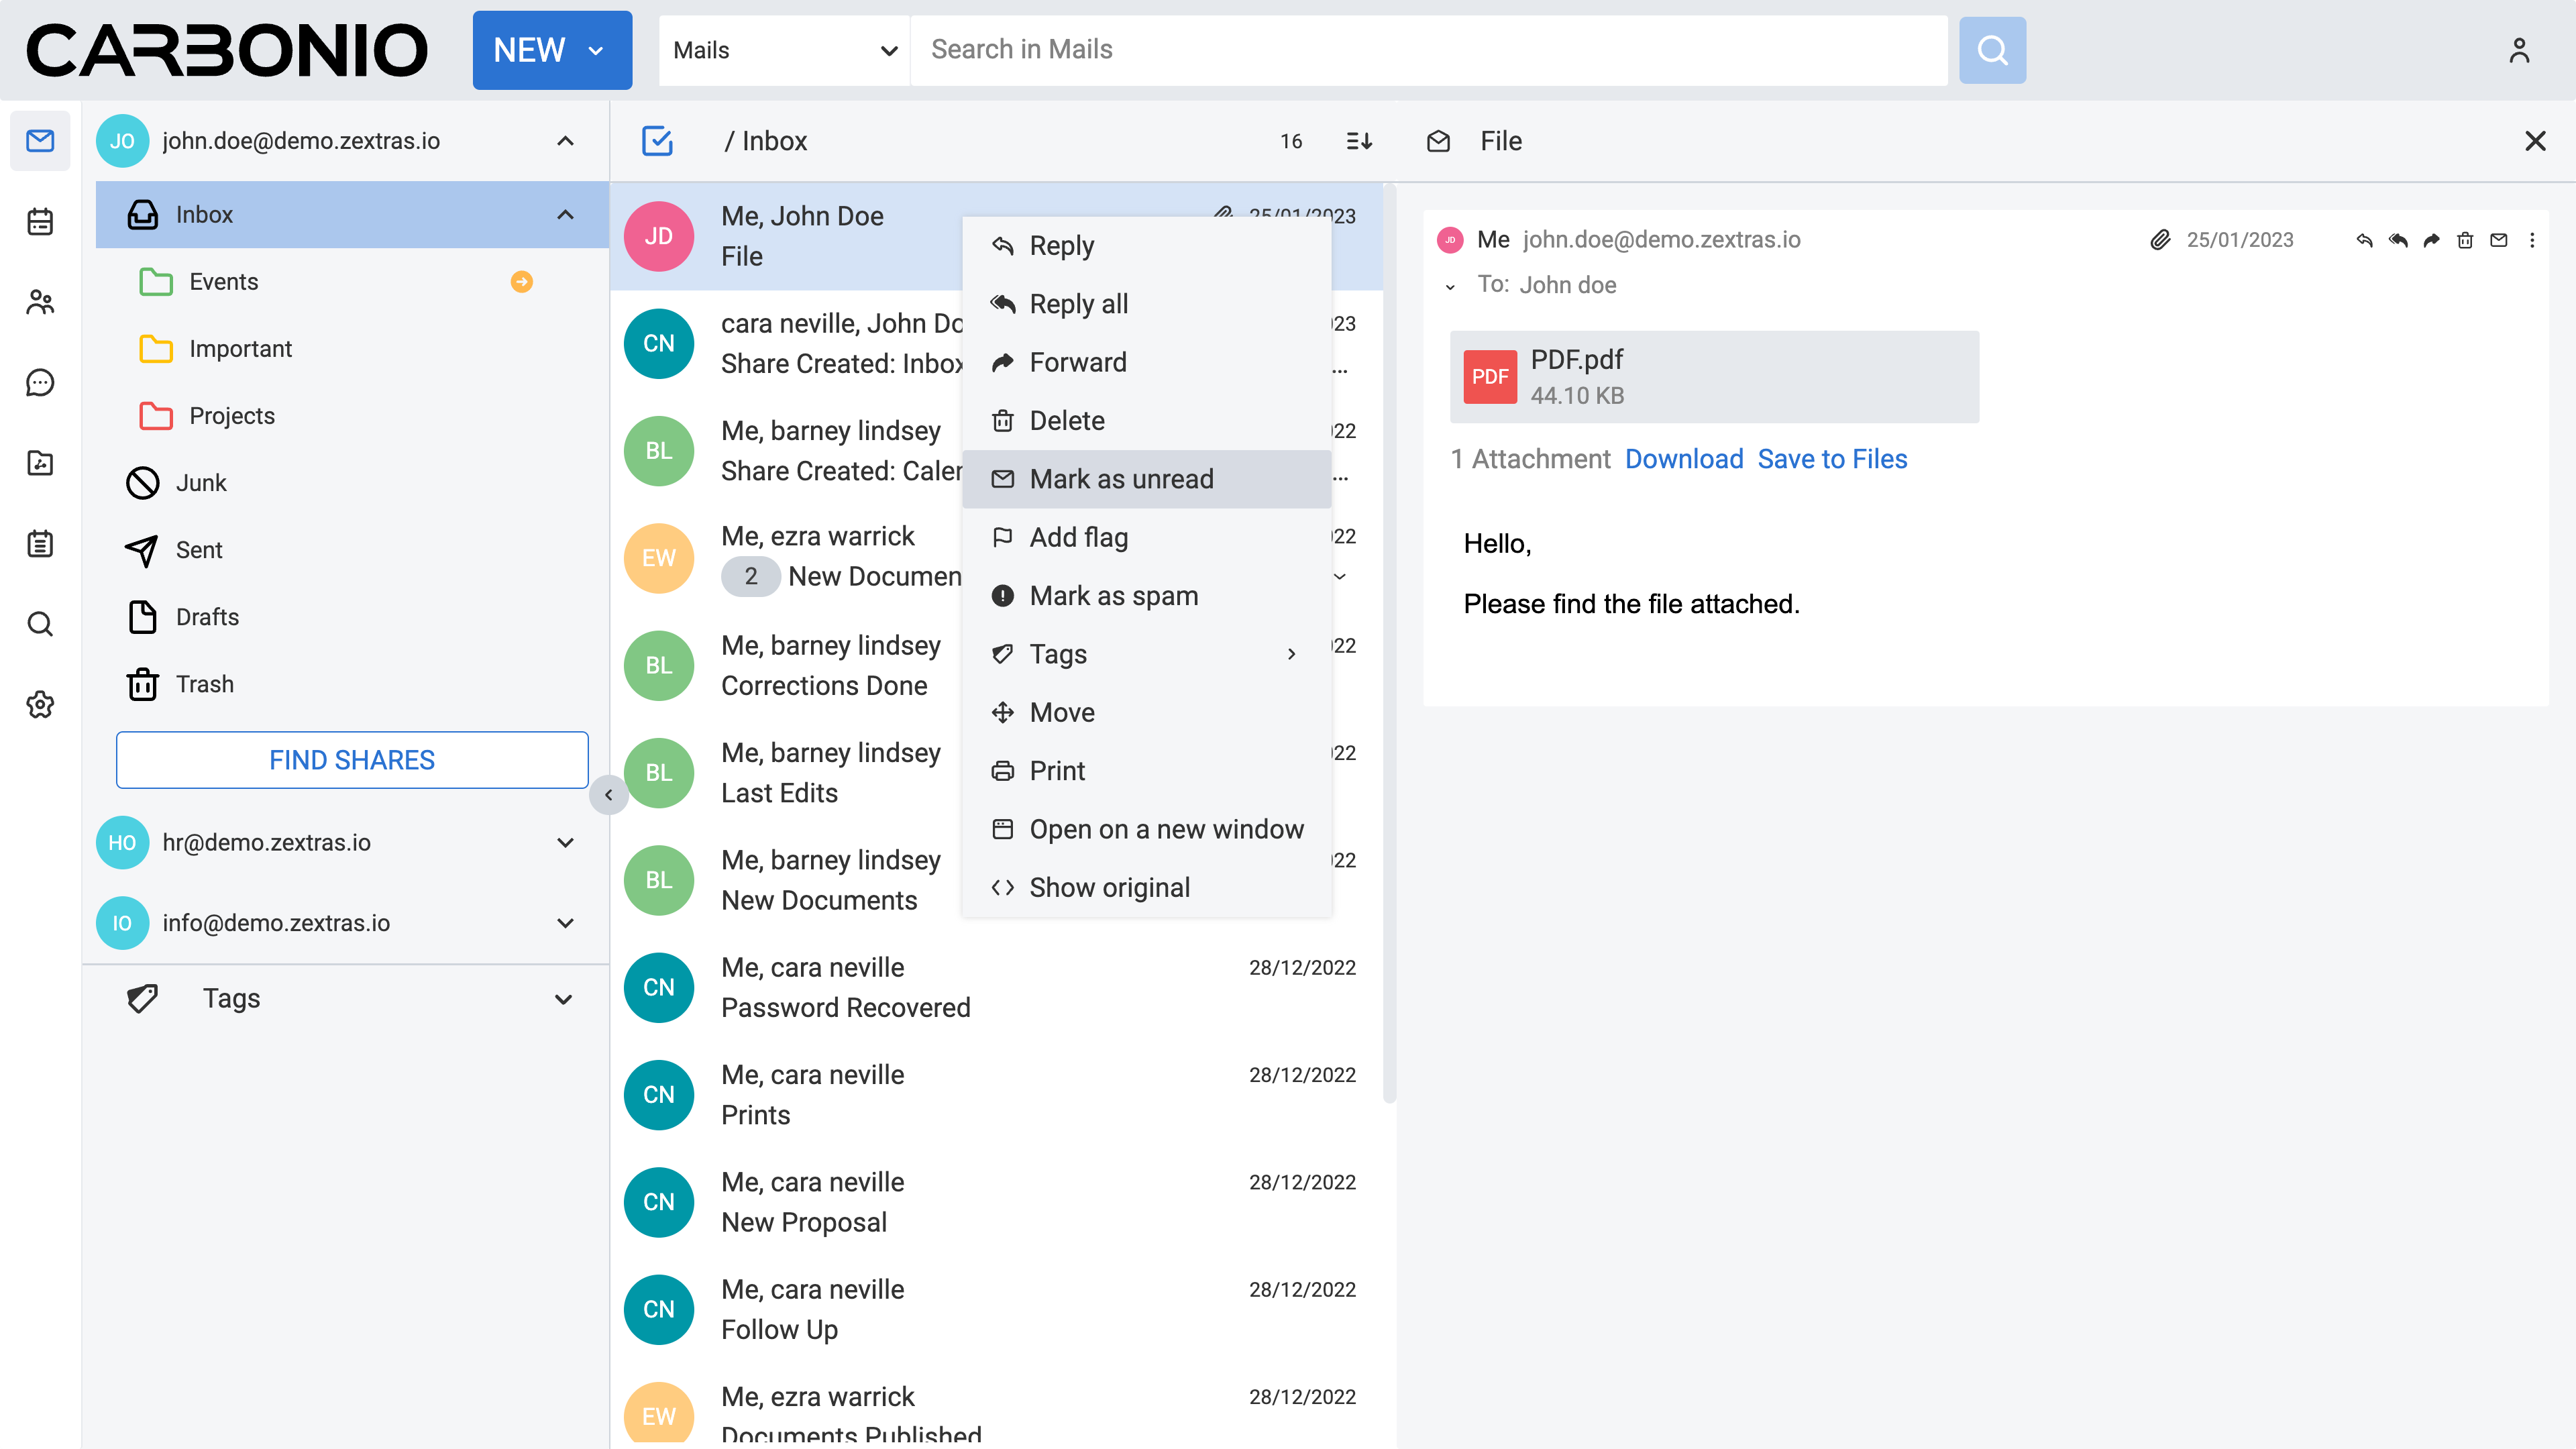
Right-click on the email you wish to mark as unread.
From the menu that appears, select Mark as unread.
Notice how the email’s subject line now appears in bold font.
It is important to be cautious after marking an email as unread, as inadvertently clicking on it again will remove the bold formatting from the subject line which undo your action.
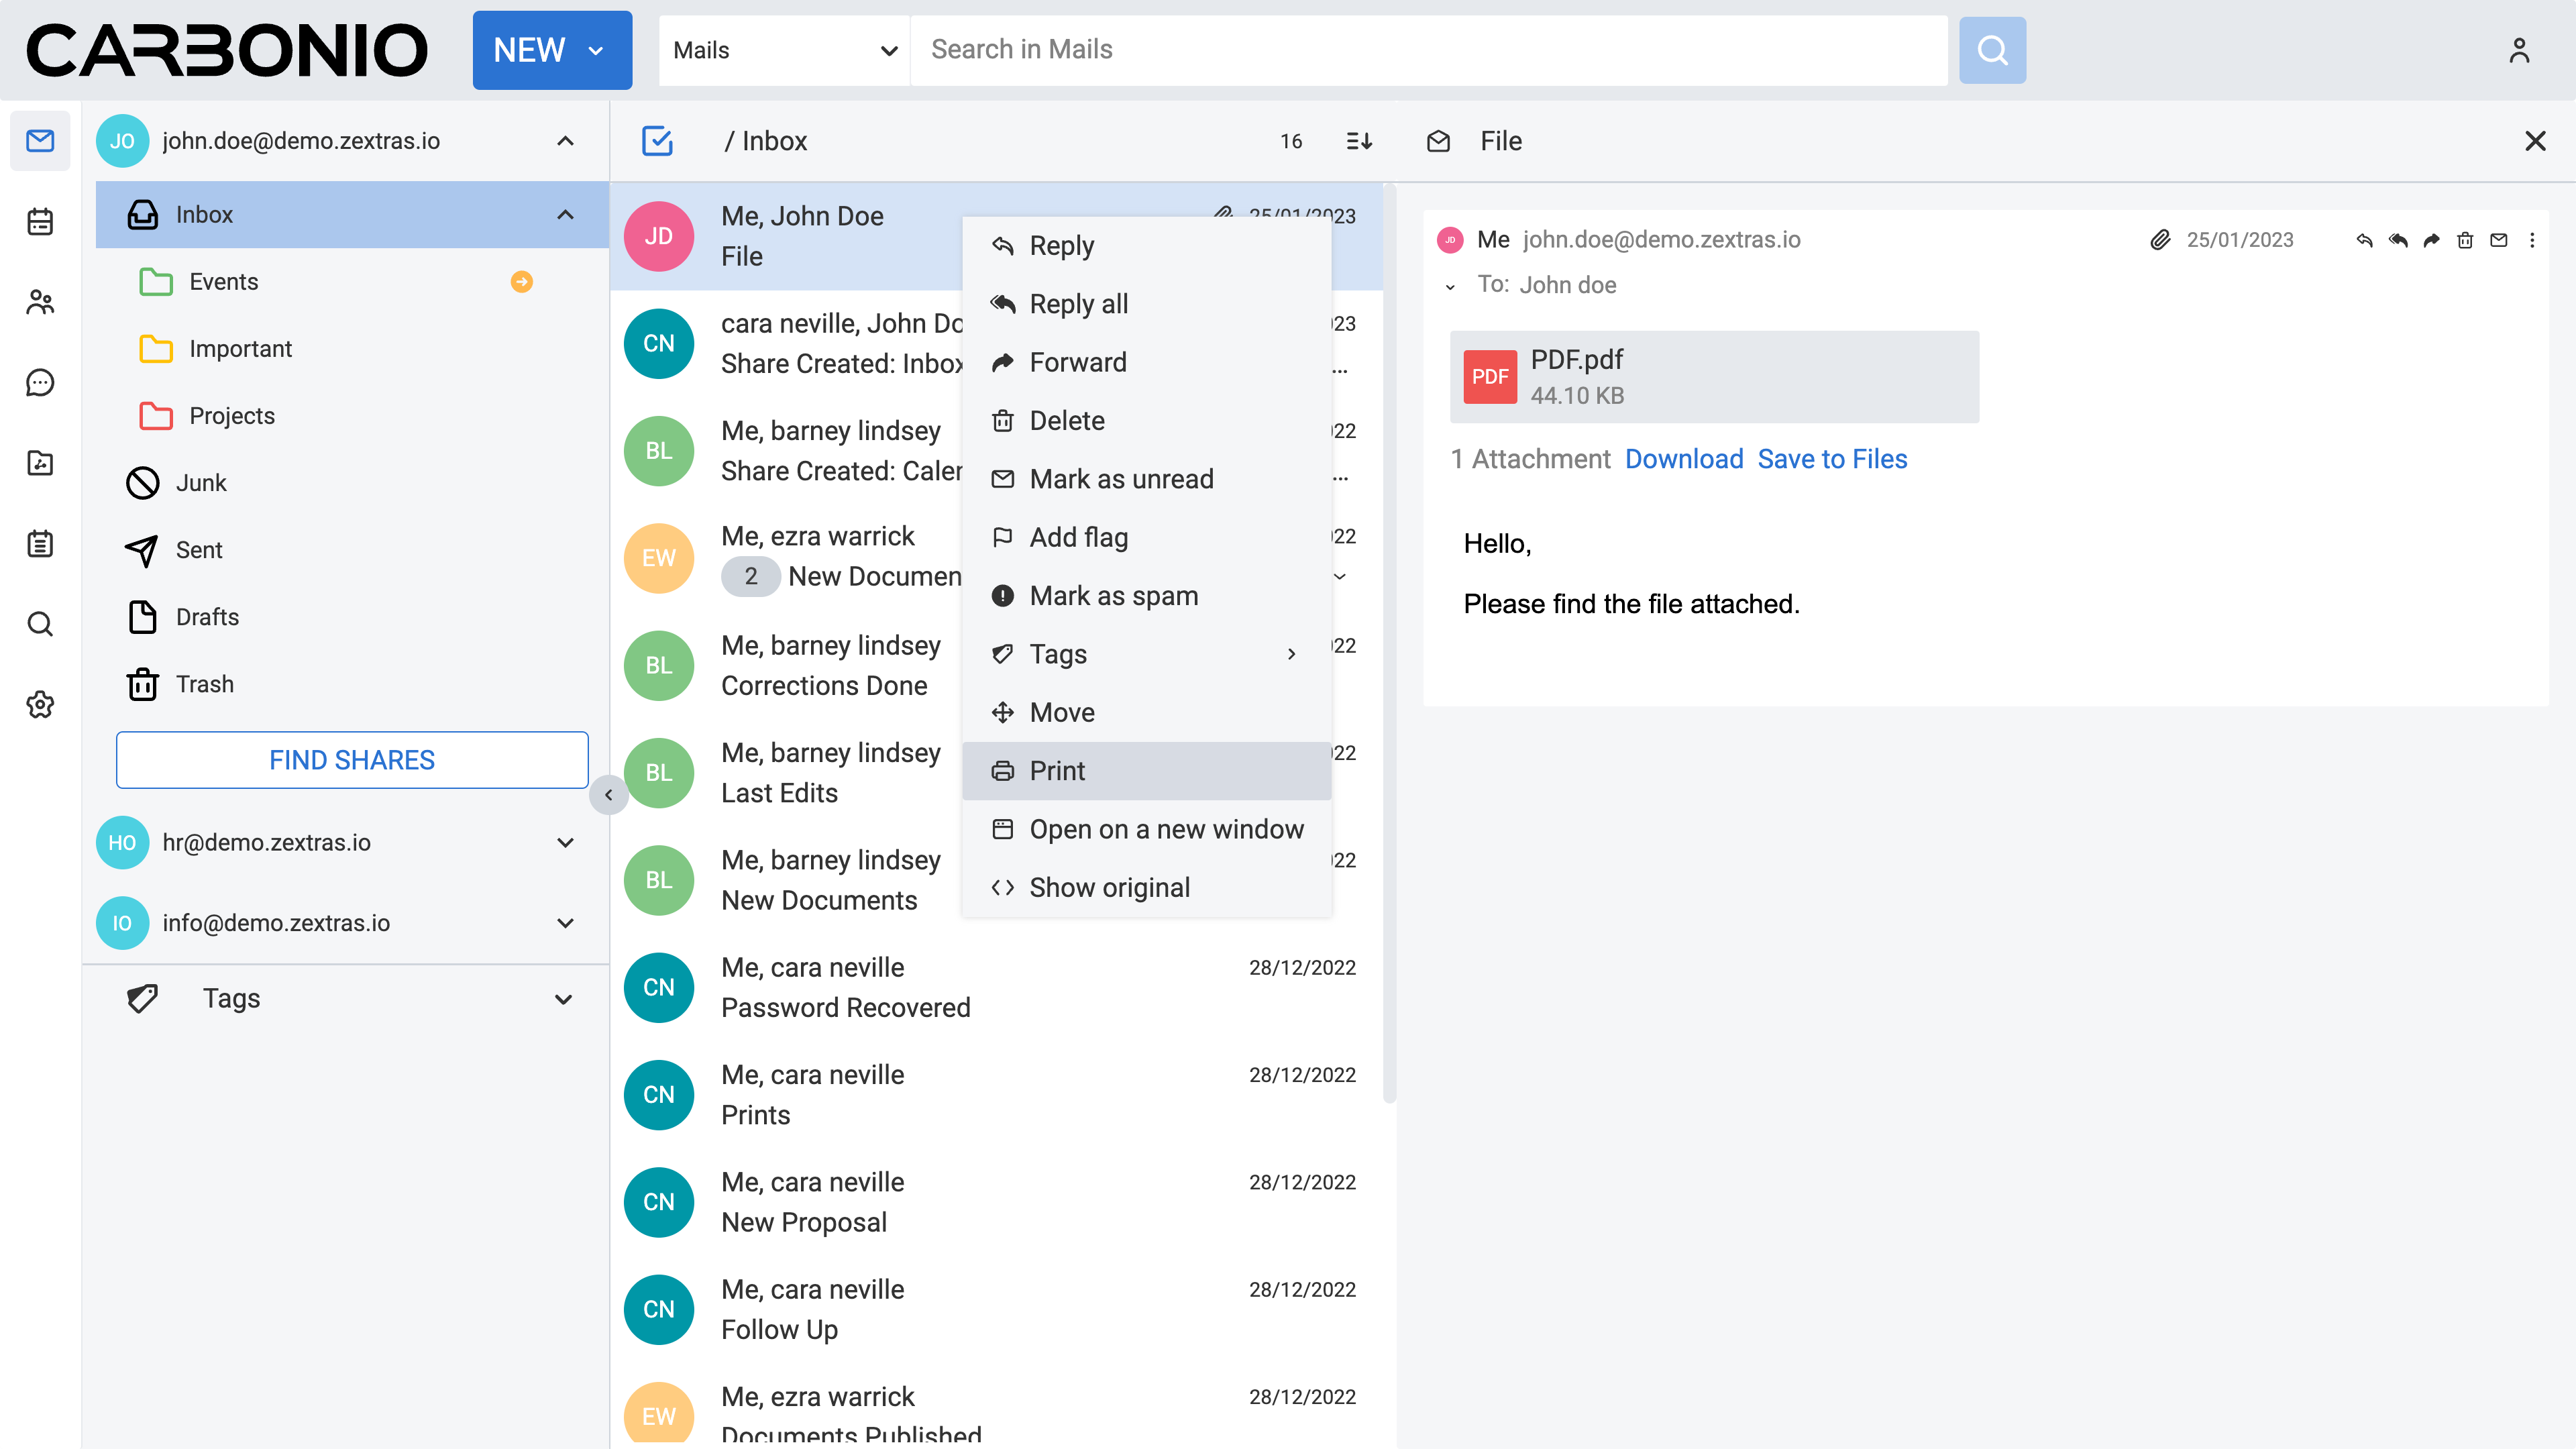
Printing an Email#
To print an email:
Right-click on the email or conversation you wish to print.
Select the Print option from the menu.
A new tab will open in your browser displaying the email, along with a window for adjusting printer settings. Make any necessary adjustments.
Click the Print button to proceed with printing.
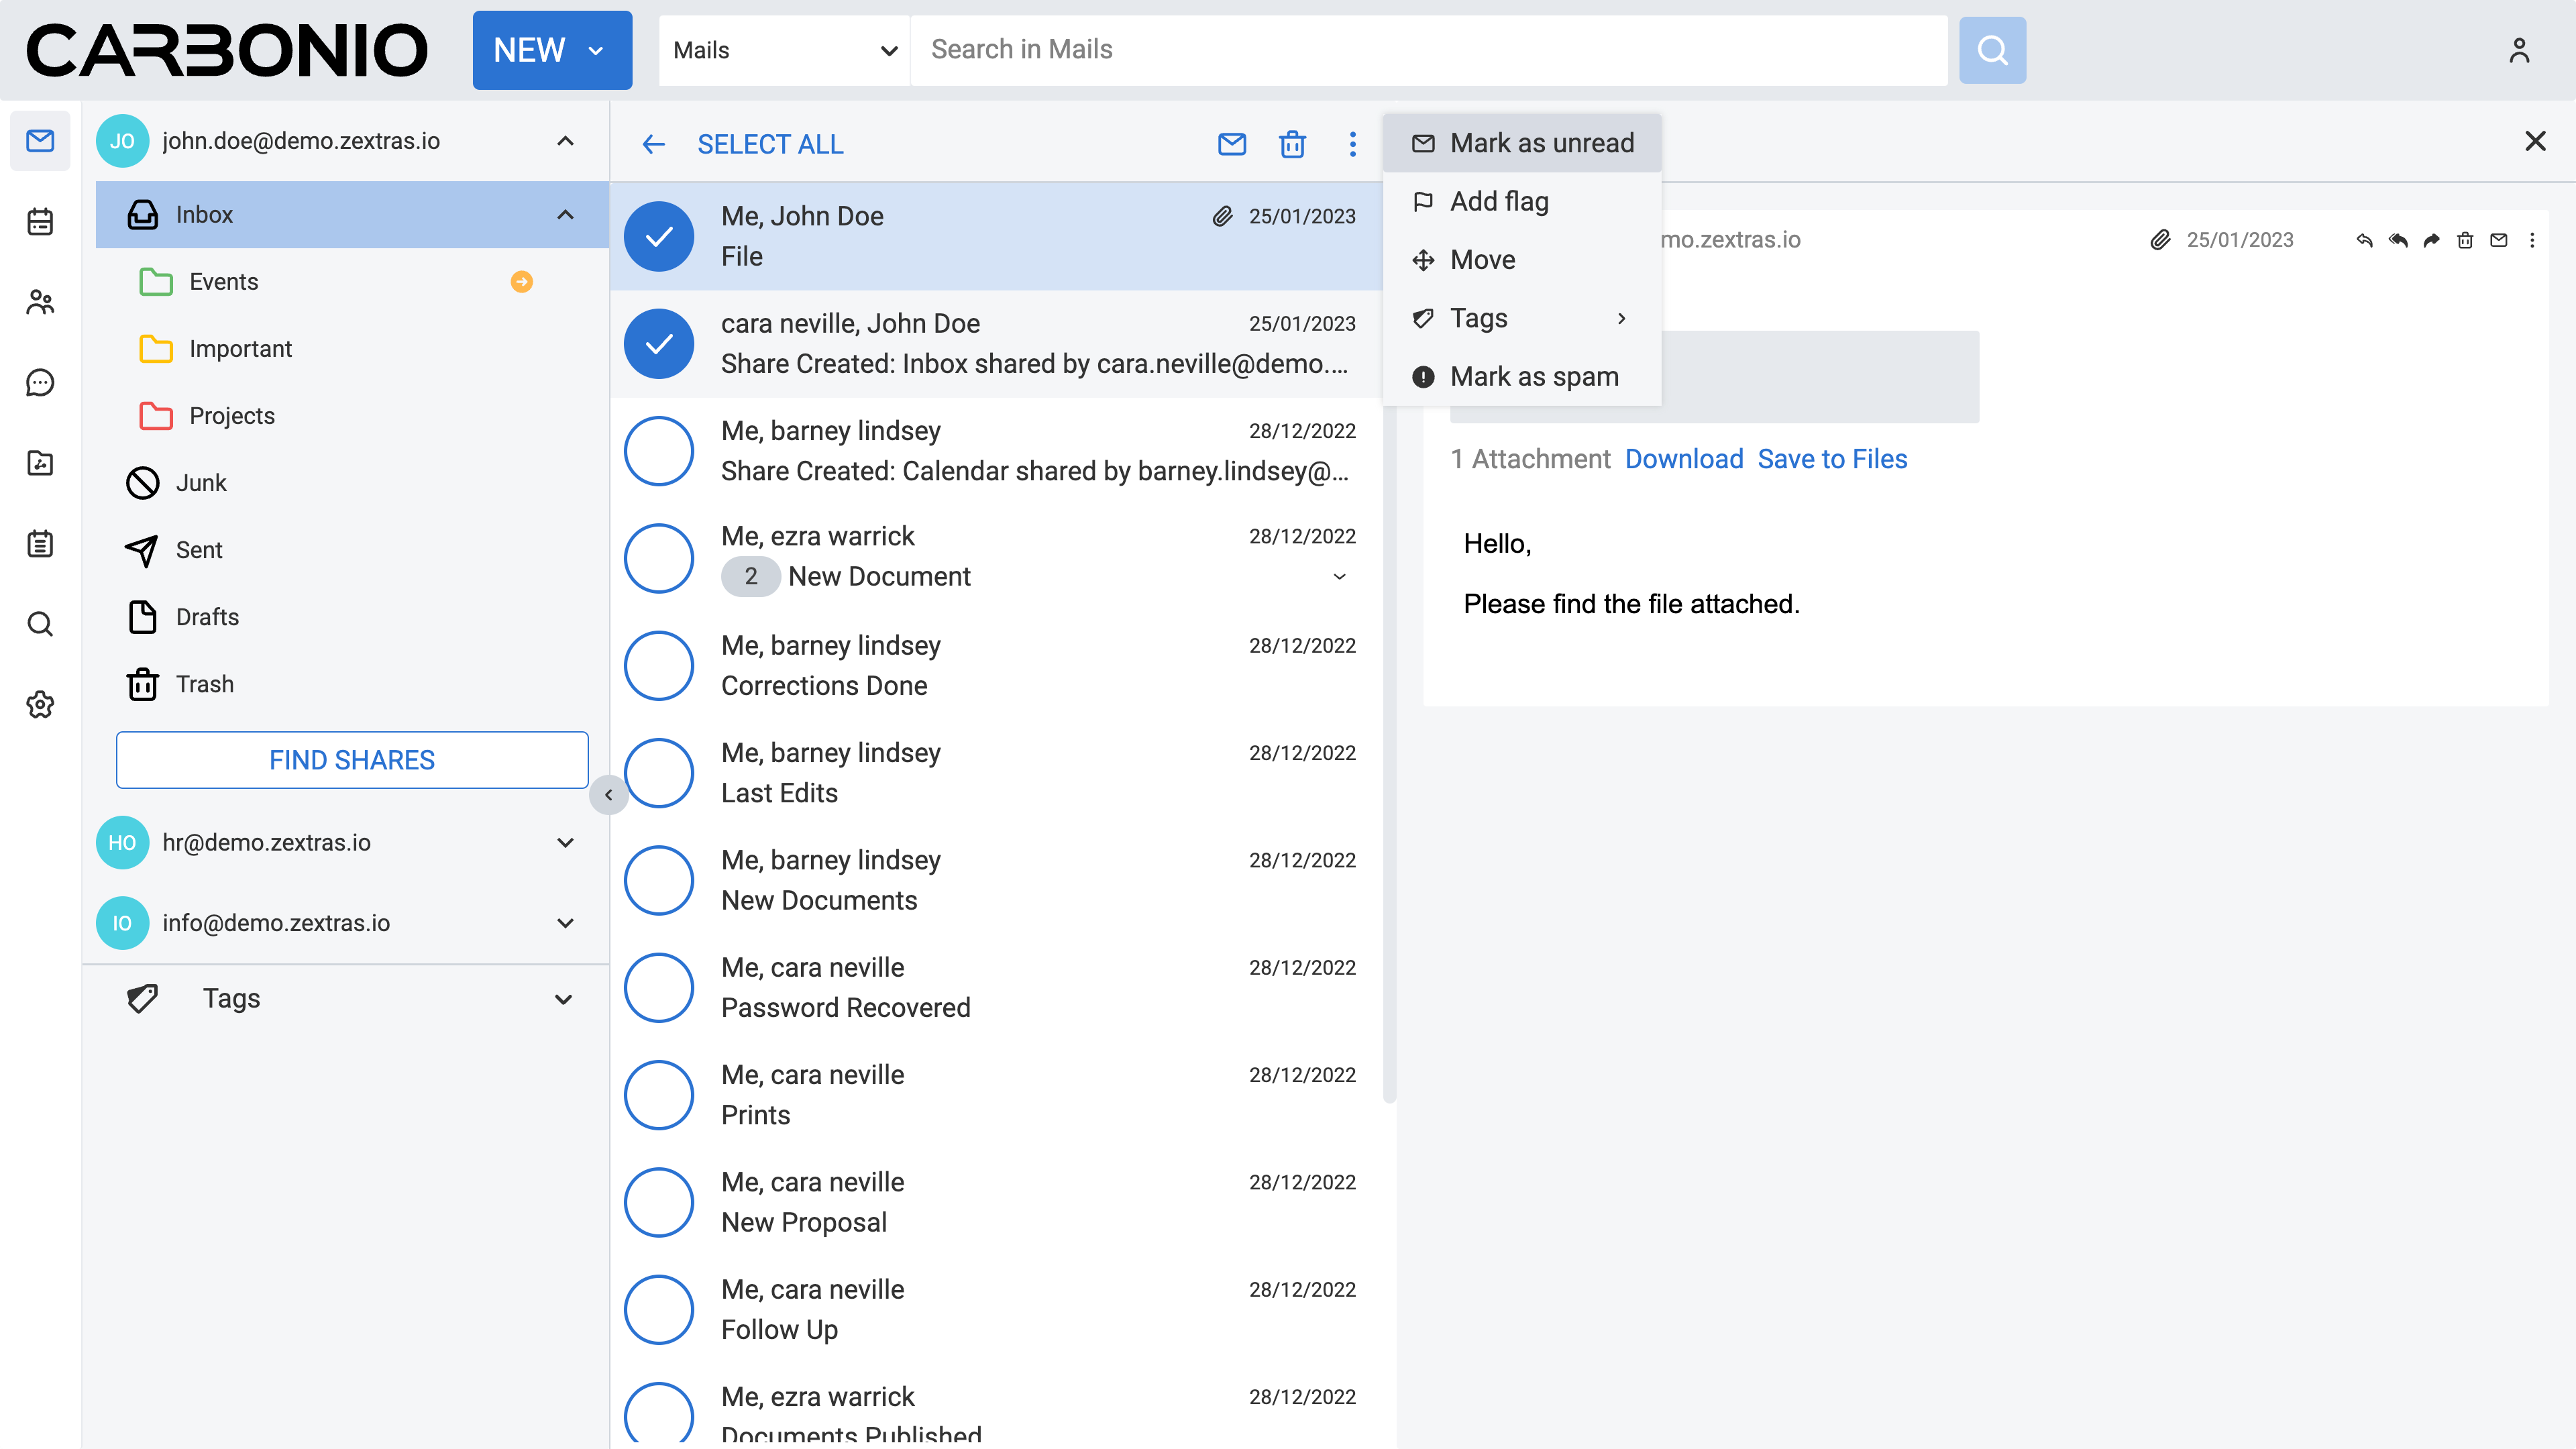
Actions on Multiple Emails at Once#
To perform an action on multiple emails:
Click on the check mark icon at the top left corner of your main panel to enter selection mode.
Select the empty circles beside each email you wish to choose.
Click on the three vertical dots icon at the top right corner of the email list.
Choose the action you want to perform.
The available actions for multiple emails include marking as unread, adding a flag, moving, and tagging.
To delete multiple emails at once:
Select multiple emails as described above.
Click on the trash icon at the top right corner of your email list.
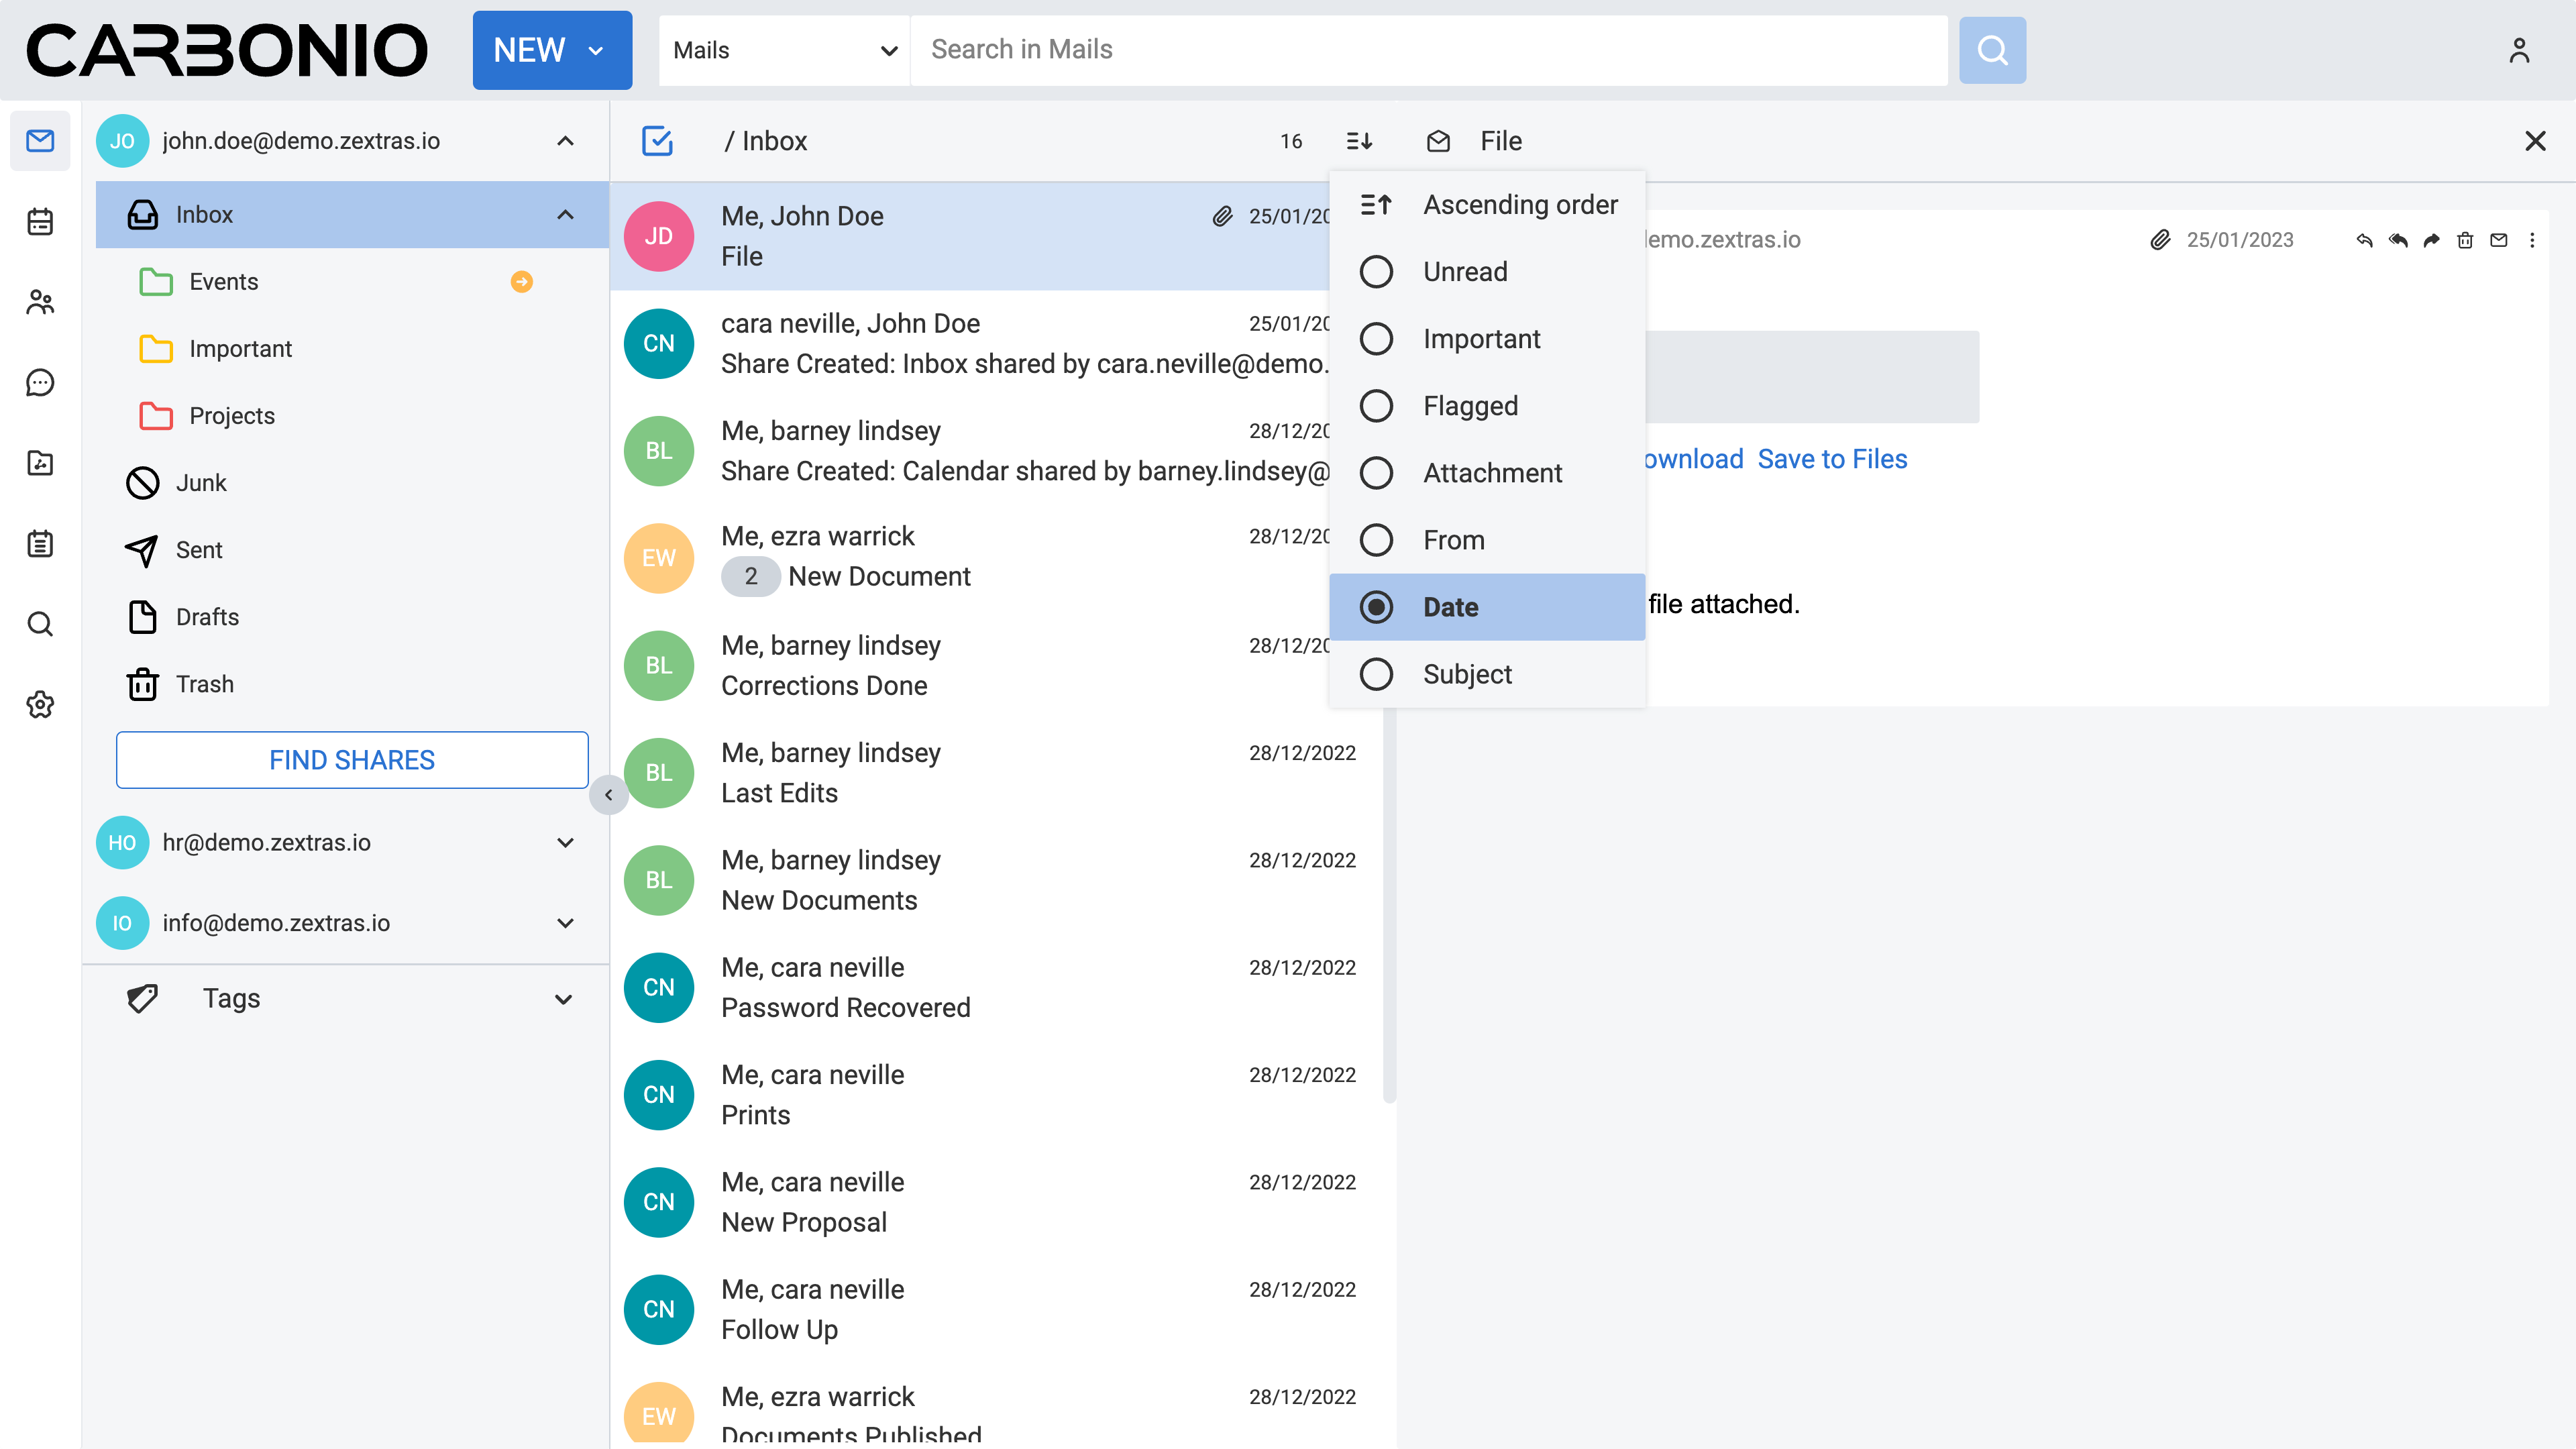
Sorting Emails#
Sorting emails can offer significant utility across various scenarios. You have the flexibility to categorize emails based on criteria such as unread status, importance, flagged status, presence of attachments, sender, date, and subject.
To initiate sorting, click on the sorting icon located in the top right corner of your email list.
Choose your preferred sorting criterion from the options provided.
Once selected, click on the sorting icon again to toggle between ascending and descending order as per your preference.
The default sorting mode automatically arranges emails based on their dates.
Emails date format#
To ensure clarity, the date format for emails that are not from the current day, it will always be displayed with the full date and time, with the complete timestamp.
The timestamp will be shown according to the browser language rules, as explained in the following table:
Language |
Format |
|---|---|
🇬🇧 English |
07/25/2024 5:08 PM |
🇮🇹 Italian |
25/07/2024 17:08 |
🇨🇳 Chinese |
2024/07/25 17:08 |
🇳🇱 Dutch |
25-07-2024 17:08 |
🇩🇪 German |
25.07.2024 17:08 |
🇮🇳 Hindi |
२५/०७/२०२४ शाम ५:१३ बजे |
🇯🇵 Japanese |
2024/07/25 17:08 |
🇵🇹 Portuguese |
25/07/2024 17:08 |
🇵🇱 Polish |
25/07/2024 17:08 |
🇧🇷 Portuguese (Brasil) |
25/07/2024 17:08 |
🇷🇴 Romanian |
25.07.2024 17:08 |
🇷🇺 Russian |
25.07.2024 17:08 |
🇪🇸 Spanish |
25/07/2024 17:08 |
🇹🇭 Thai |
25/07/2024 17:08 |
🇹🇷 Turkish |
25.07.2024 17:08 |
🇫🇷 French |
25/07/2024 17:08 |
🇻🇳 Vietnamese |
25/07/2024 17:08 |