
Carbonio Workstream Collaboration BETA#
The Carbonio Workstream Collaboration Role, currently in BETA version, adds chat functionalities and, in conjunction with the Carbonio VideoServer, video calls to Carbonio CE.
Text features#
Carbonio Workstream Collaboration ships with all the functionalities of a textual chatting system.
Overview#
The Chats module is show in Fig. 11. It is divided in three parts (a left-hand sidebar, the main area, and a right-hand sidebar). The layout is similar for a Meeting, with two sidebars surrounding the main area.
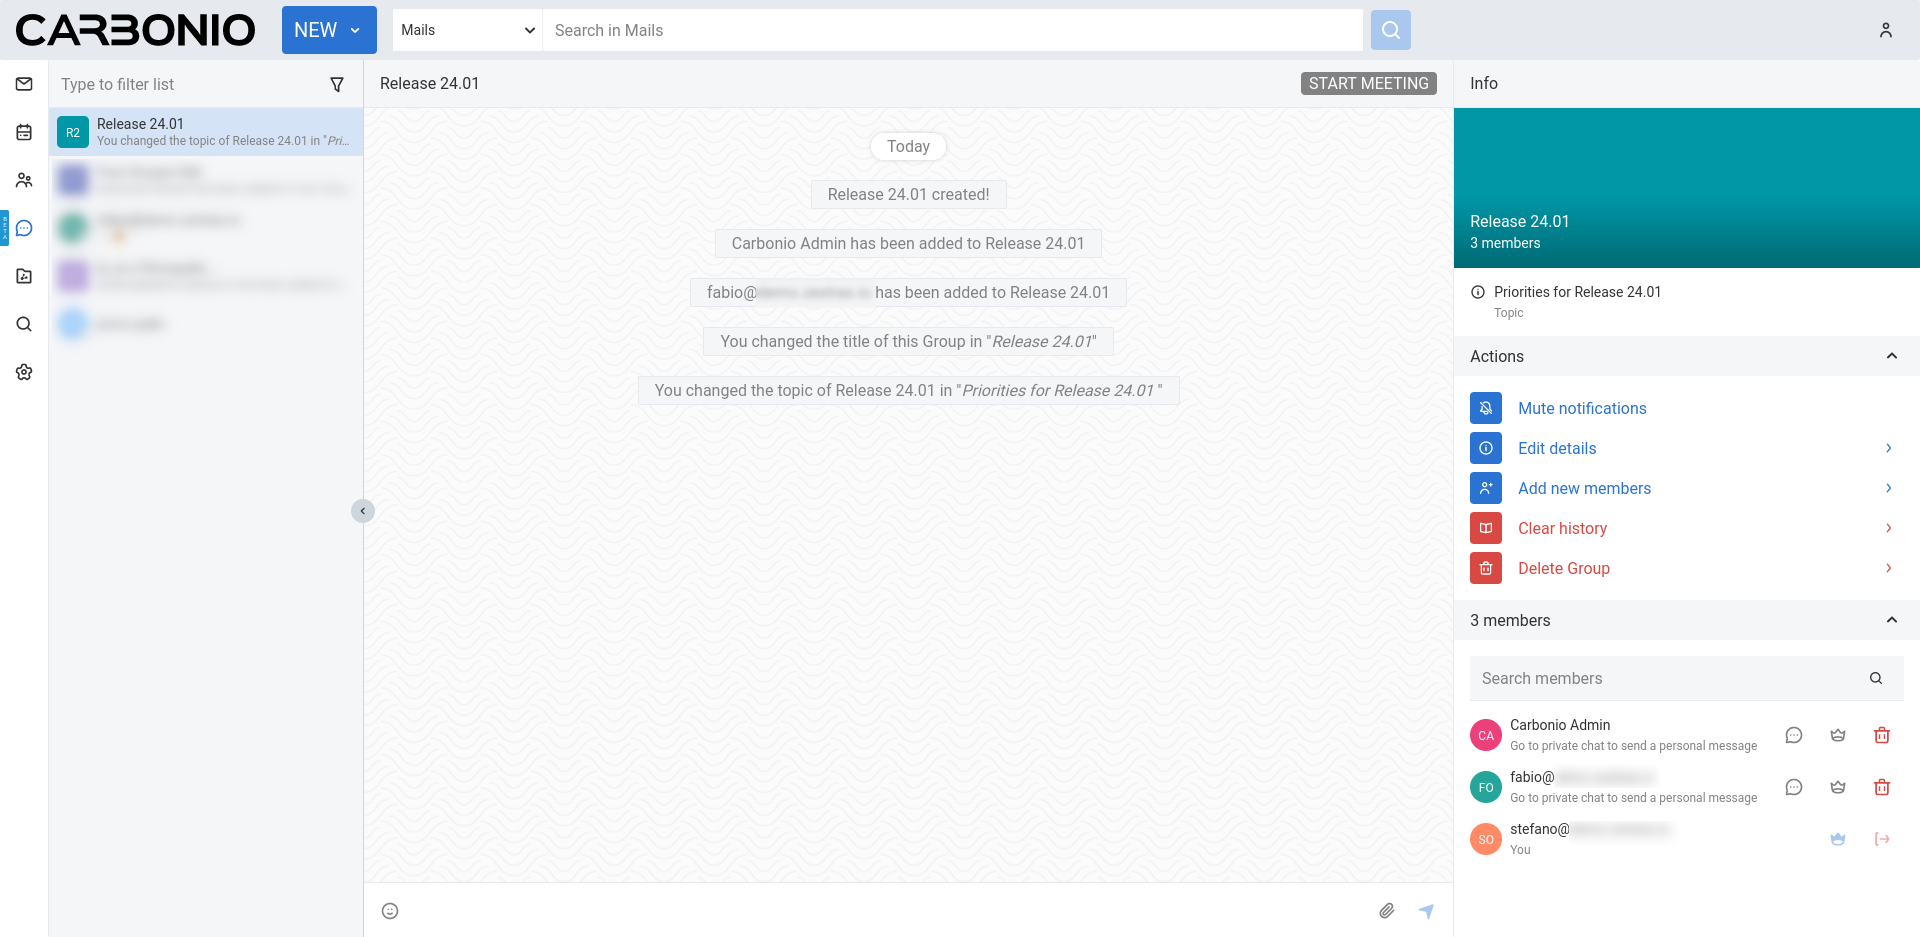
Fig. 11 Overview of the Chats module.#
Using Chats#
You can create a new one-to-one or one-to-many chat by using the NEW button on the top bar. In the dialog window, either start to type the e-mail address of a colleague or tick the checkbox next to the list of account, then the CREATE button to start the chat. If you add more than one address, you will create a one-to-many chat (also called Group): you can provide a (mandatory) title as a name for the chat and an optional topic. You also become a moderator of the group.
When you create a new Chat or Group for the first time and send a message to it, the list on the left-hand side will be populated.
Note
If you create a one-to-one Chat but send no message to it, the Chat will be removed from the list at the next login or when refreshing the page.
The most recent Chats or Groups will always appear at the top of the list. You can then filter the list if you search a particular Chat or Group.
If you search and filter by user name, beside the single chat with that user, you will find all the groups you are in, with that specific contact. Moreover, if there is are users that match the search, but with whom you never exchanged a chat, they will appear with the message Create new chat with to allow quicker creation of a new chat.
For every item it is shown whether there is an ongoing meeting (a camera icon will replace the small avatar icon), the Chat or Group is muted (a barred bell icon will appear), of if you have written a draft message.
In both Chats and Groups there is a sidebar on the right-hand side, which carries a number of information and allows to carry out some actions. There are three different sidebars: one for Chats, and two for Groups (one for participants and one for users, which have slight different functionalities).
While chatting, you can send attachments to the other members of the Chat. With the Carbonio Preview installed, the attachments can be previewed before being downloaded. You can share a link to a document that is stored in the Carbonio Files module. If you revoke the link from the Carbonio Files Module, the document will not be accessible with that link.
You can add a caption to each attachment you send, provided it is no longer than 4096 characters. If the caption exceeds that number, a dialogue will appear to inform that the caption will be truncated.
You can forward one or multiple messages from one chat to another chat. By entering the contextual menu (click the that appears upon hovering on a message) and selecting Forward, you enter the selection mode. The line of the selected message will be highlighted and you will be able to select other messages.
Hint
There is a limit to the number of messages that can forwarded at once.
The bottom line, i.e., the one on which you write the chat messages, will be replaced by two buttons: clicking the one on the left-hand side you can exit the selection mode and go back to chatting, while clicking the right-hand side button opens a dialog to select the colleague(s) to whom to forward the messages.
Note
You can forward messages only to one-to-one chats, not to group chats.
When a user receives a forwarded message, the message will have additional information that the original messages:
A string that clarifies that the message has been forwarded
The name of the original author of the message
The original sending date and time
A forwarded-multiple-times icon in case the message was forwarded two or more times
In a chat, the sidebar is split in two:
The Info box shows the e-mail and the avatar of the other member
-
The (collapsible) Action box allows to mute notifications (see what this implies in the box below) or to clear the chat’s history.
Note
The deletion of the chat history requires a confirmation; it is irreversible and personal, meaning that the other users will still be able to see it.
In a Group, the sidebar for a participant is divided into three parts.
The Info box shows the avatar, title, and topic of the group, along with the number of members
-
The (collapsible) Action box allows to mute notifications (see what this implies in the box below) to clear the chat’s history or to leave the group.
Note
The deletion of the chat history requires a confirmation; it is irreversible and personal, meaning that the other users will still be able to see it.
In the (collapsible) Members box shows the e-mail and avatars of the other members. It is possible to search for members or open a direct chat with each of the members by clicking the icon. A crown icon shows the moderator of the group.
In a Group, the sidebar for a Moderator is divided into the same three parts that participants see, but with a few more options to manage the Group. The differences are:
Info box. A moderator can also upload an image to change the avatar
Action box. A moderator can Edit details of the group (title and topic), add new members, or delete the group
Members box. You can promote other members to moderator.
Note
If you are the only moderator, you can not leave the group.
When the notifications for a Chat or a Group are muted, the following changes take effect:
The avatar of the User or of the Group is replaced by a crossed-out bell
Desktop notifications, if configured, are suppressed
Notification sounds are also suppressed
The unread messages badge will be shown in grey and not in blue
Meeting features#
A Meeting is a video call between two Participants, while a Group Meeting is a meeting between three or more Participants.
A Group is composed by three of more users, which are the members of the Group: all members receive the text messages written in the chat. Whenever a Group Meeting is started, while all the members can join that Group Meeting, only those who indeed take part are called participants.
To take part to a meeting, use the button on the top right of the chat window: if you are starting the meeting, the button is called START MEETING, while if the meeting has already started (in the case of a video conference), the button becomes JOIN MEETING.
While users authenticated to the Carbonio CE infrastructure can join directly a (Group) Meeting, the journey of external users (i.e., users that do not have an account on Carbonio CE) and internal but unauthenticated users (e.g., a Carbonio CE user that wants to join from a private tab of the browser) is a bit longer.
An external user receives a link to the meeting room, clicks on it and lands on a Welcome page where to insert a name. After clicking the Join meeting button, the user will be redirect to the Waiting room and, after clicking Ready to participate, he will join the meeting as soon as the moderator will accept the request.
The internal unauthenticated user has a procedure similar to the external user, differing only in the Welcome page. Here, instead of providing a name, the user will be redirected to the login page. After a successful login, the user can join the Waiting room.
If someone is trying to call you directly, a dialog allows you to accept the call and enter the meeting or to refuse the call and write a short message that will be sent to the caller. Upon entering the meeting, you have the chance to choose the microphone and webcam (i.e., the devices) to use and to test the microphone. The selected devices are always shown, to make clear which are the one used when entering the call. You can also start a call with both devices deactivated and enable them during the call, and even change them. If you start the meeting without granting to the browser the permission to access the Webcam and microphone, whenever you want to enable either of them, you will be prompted by a message that asks to grant the permission to use the device.
After the meeting has started, on the left-hand side three collapsible panels appear: the Actions and Participant boxes, which are the same as the corresponding Actions and Members box in the textual chat, and the Chat on the bottom.
A user who is trying to enter a Group Meeting will enter the waiting room; here, the user remains until a Moderator grants the access; if the Meeting ends before entering, the user is notified that the meeting has ended.
On the bottom of the main area, the Action Bar allows to change or disable the devices, to share the screen, to change the mode of the call (see next section), or to leave the Meeting. Next to the red leave meeting button appears the duration of the meeting.
Note
Leaving a meeting requires a confirmation click on the button.
Meeting modes#
The right-hand side sidebar depends on the mode used during the meeting which can be one of:
- Face to face mode.
-
This is available only for a video call (i.e., between two participants) and the only interaction is to hide your video and show only the other participant.
- Cinema mode
-
It is available only in video conferences. The sidebar shows a miniature of the participants. Only a few are shown in a vertical carousel, depending on the size of the browser’s window, but you can scroll the carousel. By default, the main area shows the participant that is talking, but it is possible to force one participant to stick in the main area by pinning it (i.e., clicking the corresponding icon on the miniature).
- Grid mode
-
It is available only in video conferences. All the participants will be shown in the main area. When the number of participant is large and they can not be fit in a single window, it will be possible to scroll the grid.
It is also possible to pin one of the participants: in this case, the mode will be automatically switched to Cinema.
Hint
To toggle between the Cinema and Grid modes use the button located between the screen share and leave buttons in the Action Bar.
Screen Sharing#
It is possible to share an entire screen or single windows. Depending on the browser used, it might be even possible to share only a tab of the browser.
In video conferences, if someone (Alice) starts sharing the screen while someone else (Bob) is already sharing, the screen of Alice will replace Bob’s. Bob’s screen will remain shared, but other participants need to pin it to see it again in the main area.