Install Carbonio Using Ansible#
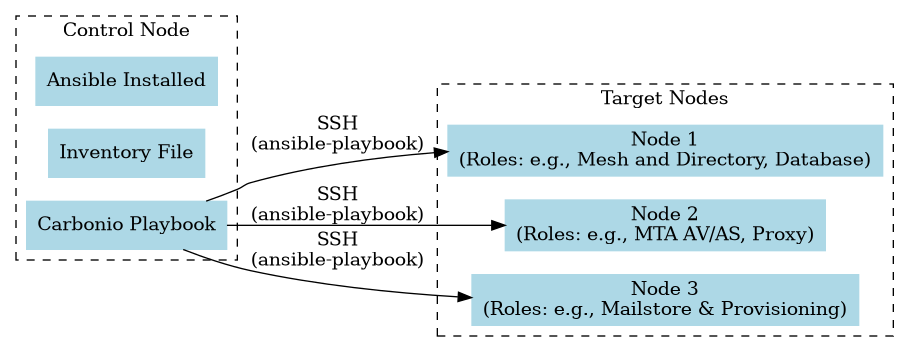
Carbonio can be installed automatically by using the inventory files, provided with each installation scenario, with the Ansible software. The components of a sample Carbonio installation and their interaction is depicted in the diagram below.

Fig. 2 Sample Ansible installation on a three Nodes setup#
Prepare Inventory#
Download the inventory file corresponding to the scenario that you want to install (you can find it in the various Scenarios page that follow this one) and place it under a directory of your choice. Remember to give the inventory file a meaningful name.
The carbonio_inventory file contains various sections, one for
each of the available Components. You need to edit the file and provide the
FQDN of the Node on which the Component will be installed. Suppose that you
install on 5 nodes, whose FQDNs are srv1.example.com to
srv5.example.com, an excerpt of the file might look like:
[postgresServers]
srv1.example.com

[masterDirectoryServers]
srv1.example.com

[dbsConnectorServers]
srv1.example.com
If you do not want to install a Component, simply leave the corresponding section empty.
For some of the Components you need to provide some additional value for a proper configuration. Currently, these sections are
-
the Proxy Component:
[proxyServers:vars]
#webmailHostname=webmailPublicHostname
This is the FQDN of the domain, for example
mail.example.com, so:[proxyServers:vars] webmailHostname=mail.example.com
-
The Carbonio VideoServer, if installed:
[videoServers]
#hostname public_ip_address=x.y.z.t
In this case, supposing that the Component is installed on
srv5.example.comand the public IP address of the Carbonio VideoServer is 172.16.12.5, this entry should look like:[videoServers] srv5.example.com public_ip_address=172.16.12.5
Note
172.16.12.5 is a private IP, remember to replace it with an actual public IP!
In order to run the script, first go to the directory in which you saved the Inventory, then execute either command, depending on the Scenario.
$ ansible-playbook zxbot.carbonio_ssinstall.carbonio_ssinstall \
-u root -i carbonio-inventory \
--extra-vars "install_path=zxbot.carbonio_install.carbonio_install"
$ ansible-playbook  zxbot.carbonio_install.carbonio_install \
-u root -i carbonio-inventory
Make sure to replace carbonio-inventory with the proper name of the
inventory you want to install.
The playbook will execute all the tasks necessary and print the result
on the screen. When finished, a summary of the results is
displayed. Moreover, the passwords created during the installation are
saved in the directory from which the command was launched, along with
the carbonio-inventory file, so you have them always at your
disposal when you need them, for example during upgrades or routine
tasks. To protect them, make sure:
to allow only trusted persons the access to the directory
to make a backup of the directory
If for any reason the installation fails, you can check the log file (to set it up, see Section Configure Ansible) to see what happened, fix it, then execute again the inventory. Ansible will recognise the steps already successfully carried out and run only those that failed.
Closing Remarks#
Once the script has successfully completed, you can immediately access your new Carbonio installation and execute the first necessary tasks, see Section Access to the Web Interface. You can then proceed to carry out further administration tasks, see Post-Install.
Troubleshooting Ansible Installation#
While most of the times the Carbonio installation using Ansible is flawless, there are a few cases in which a playbook run is not successful. This can happen for example when communication between the Control Node, the Nodes, and the repositories fails.
When the playbook does not terminate successfully, the best choice is to run it again. Even though Ansible can be invoked to run only selected tasks, due to the nature of Carbonio installation, manually running only those tasks may not suffice to successfully complete the installation.
Moreover, since Ansible features an internal mechanism that, during a playbook run, keeps track of the tasks that were completed, failed, or not executed, the best solution is to run the playbook another time. Indeed, during this second run, only the tasks that failed or were not executed during the first run are carried out.